

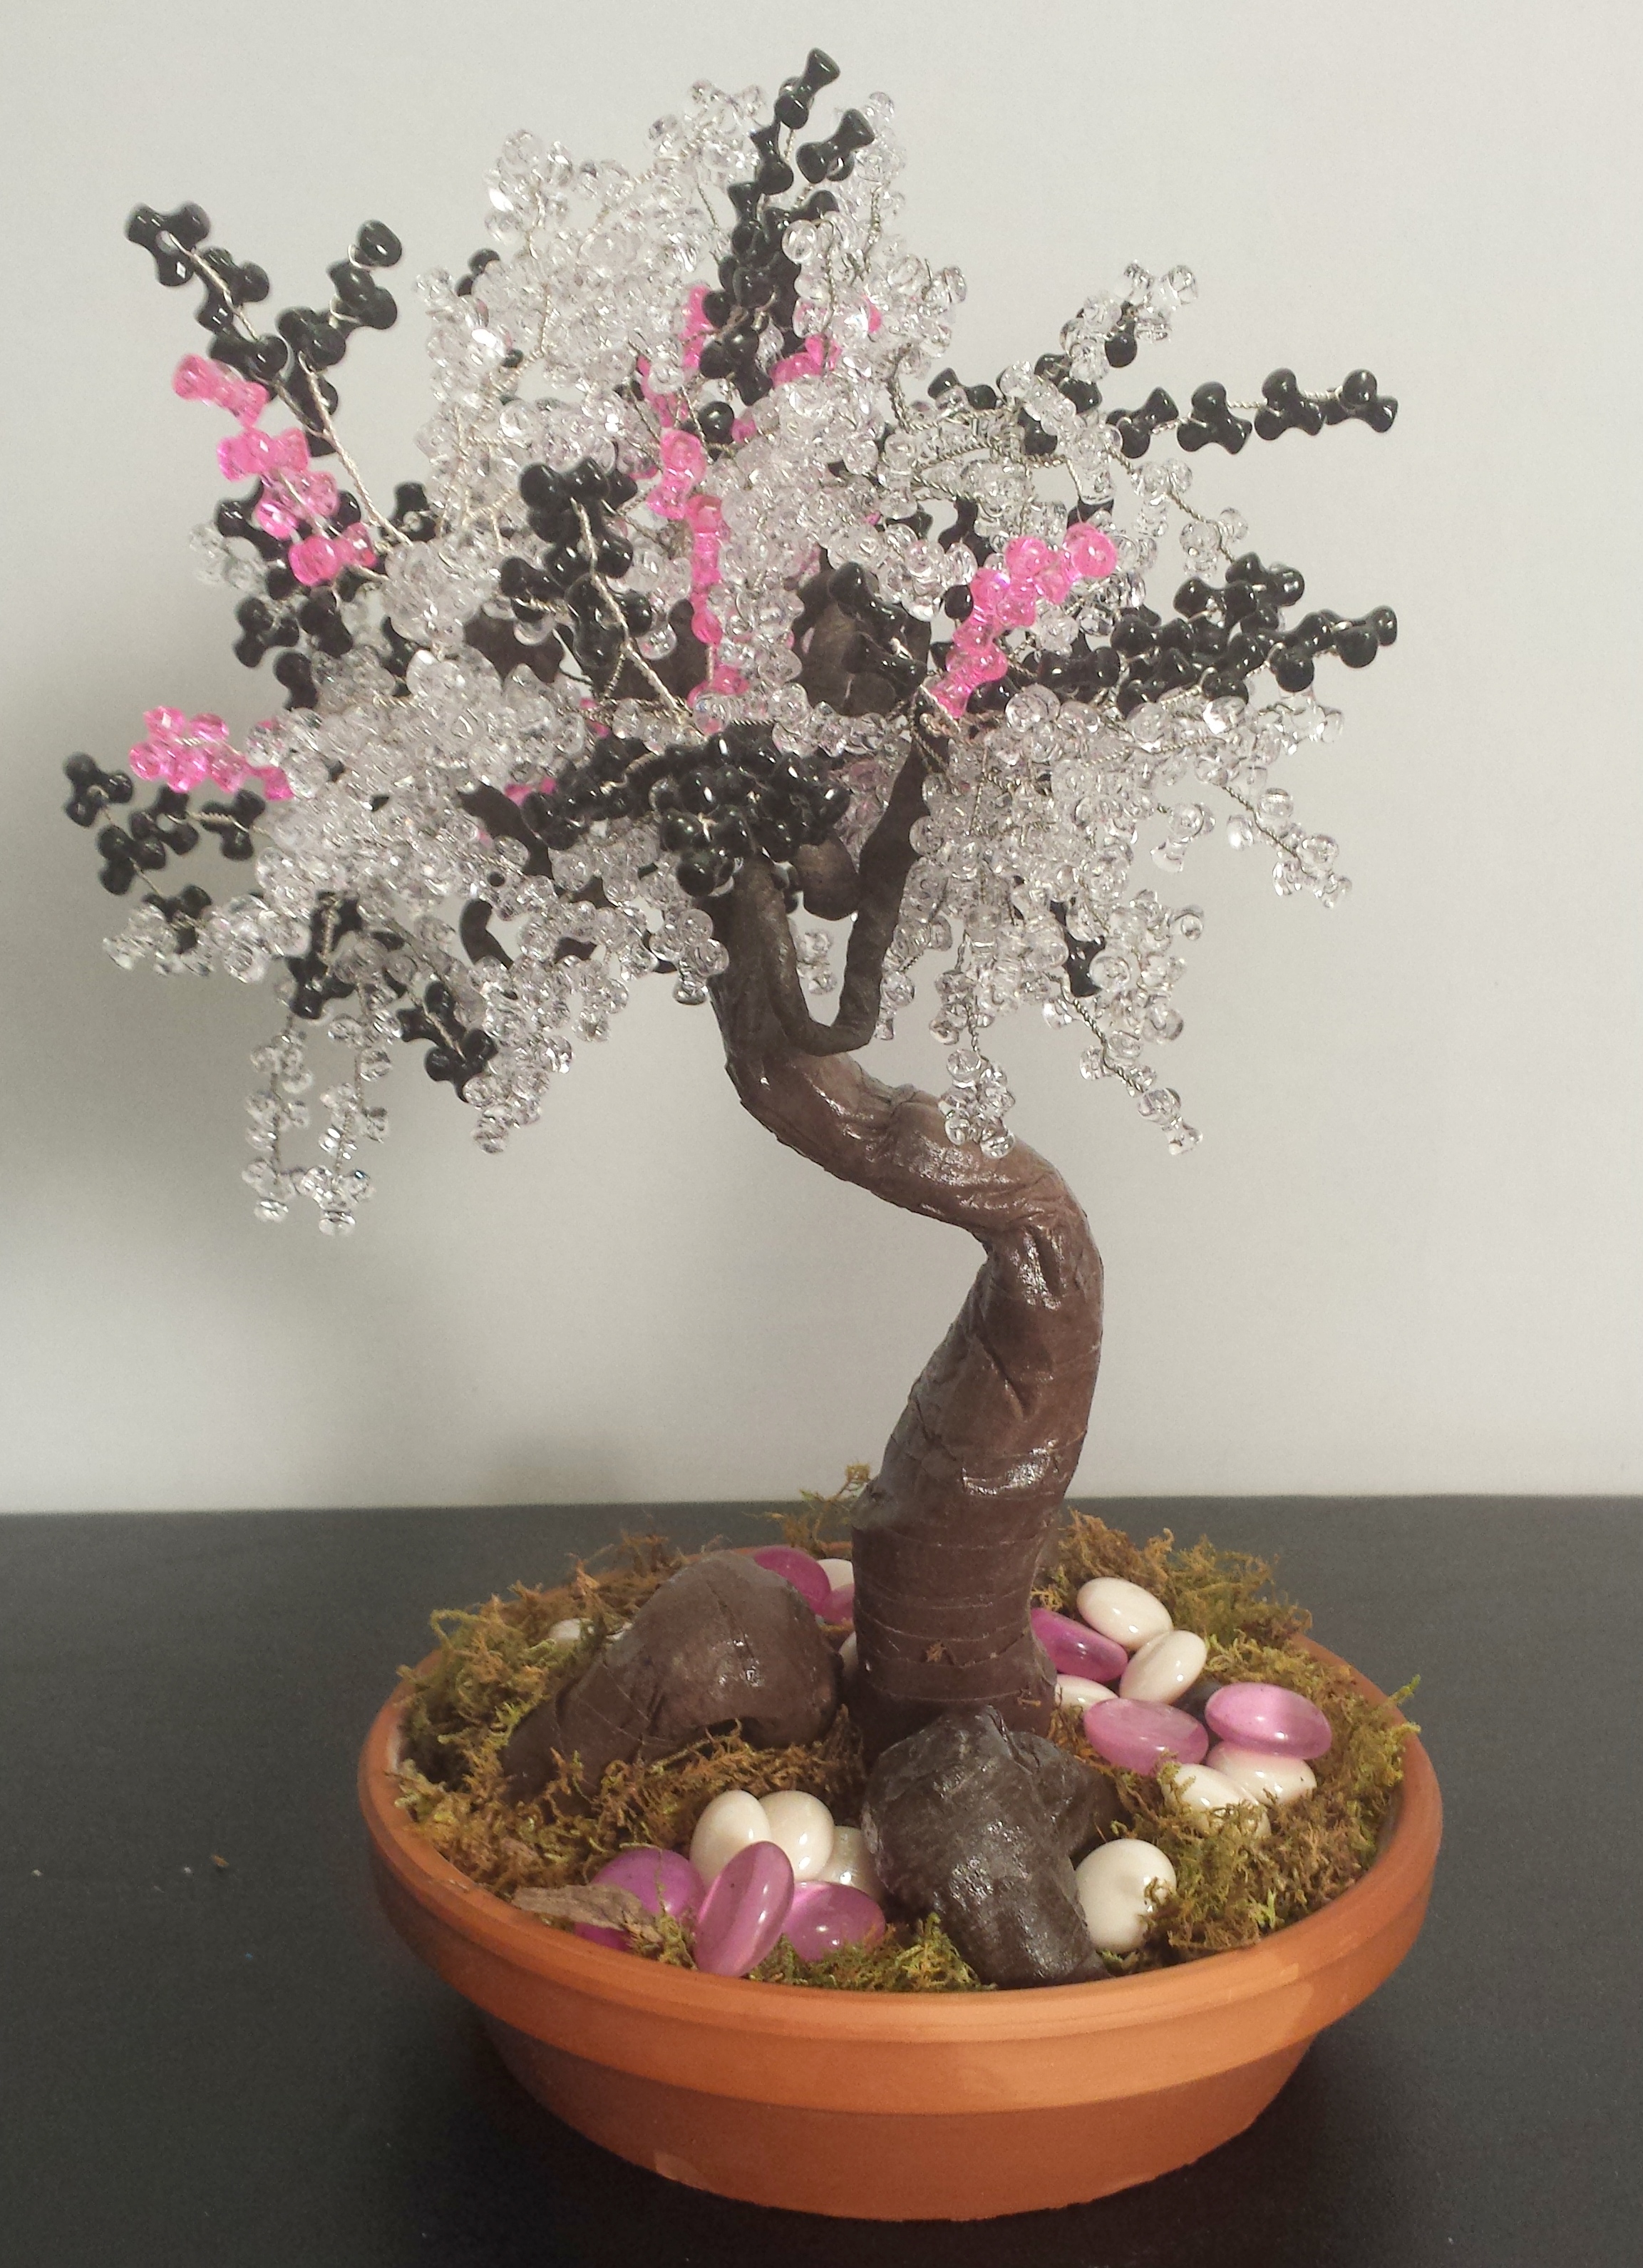
Back in the late 90’s I used to work at Joann Fabrics and one of my co-workers taught me how to make this beautiful crystal tree. Now I am going to take you step by step to show you how to make one as well 😀
Please note that this will require some patience so I suggest working on this project little by little everyday or whenever it fits your schedule but I promise you will be happy with the end result.
Step 1: BUY SUPPLIES
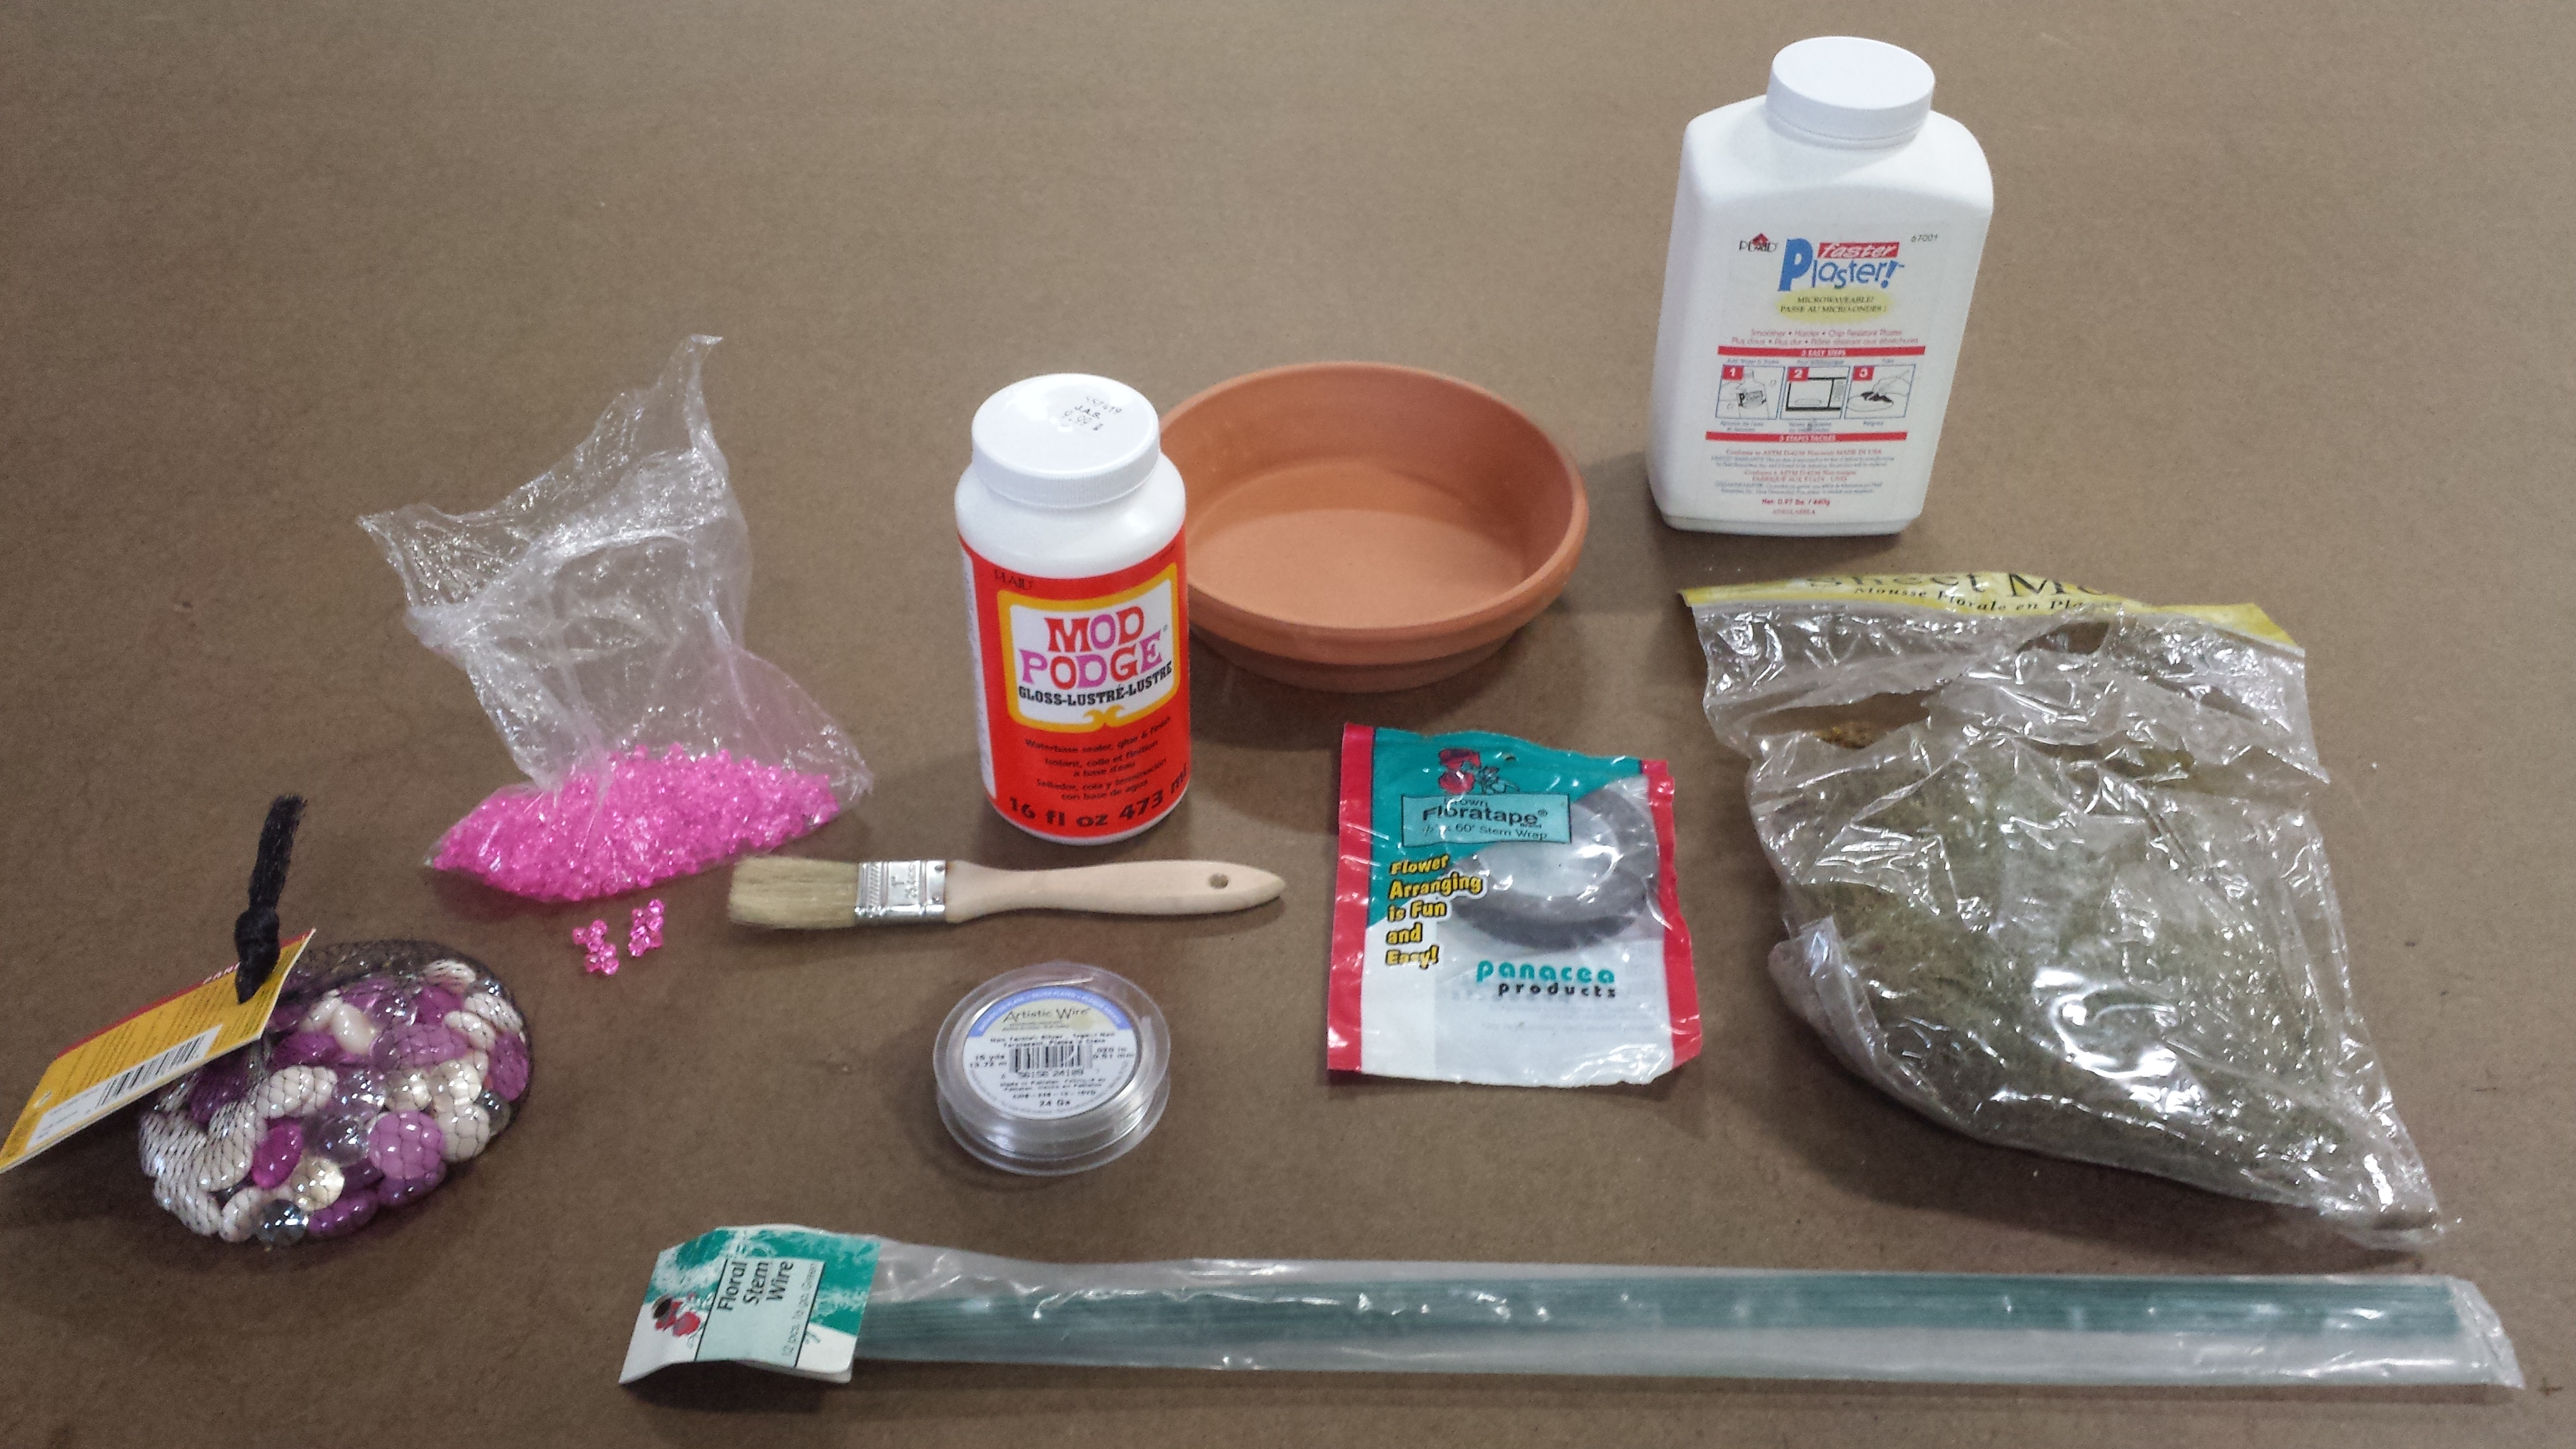
Most of these supplies you can find at Joann Fabrics or any craft supply store. You can also Google most of these supplies for online craft stores and have them shipped to you.
1. 6″ terra cotta clay pot
2. 1 bag of Sheet Moss
3. Faster Plaster by Plaid
4. About 2 packages Brown floral tape 1/2″ X 60′ stem wrap
5. about 50 feet of 24 gauge wire
6. 10pcs of Green Floral stem wire 16 gauge
7. Mod Podge Glossy (optional)
8. 1″ paintbrush for Modge Podge Glossy
9. A bag of Colorful tri-beads
10. Marble accents (optional)
11. Scotch tape
12. Few sheets of paper towels
13. Needle nose jewelry pliers with wire cutter

Step 2: CREATING THE LEAVES
Create the first set of “leaves” using the wire and beads.
Using your pliers cut about 26″ of wire and fold in half. Put one tri-bead thru the wire.

With your forefinger hold the bead with the wire as shown in the picture below.

With your other hand you will twist the wire by holding the tri-bead and turning it.
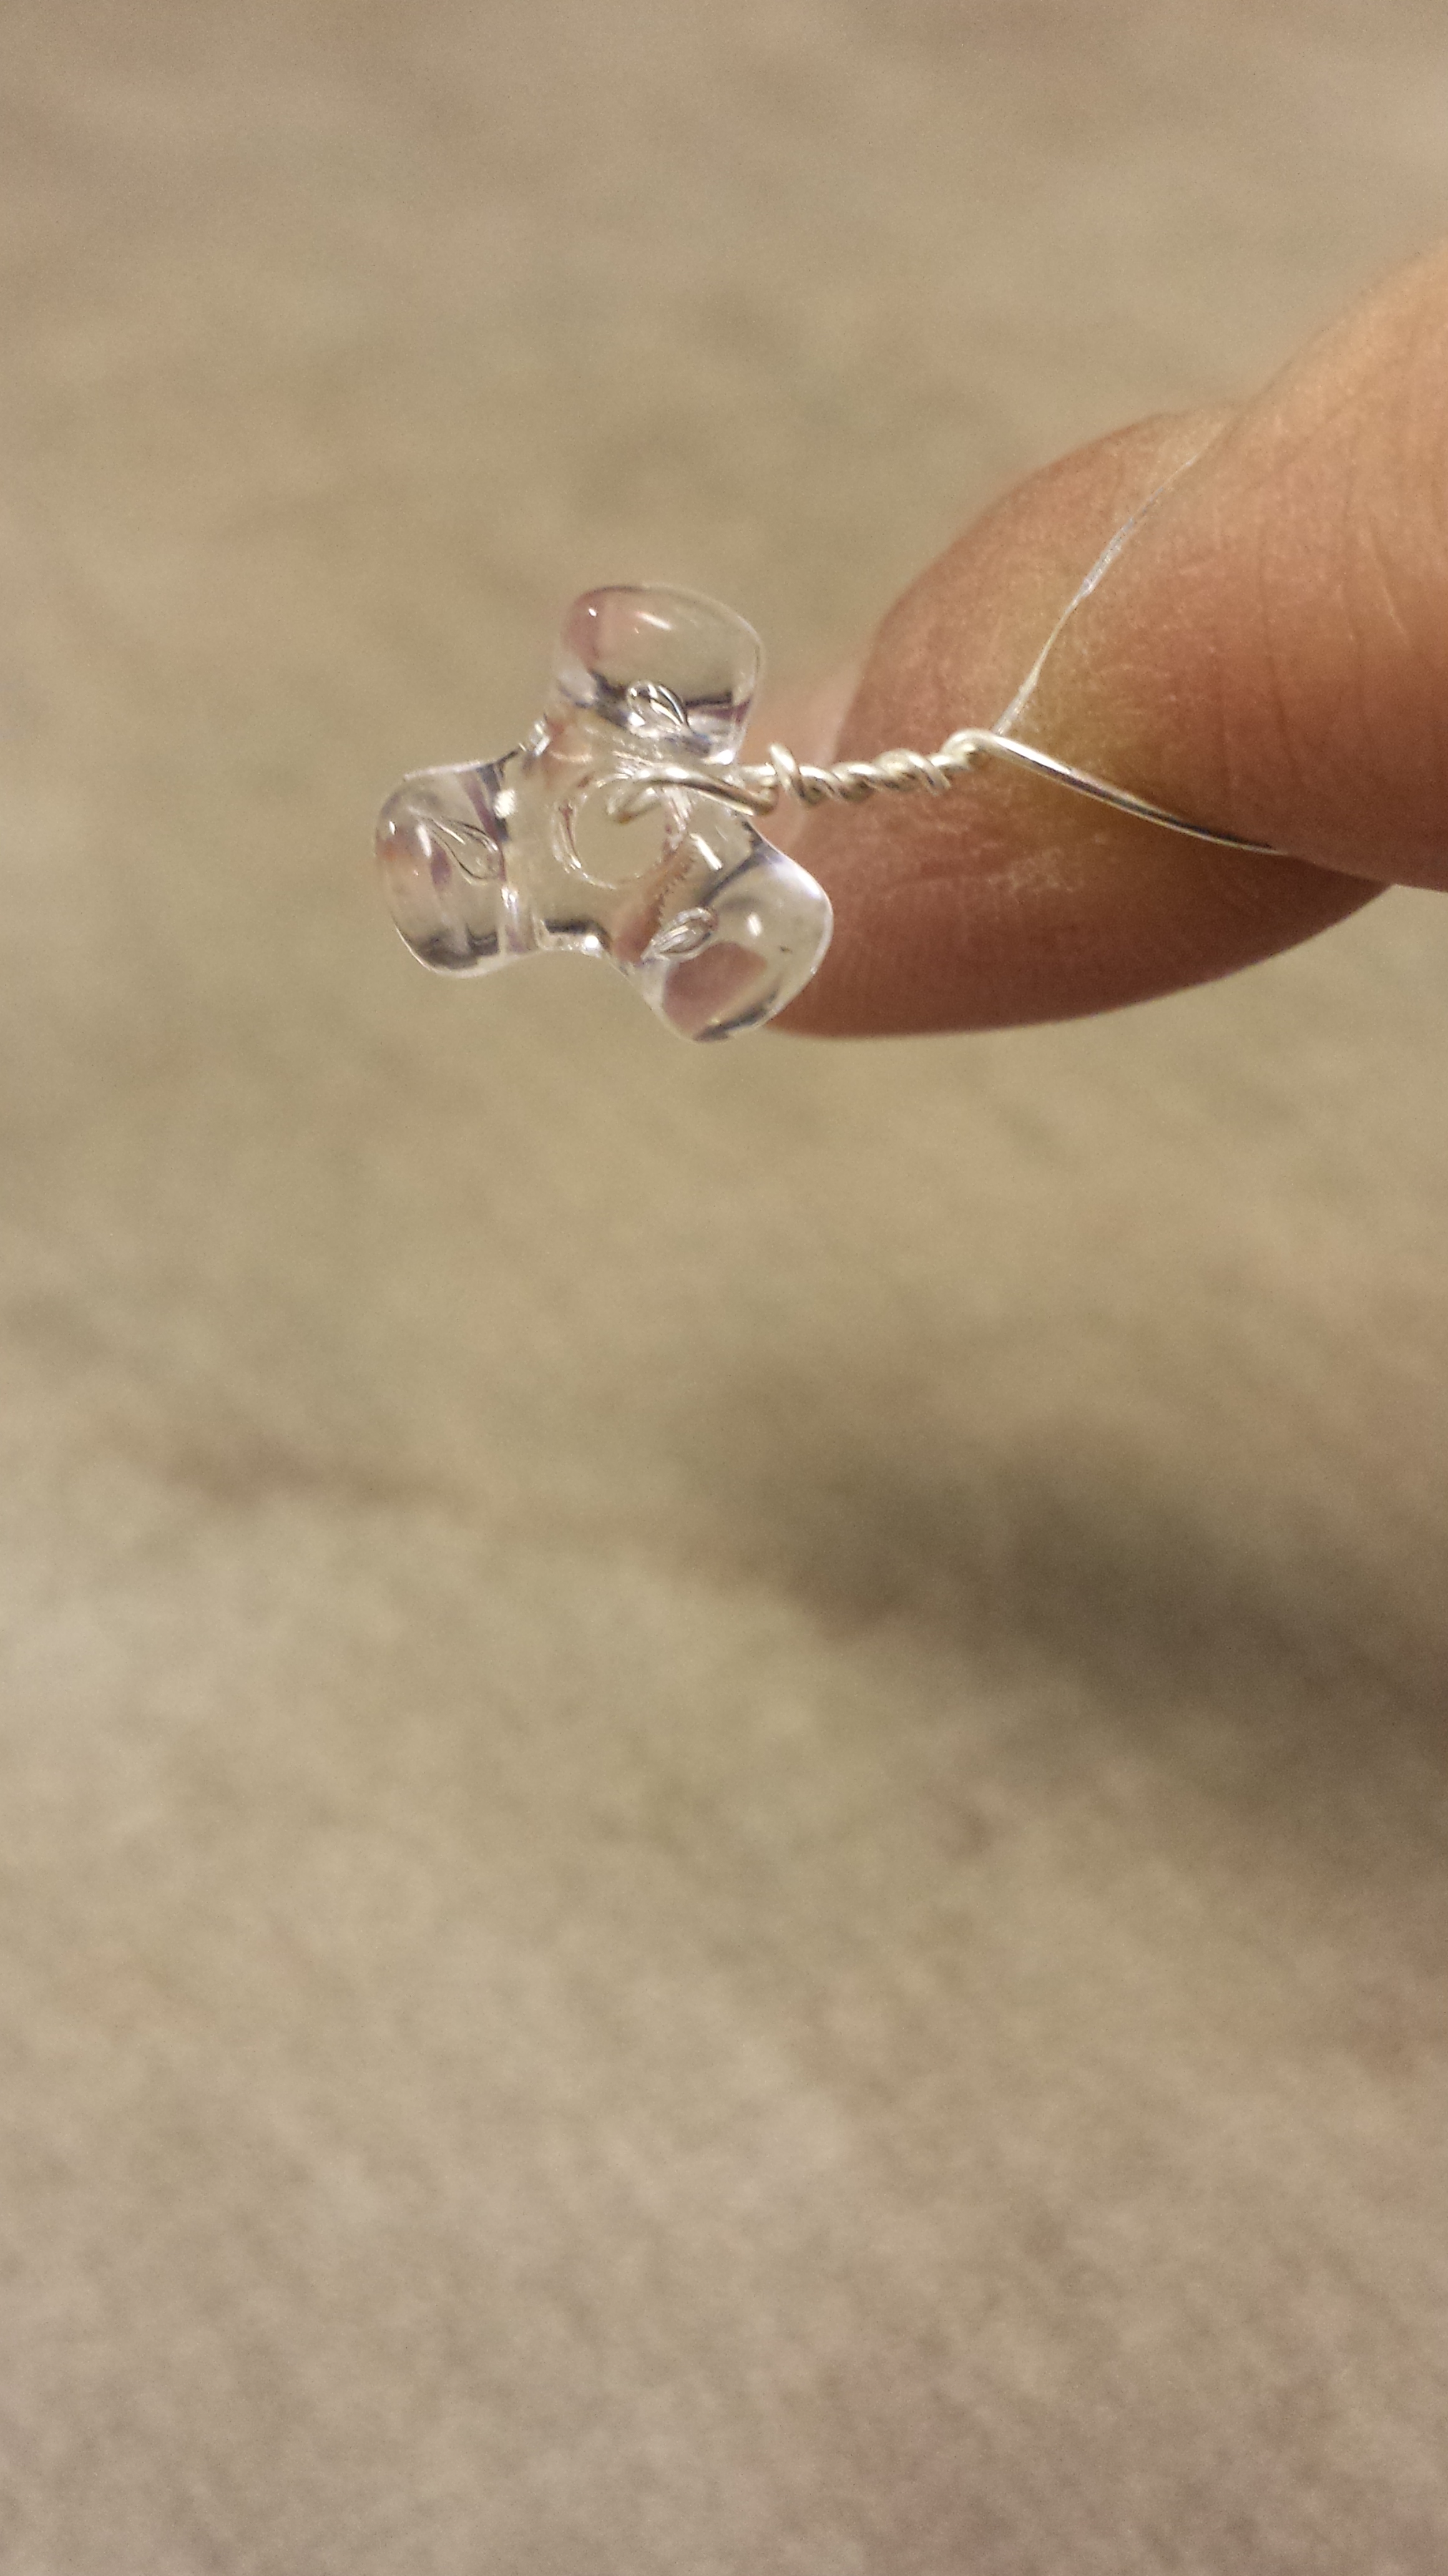
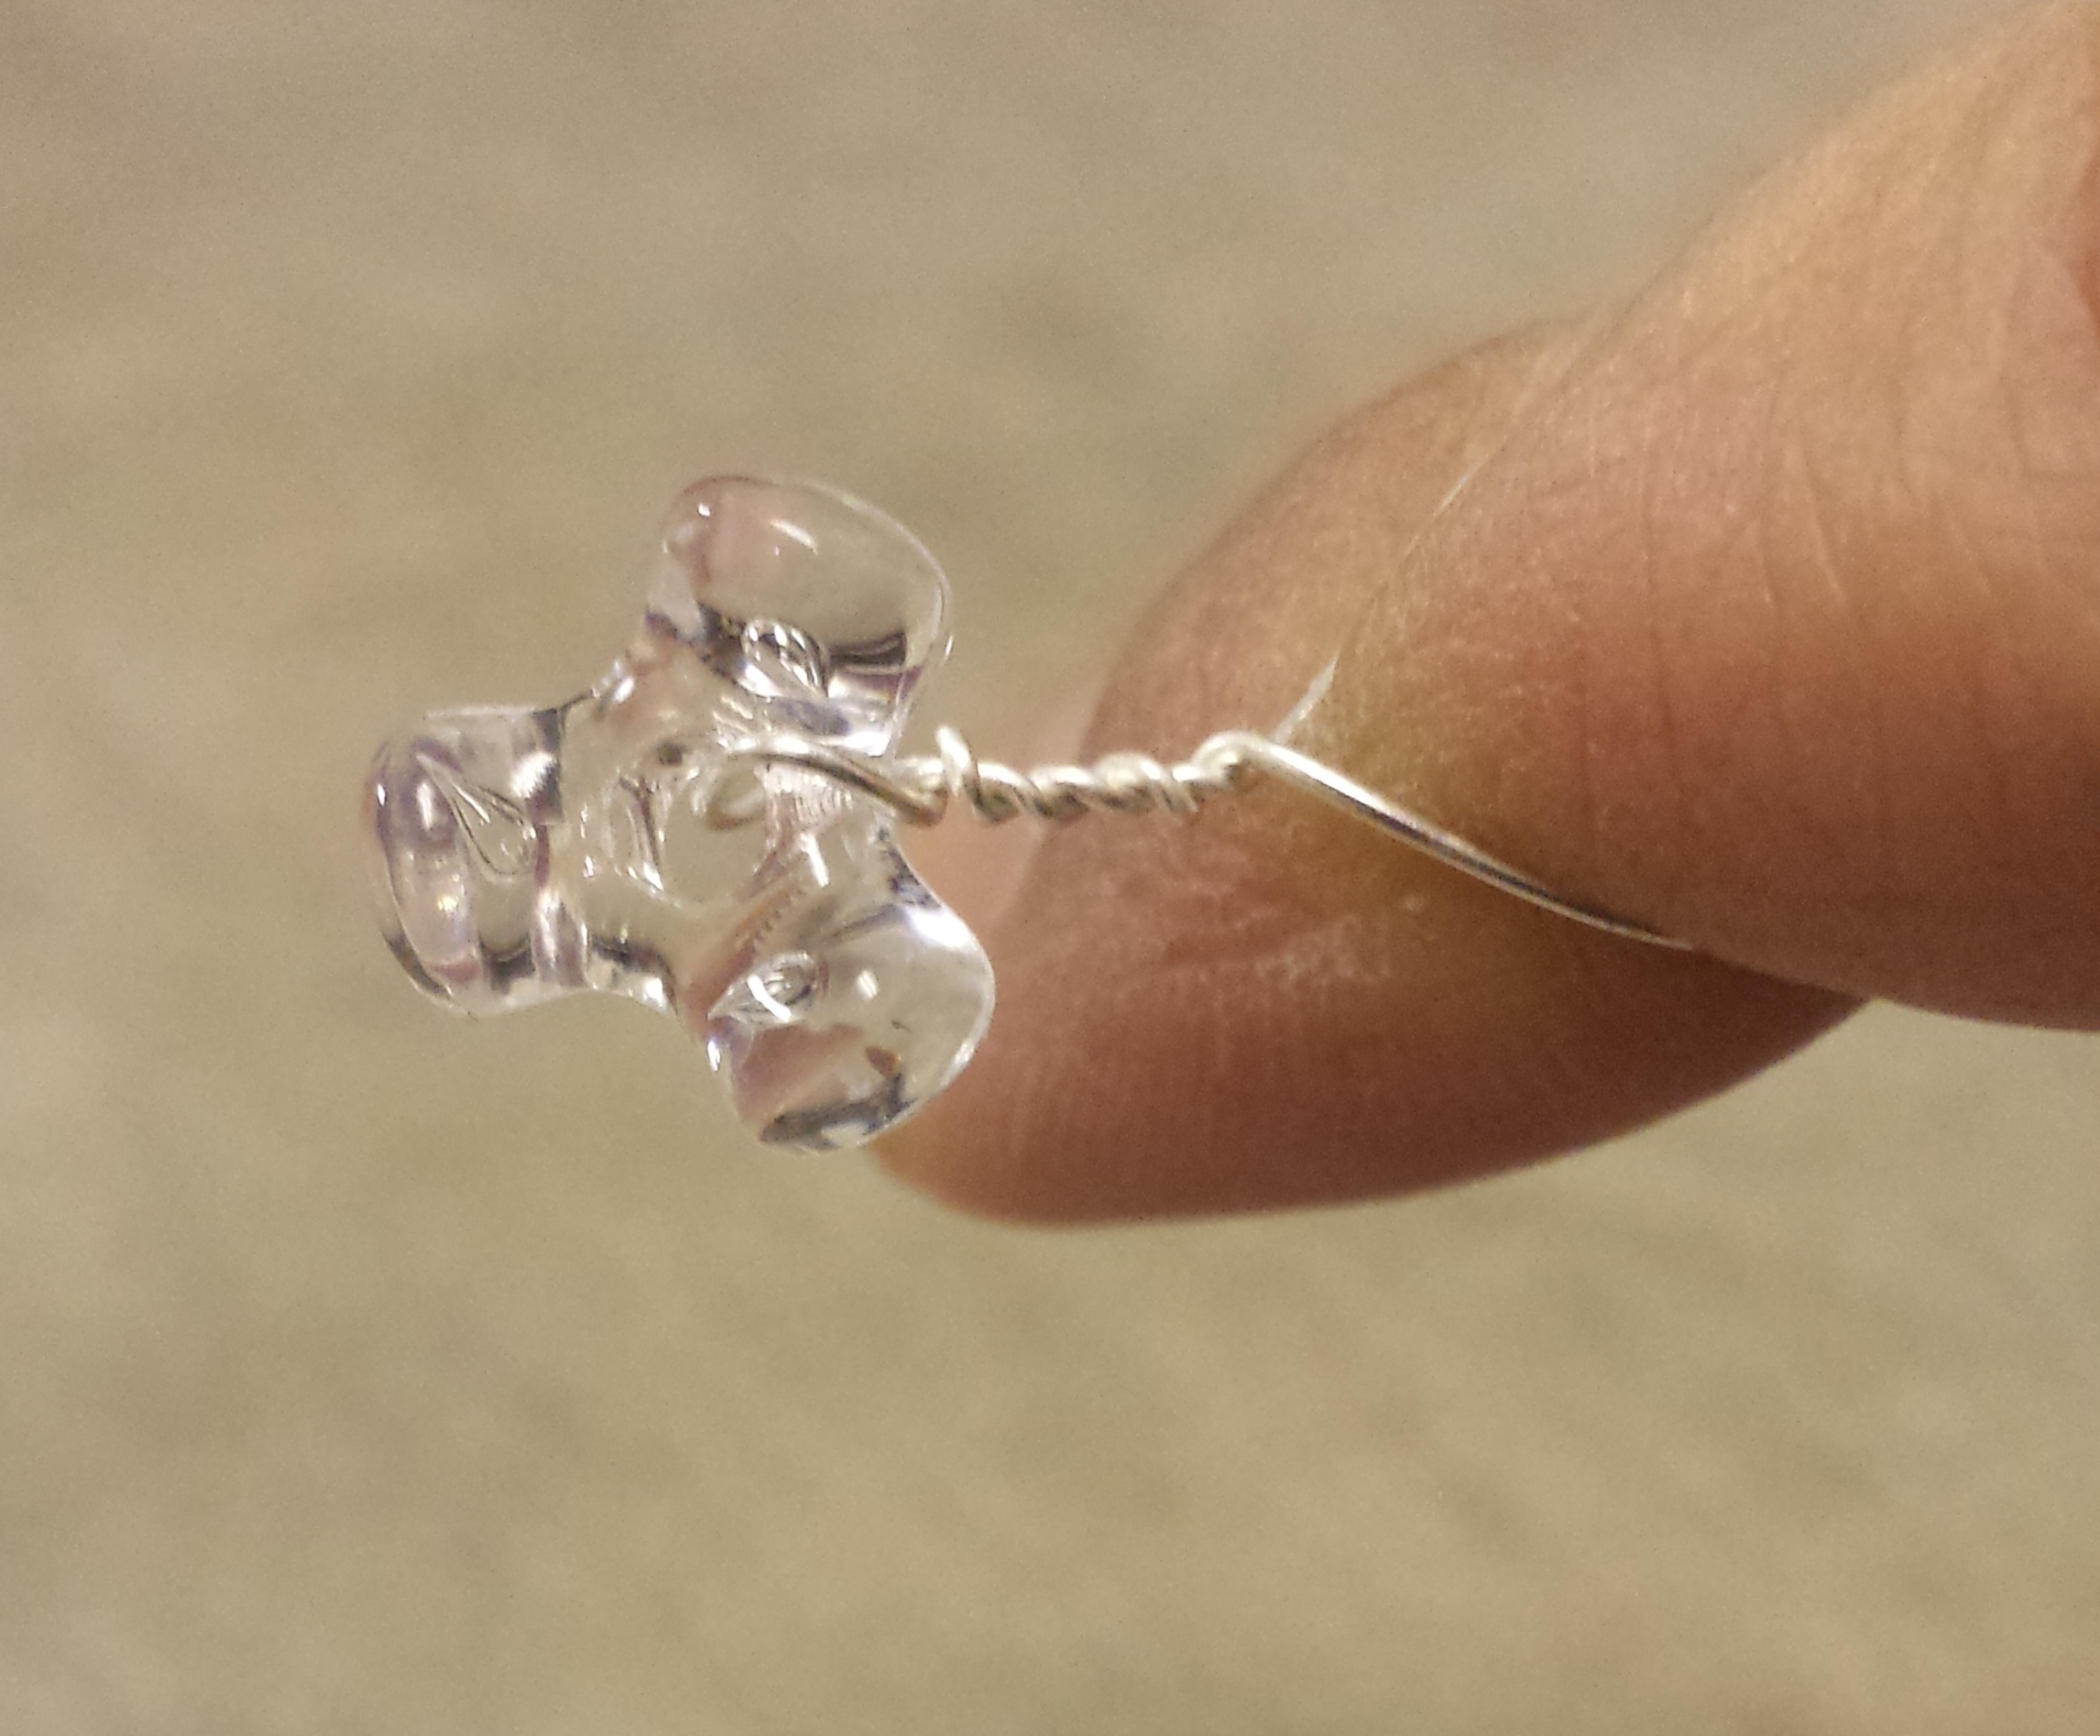
Twist 4 beads, then fold the wire and start and new “branch” twist 3 beads on each side, fold wire and twist 2 beads. See video for a better understanding
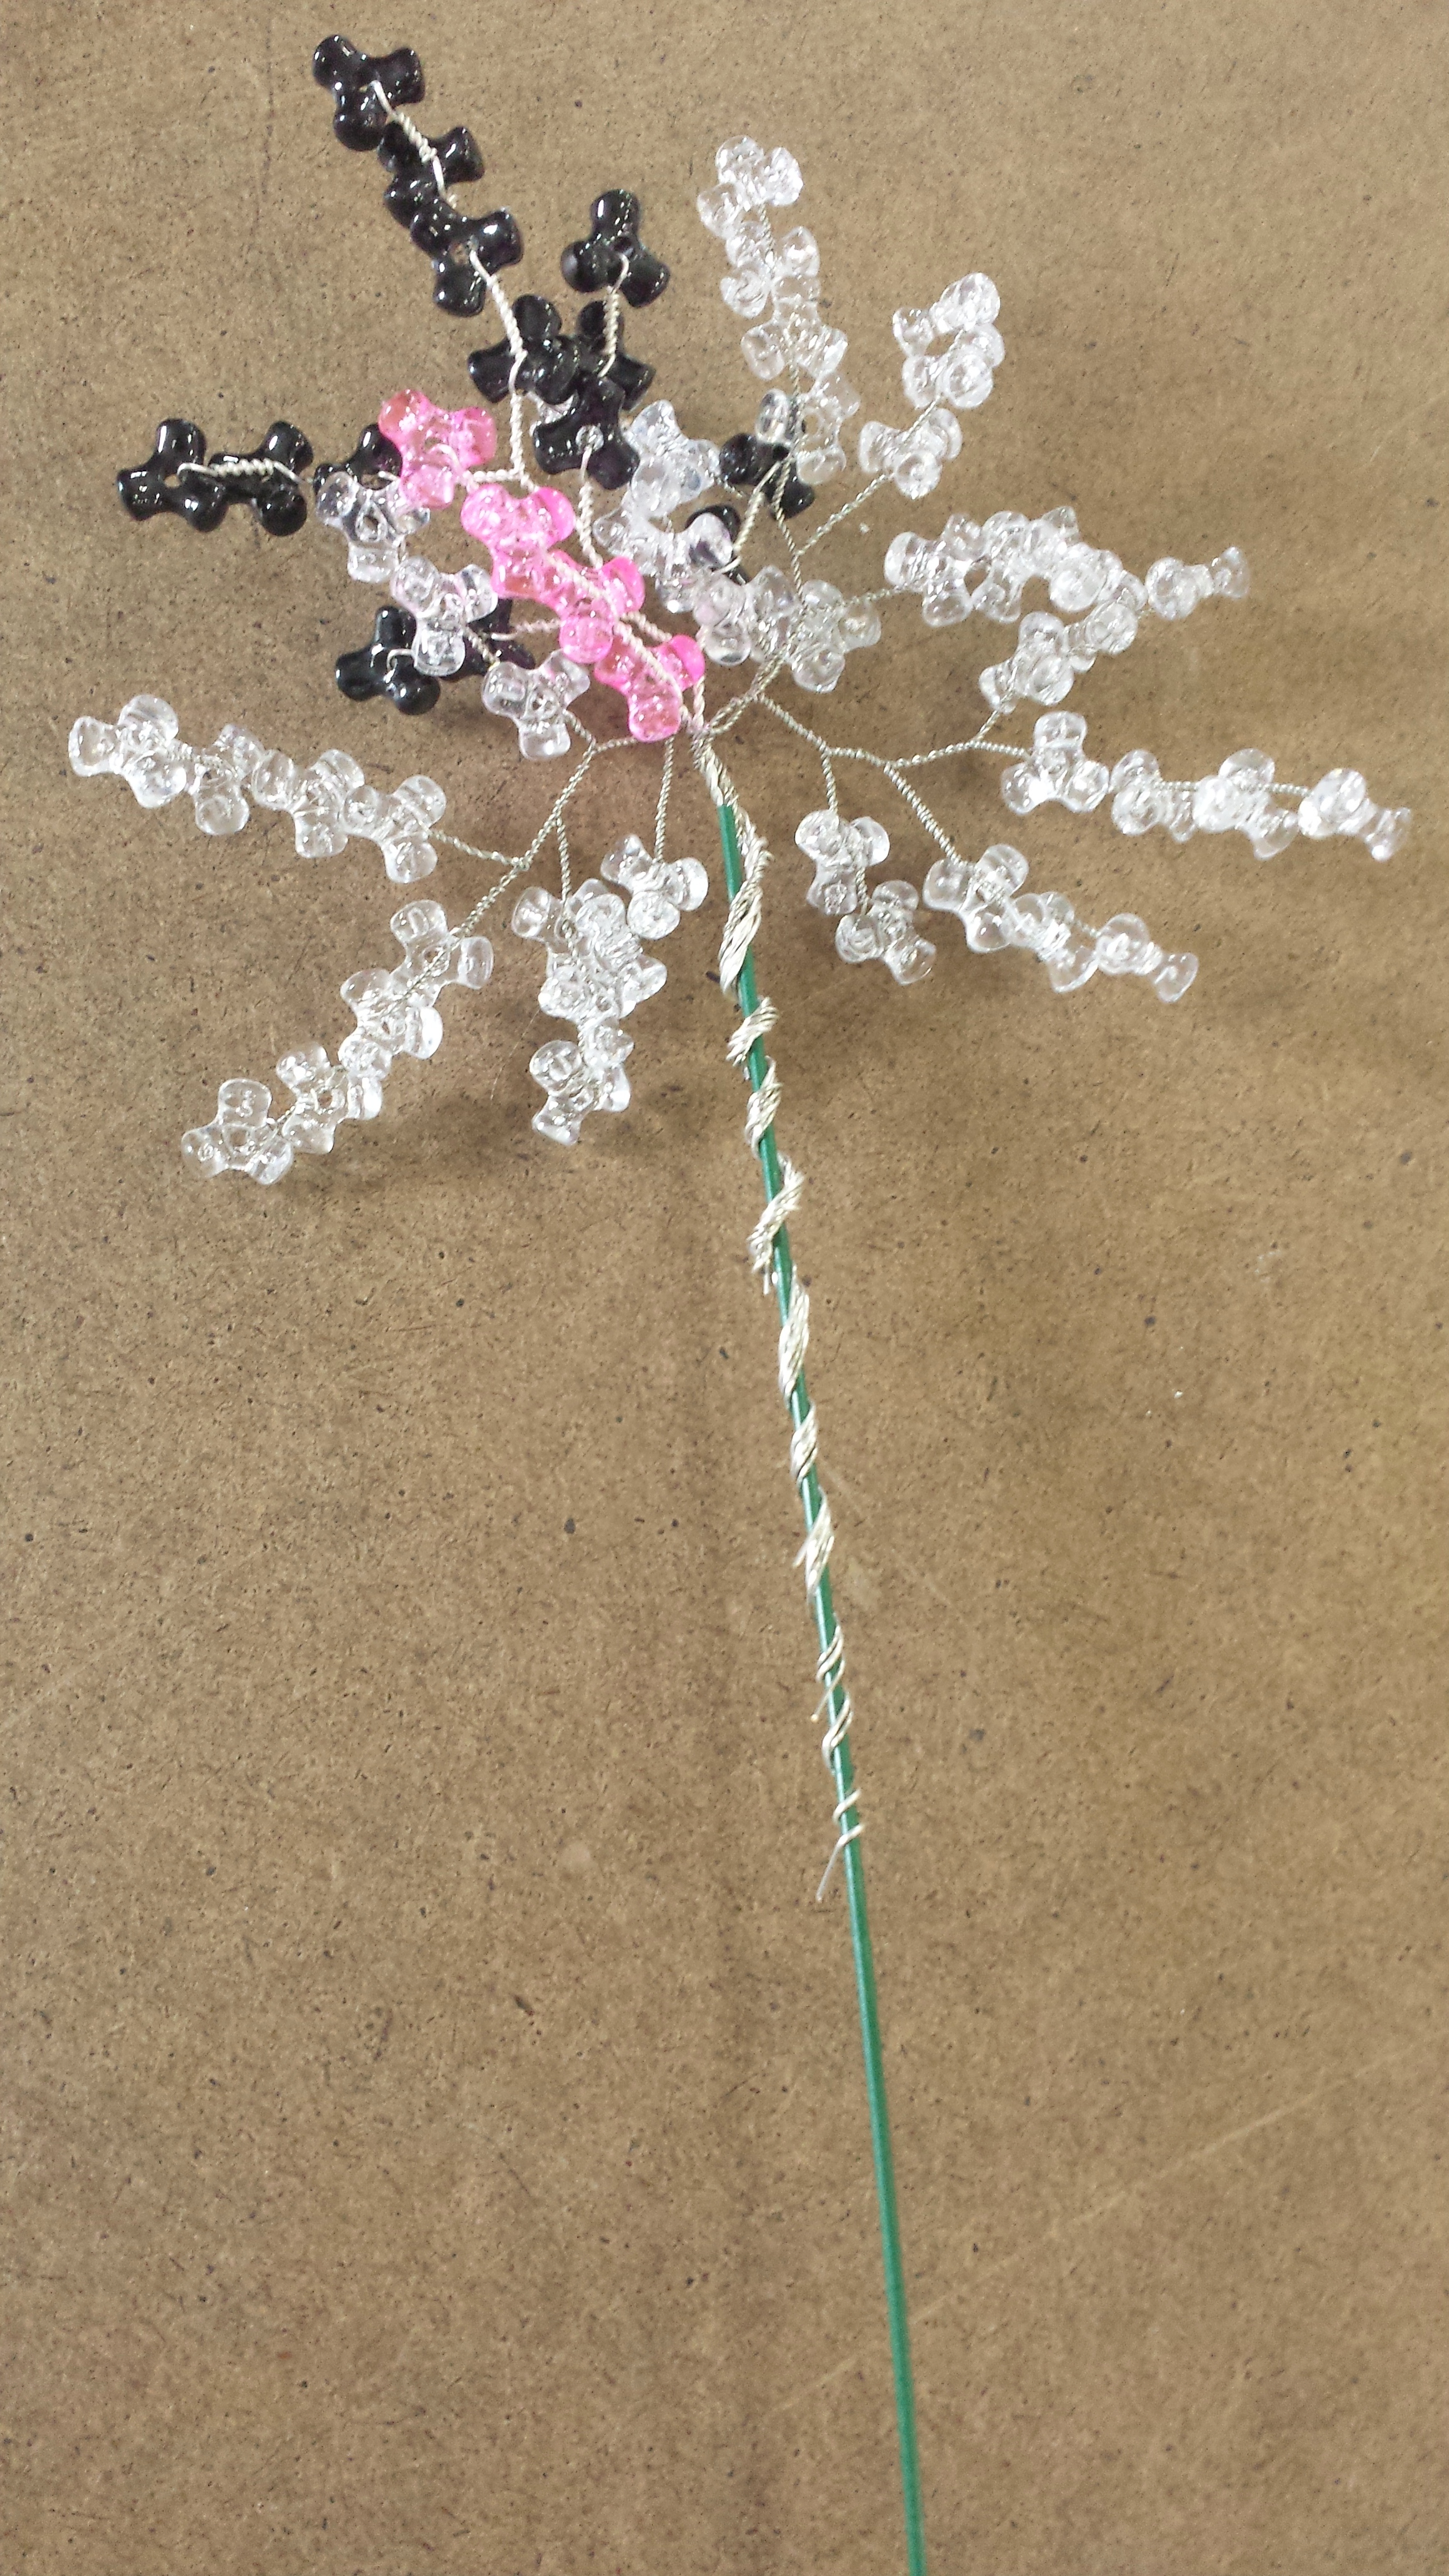
By the time you are done with your “leaf” it should look like this:
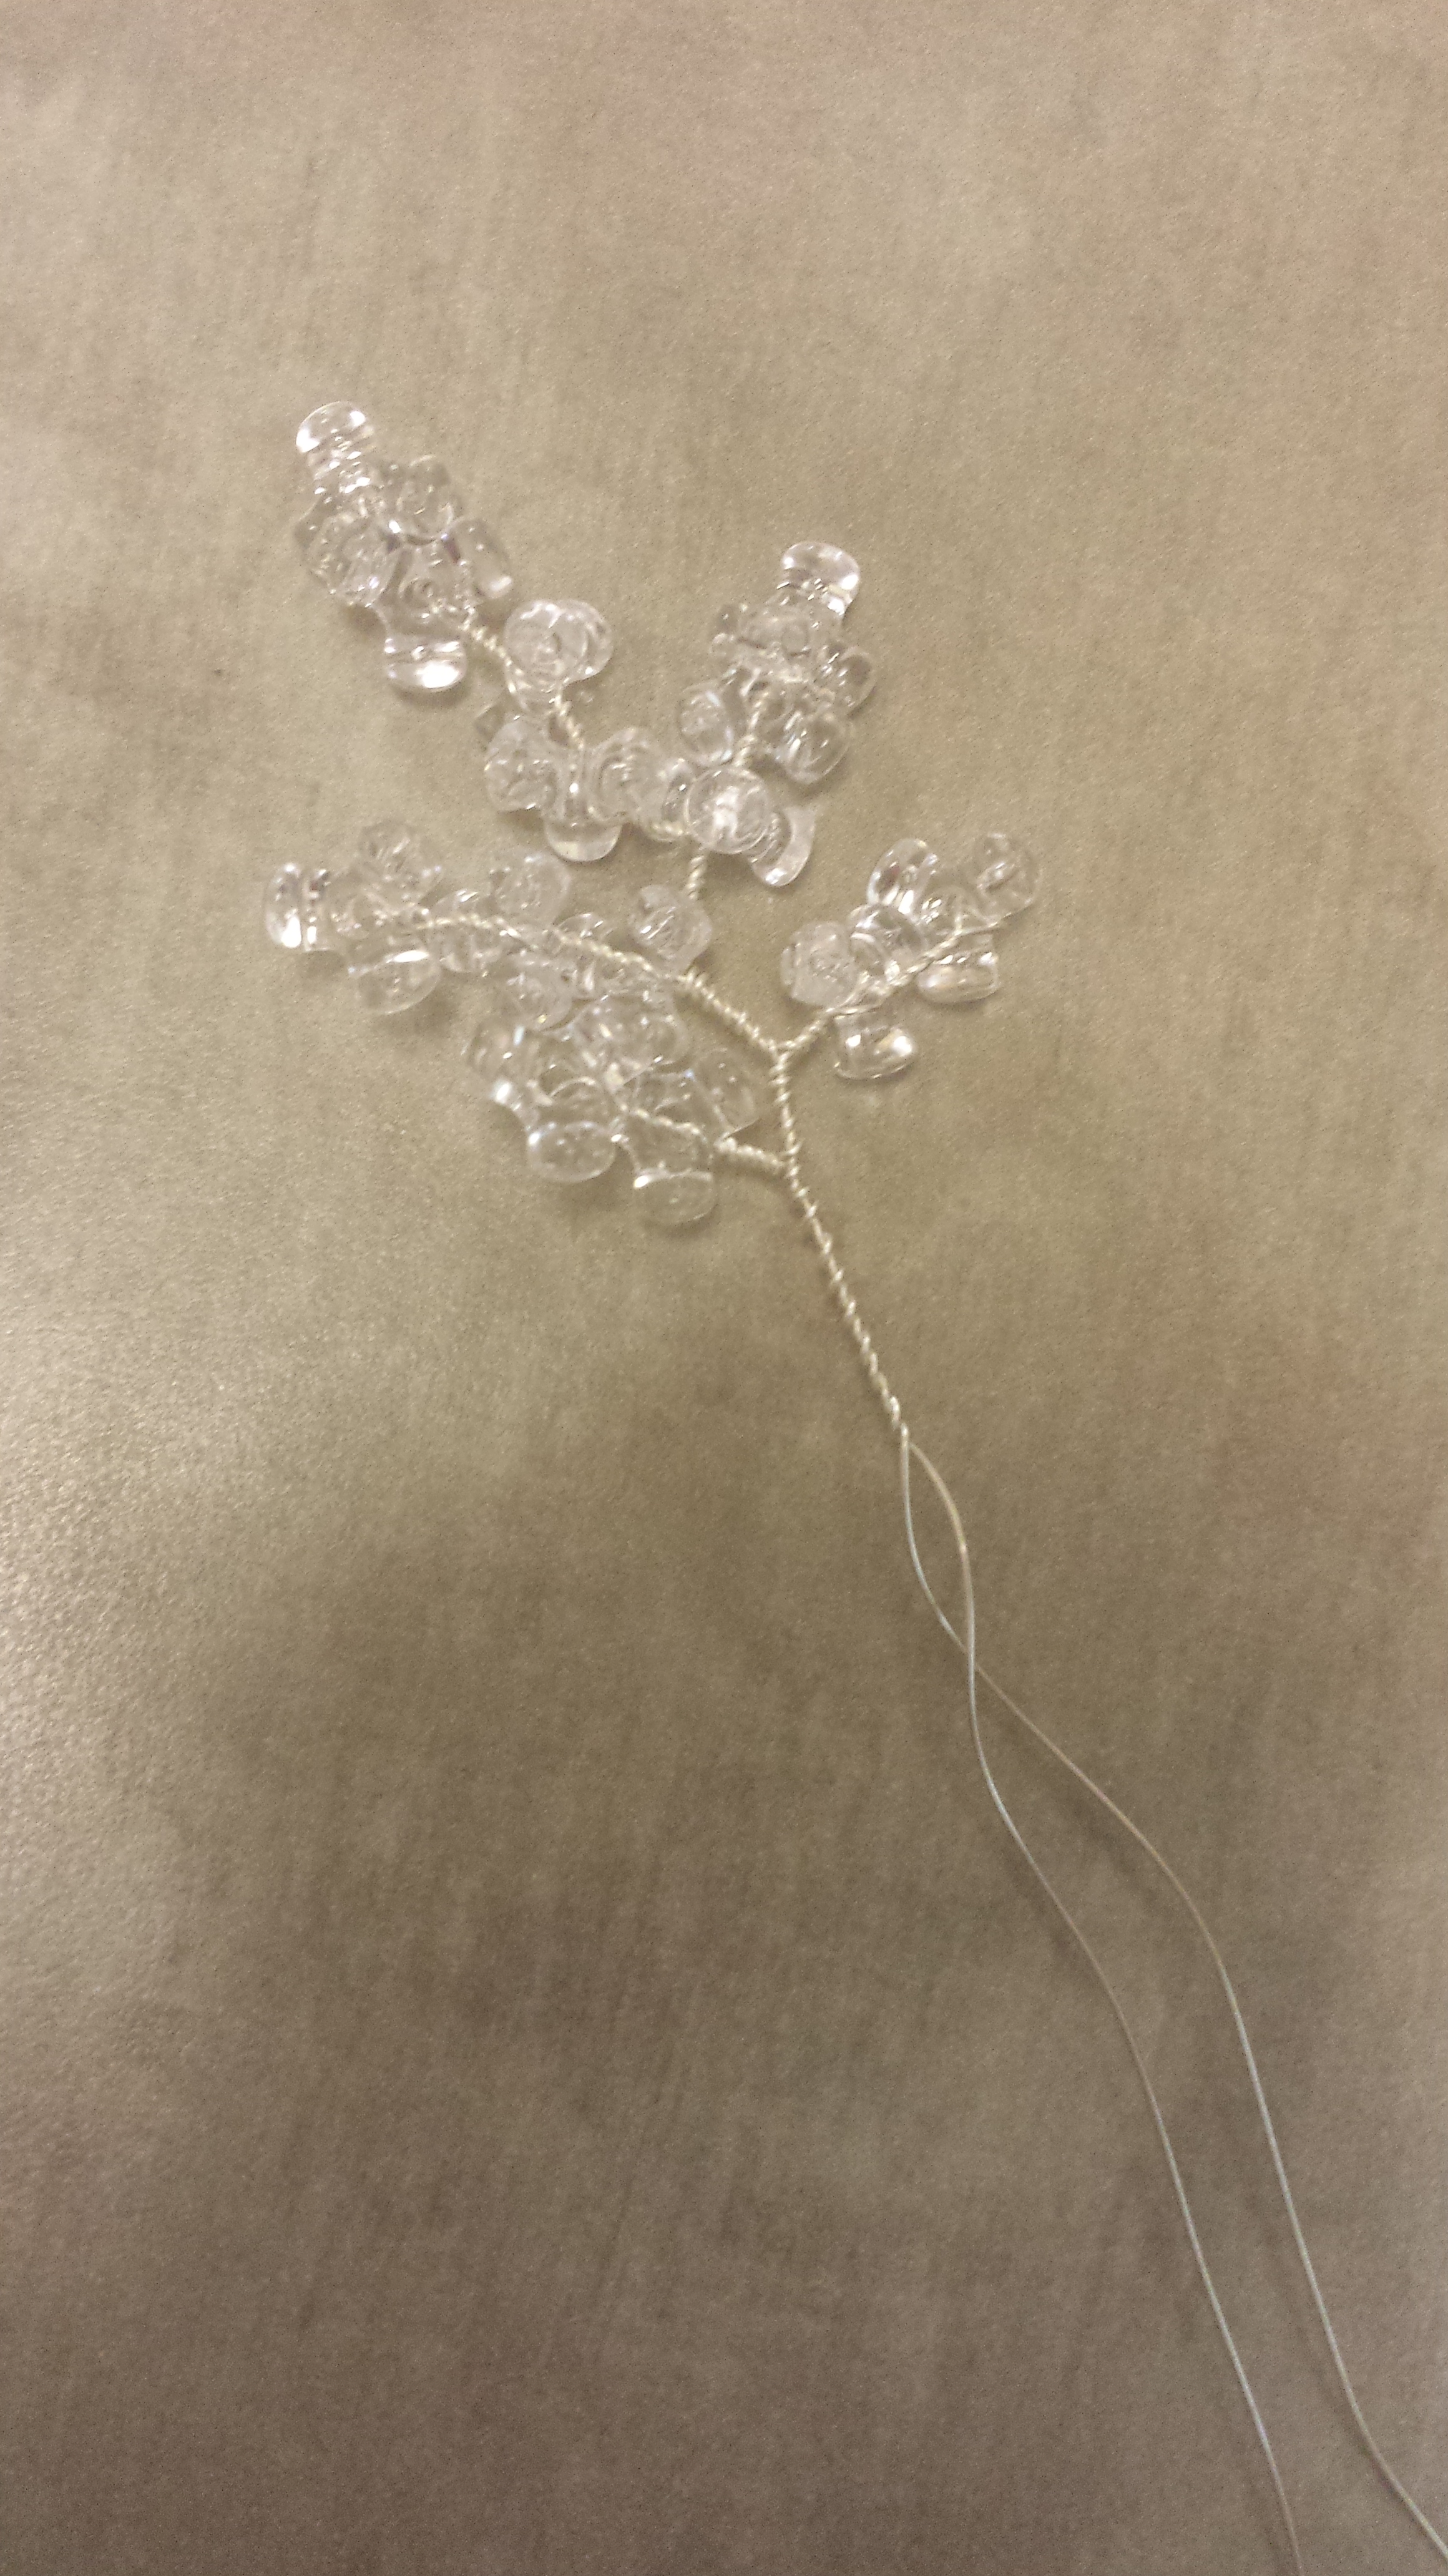
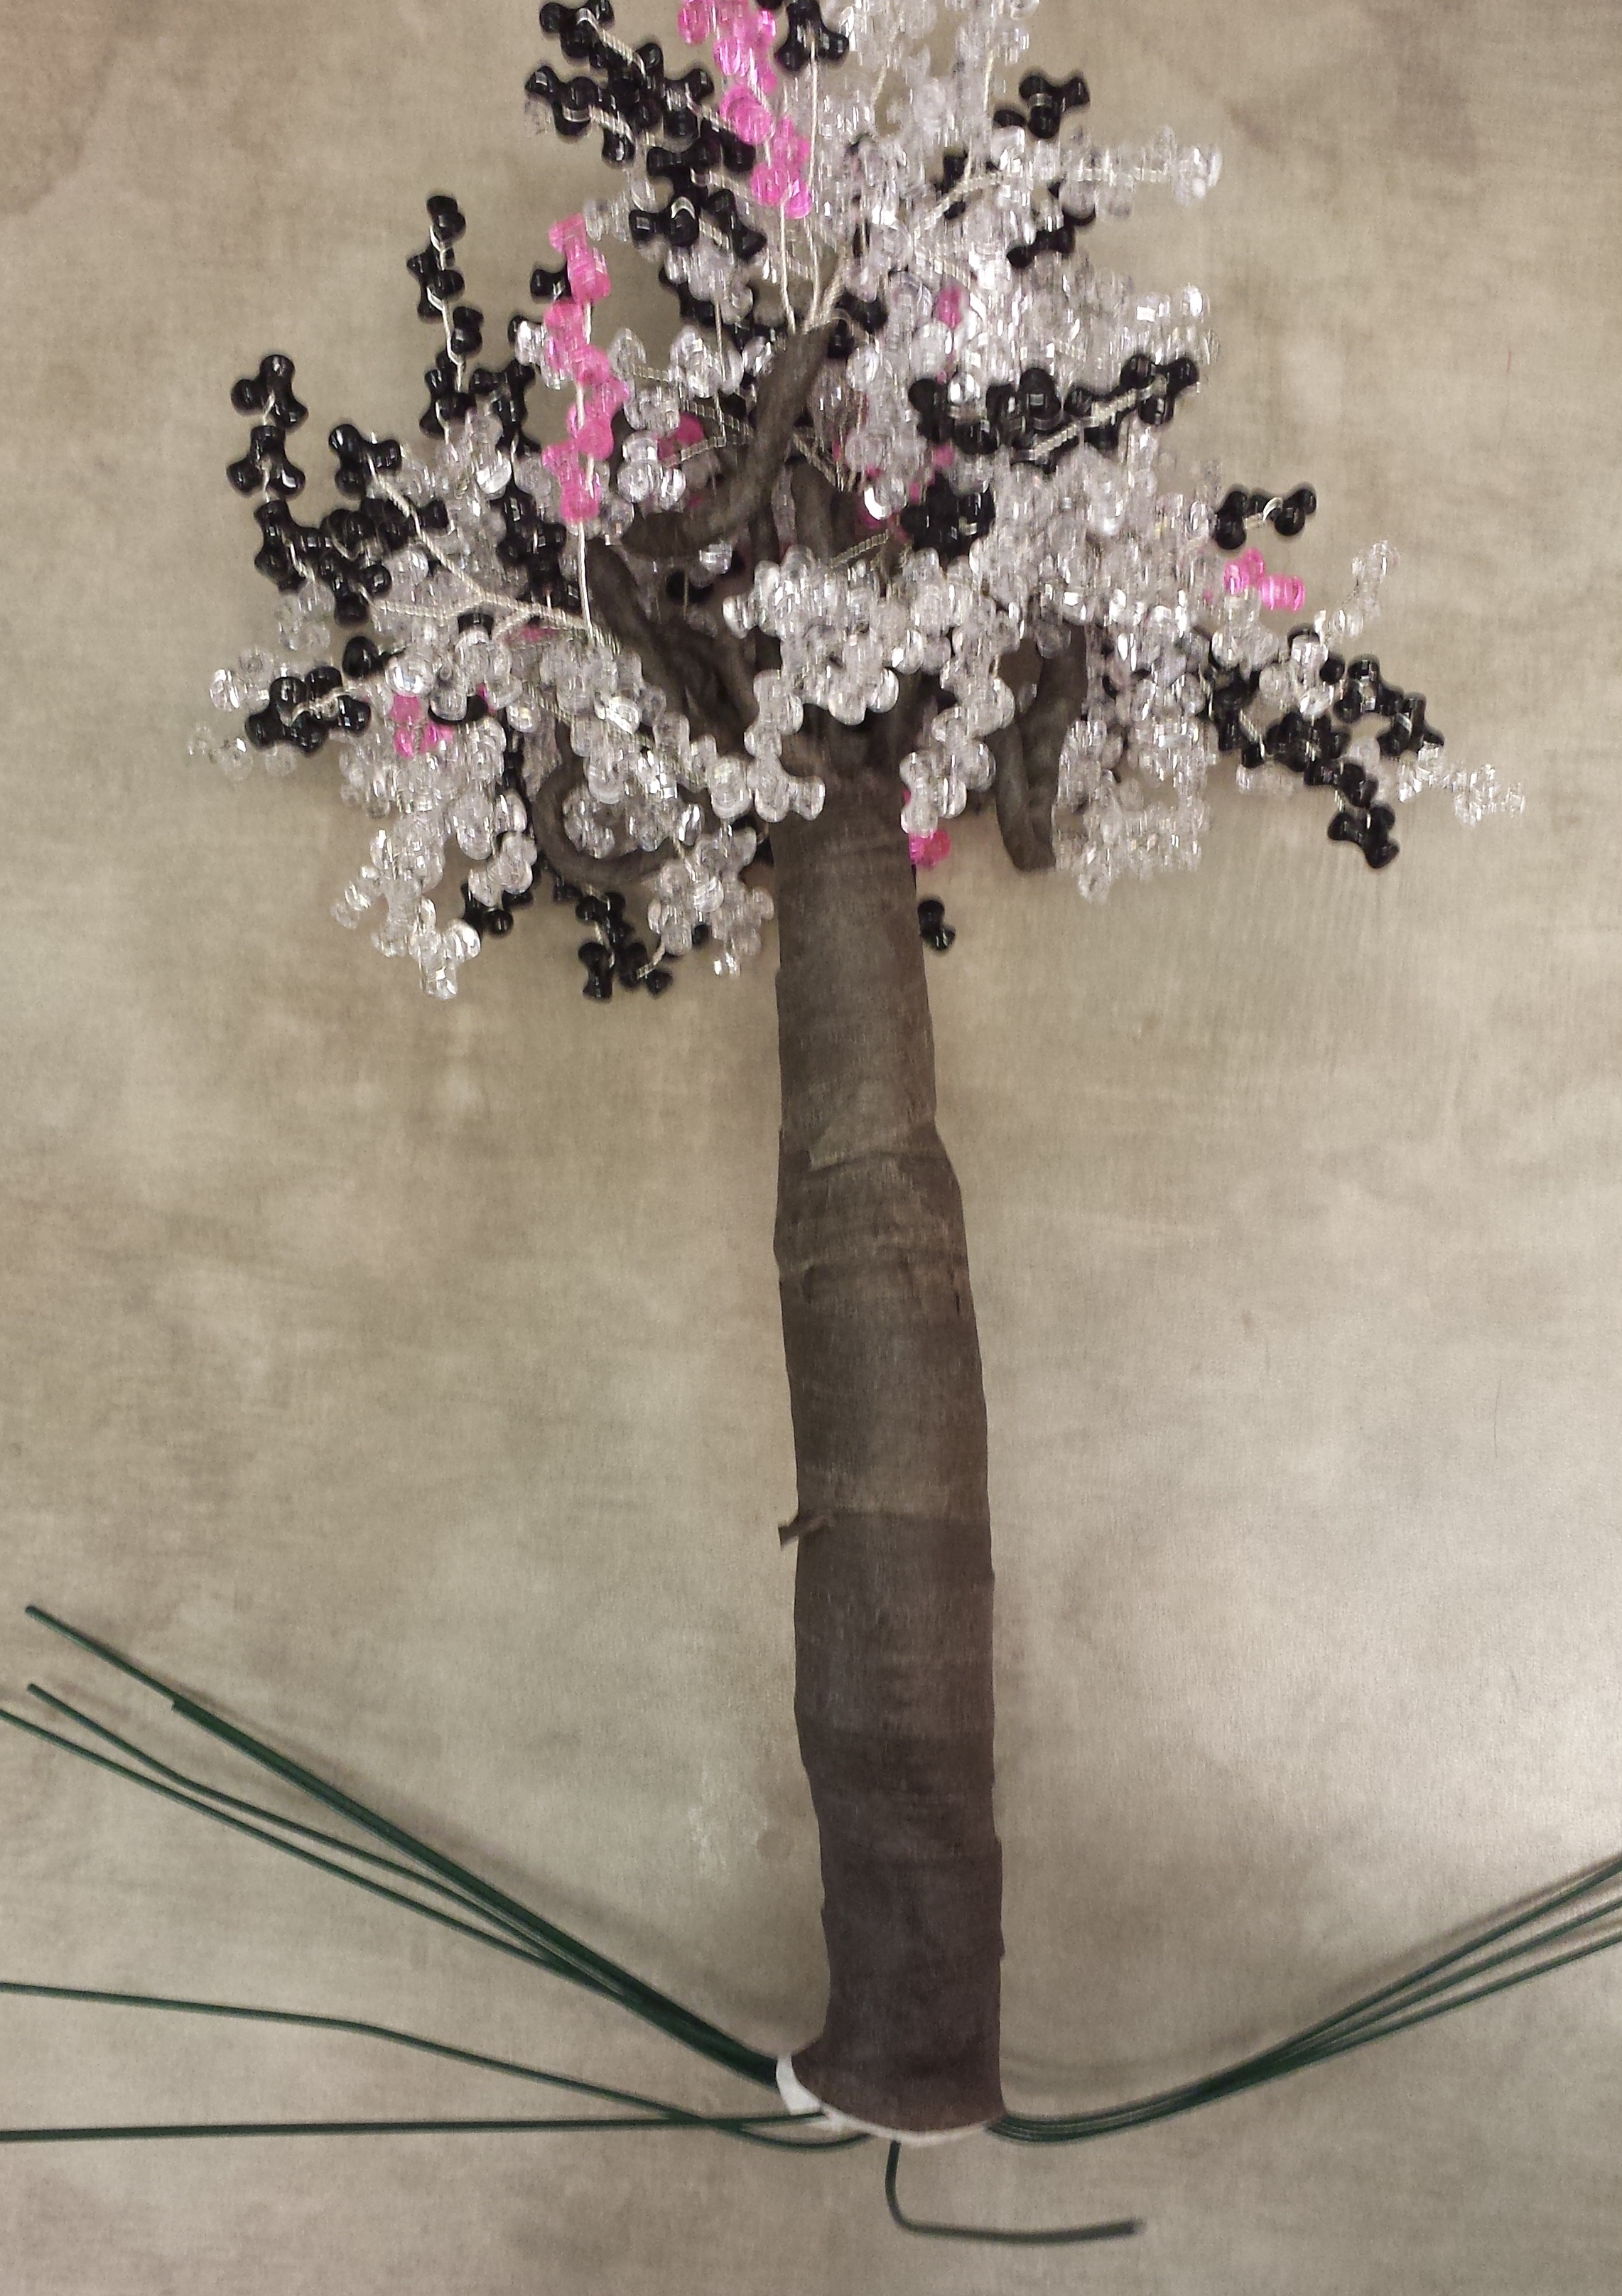
You will need to make 30 of these.
Once you have all your 30 sets of “leaves” you will need to combine 3 of them together to create one bigger set of “leaves” ending up with ten big “leaves”

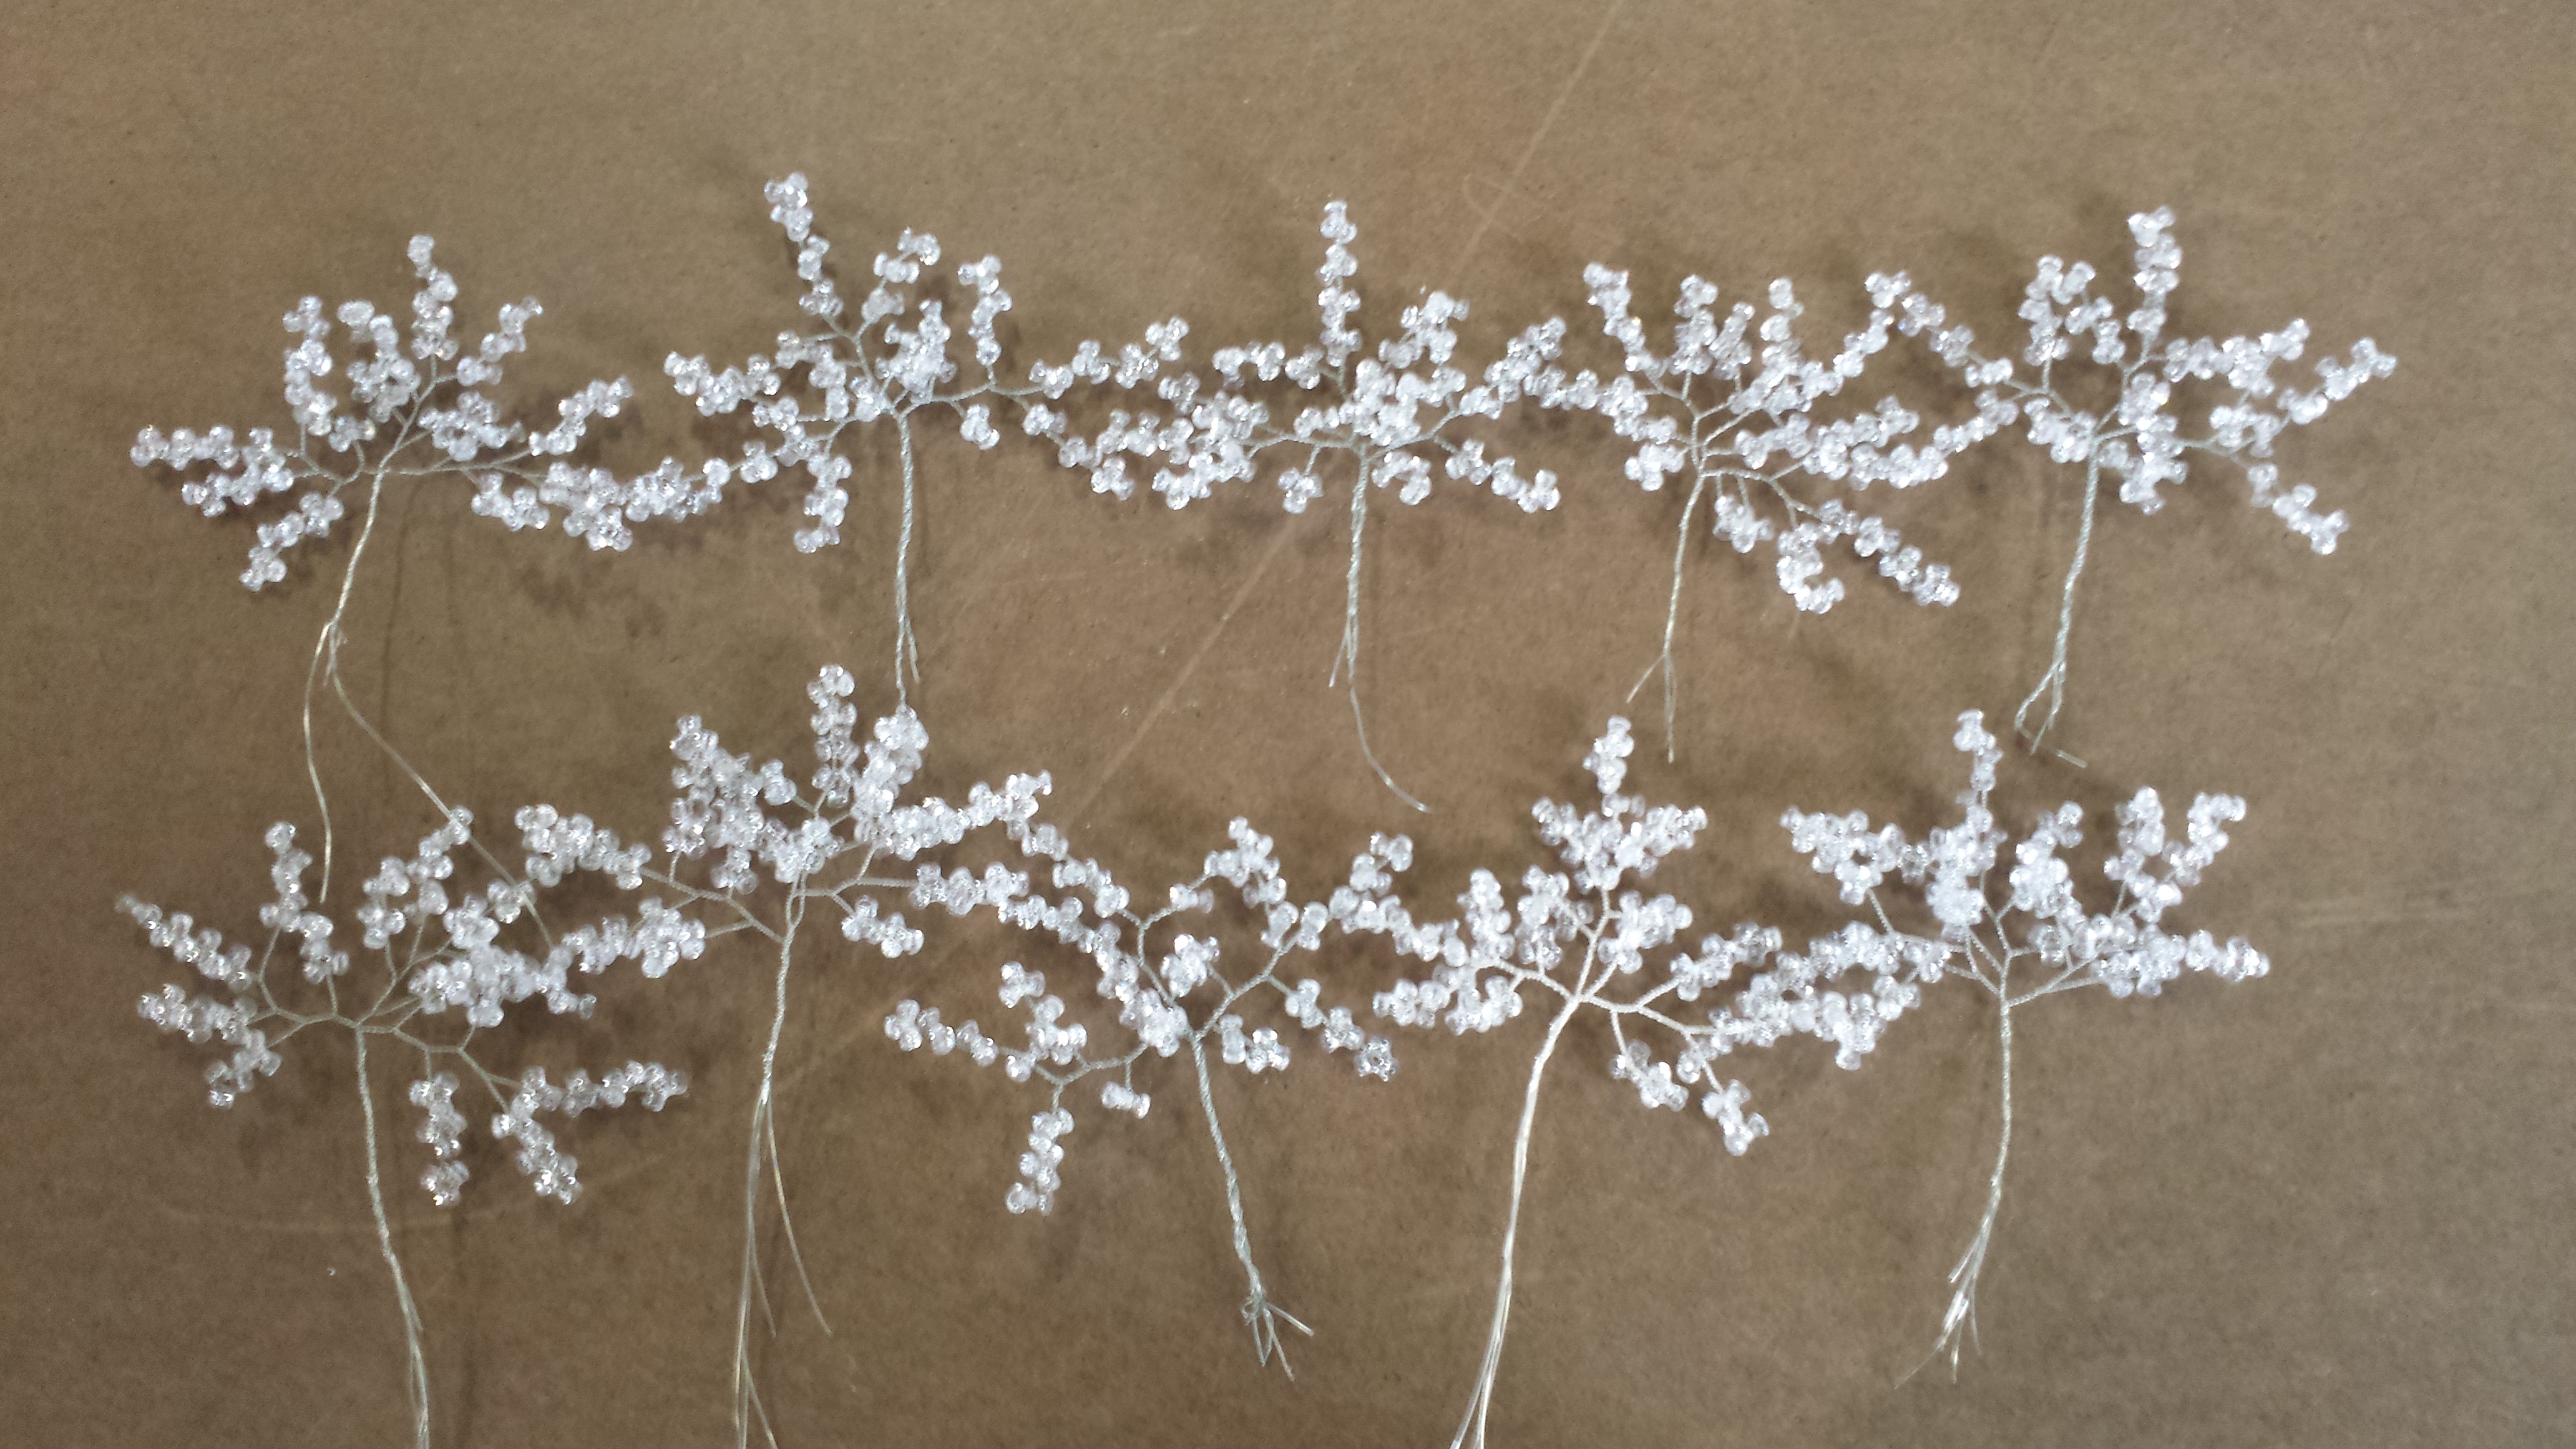
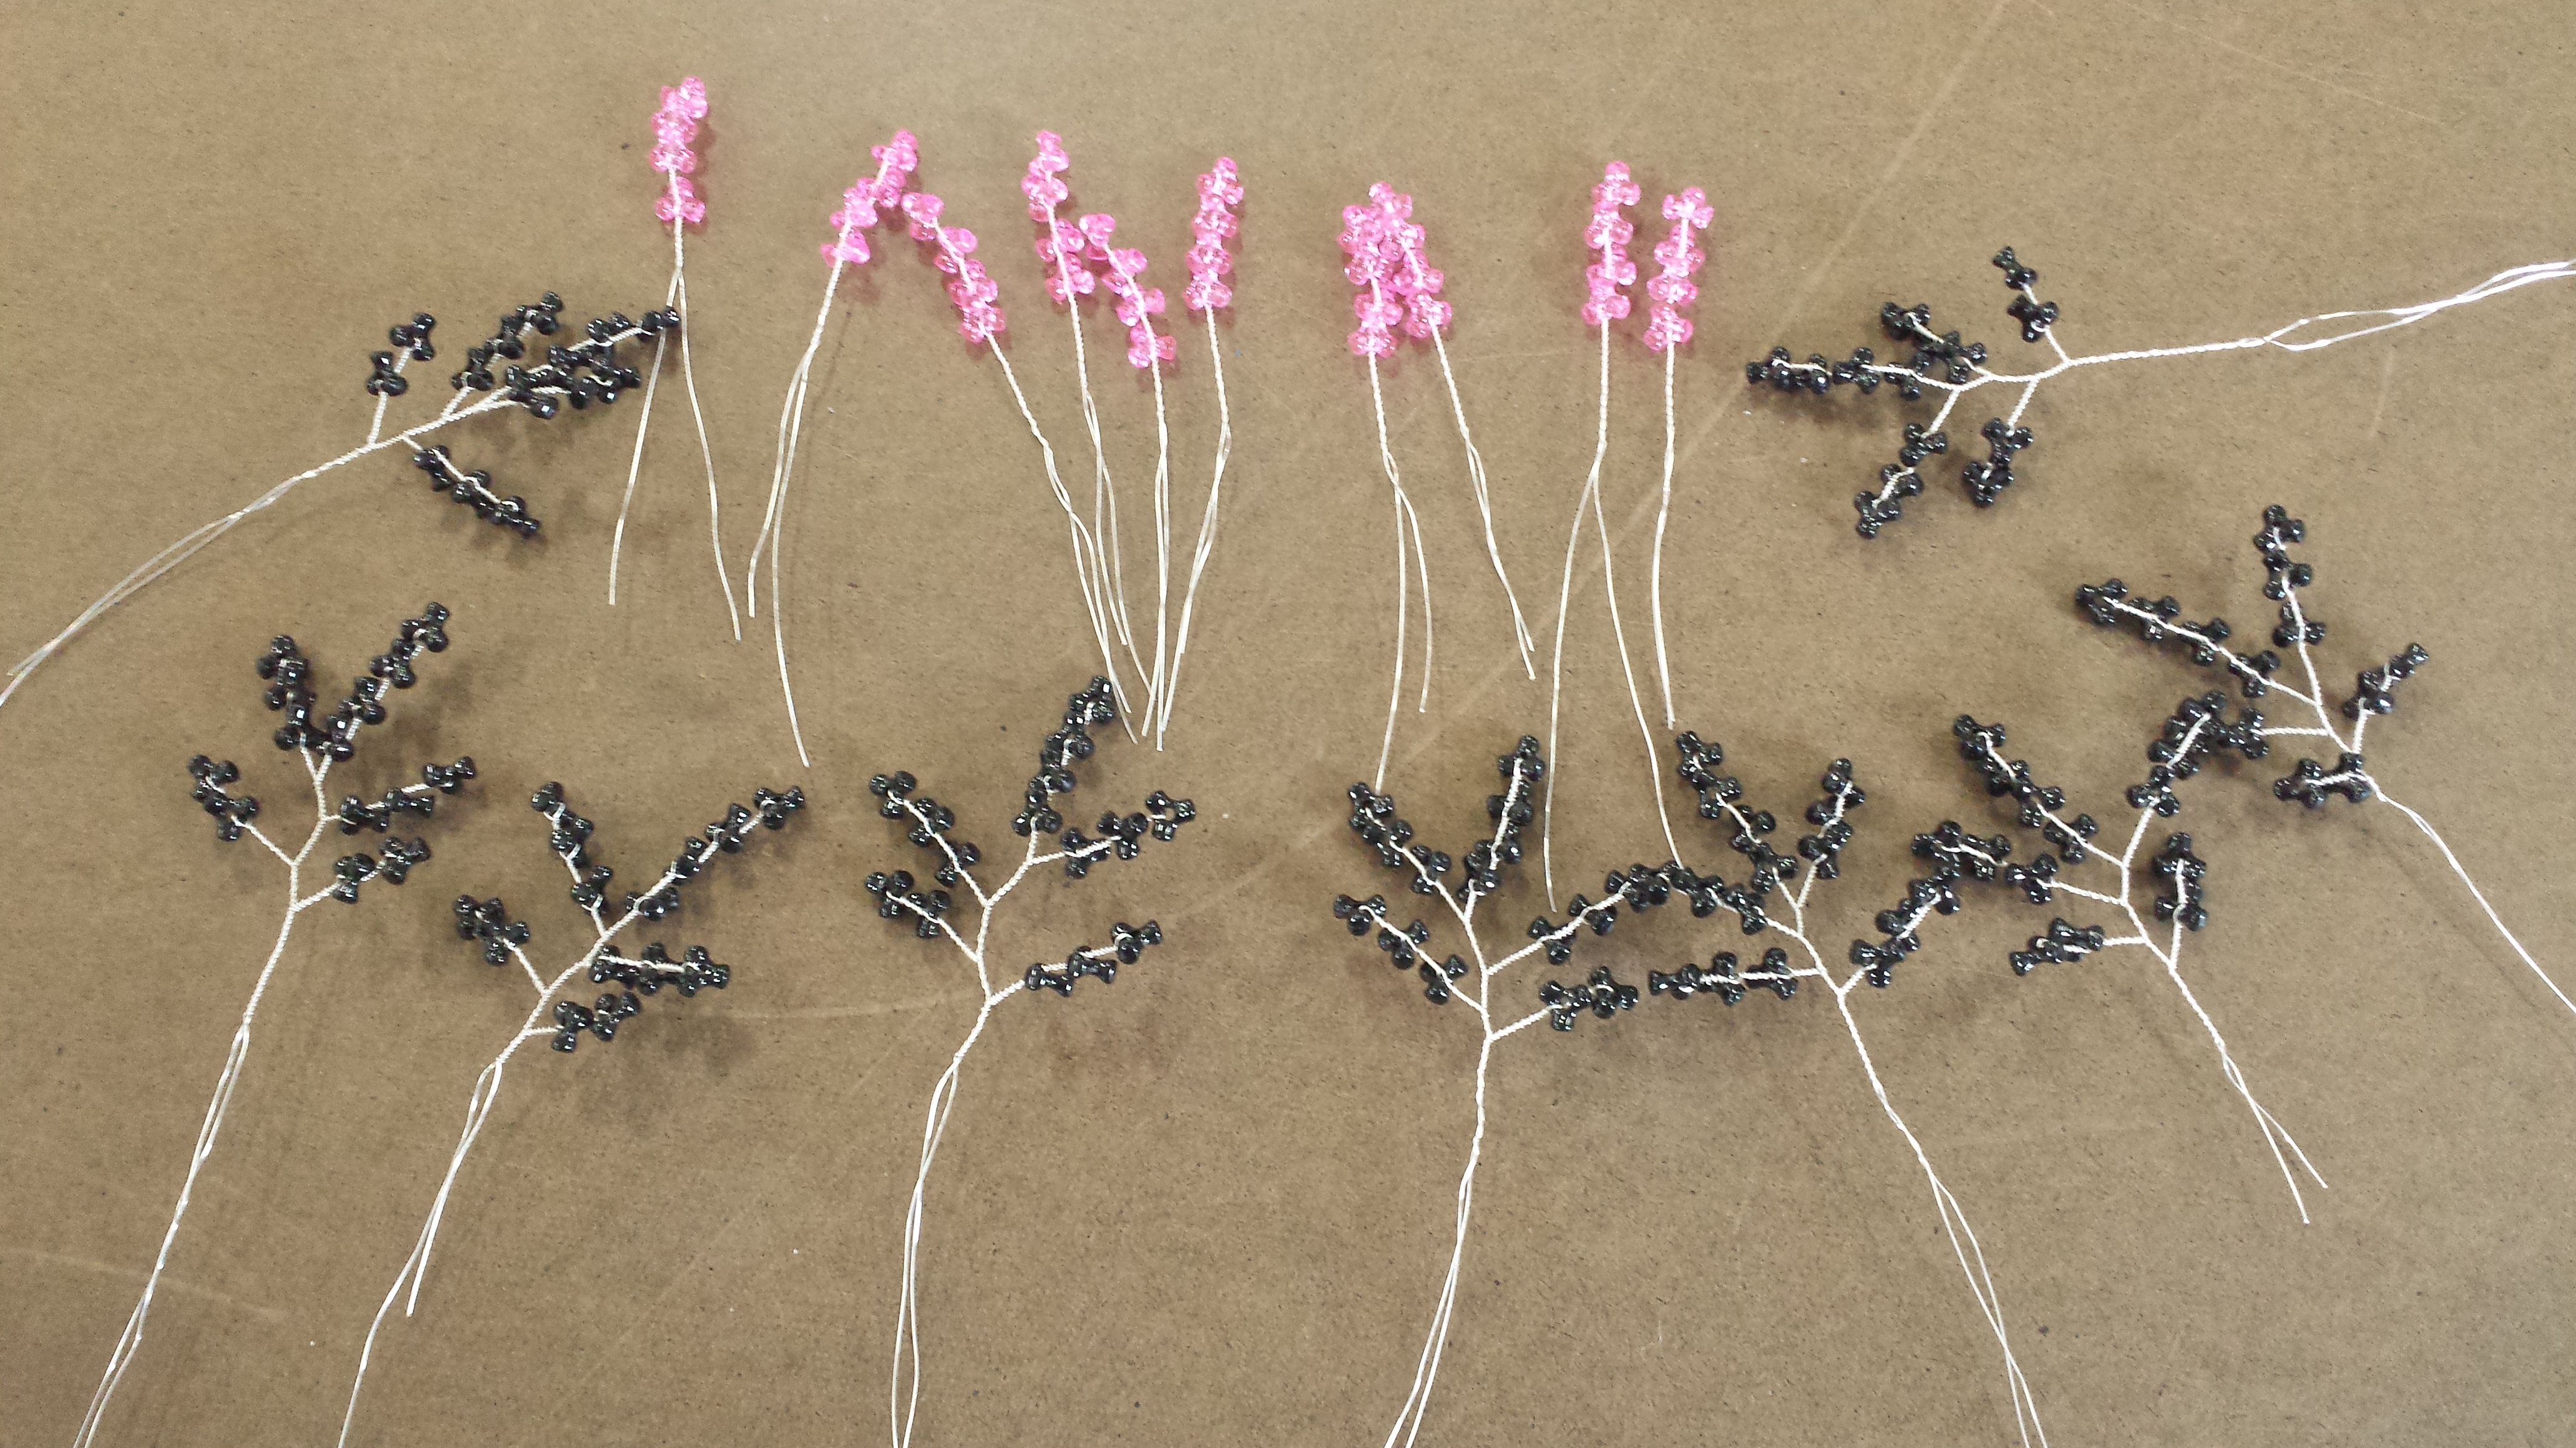
Now you will need to create the second and third set of “leaves”. For the second set you will repeat the first process but this time only make 10 pieces. For the third set cut about 12″ of wire and only twist 4 tri-beads and make 10 pieces.
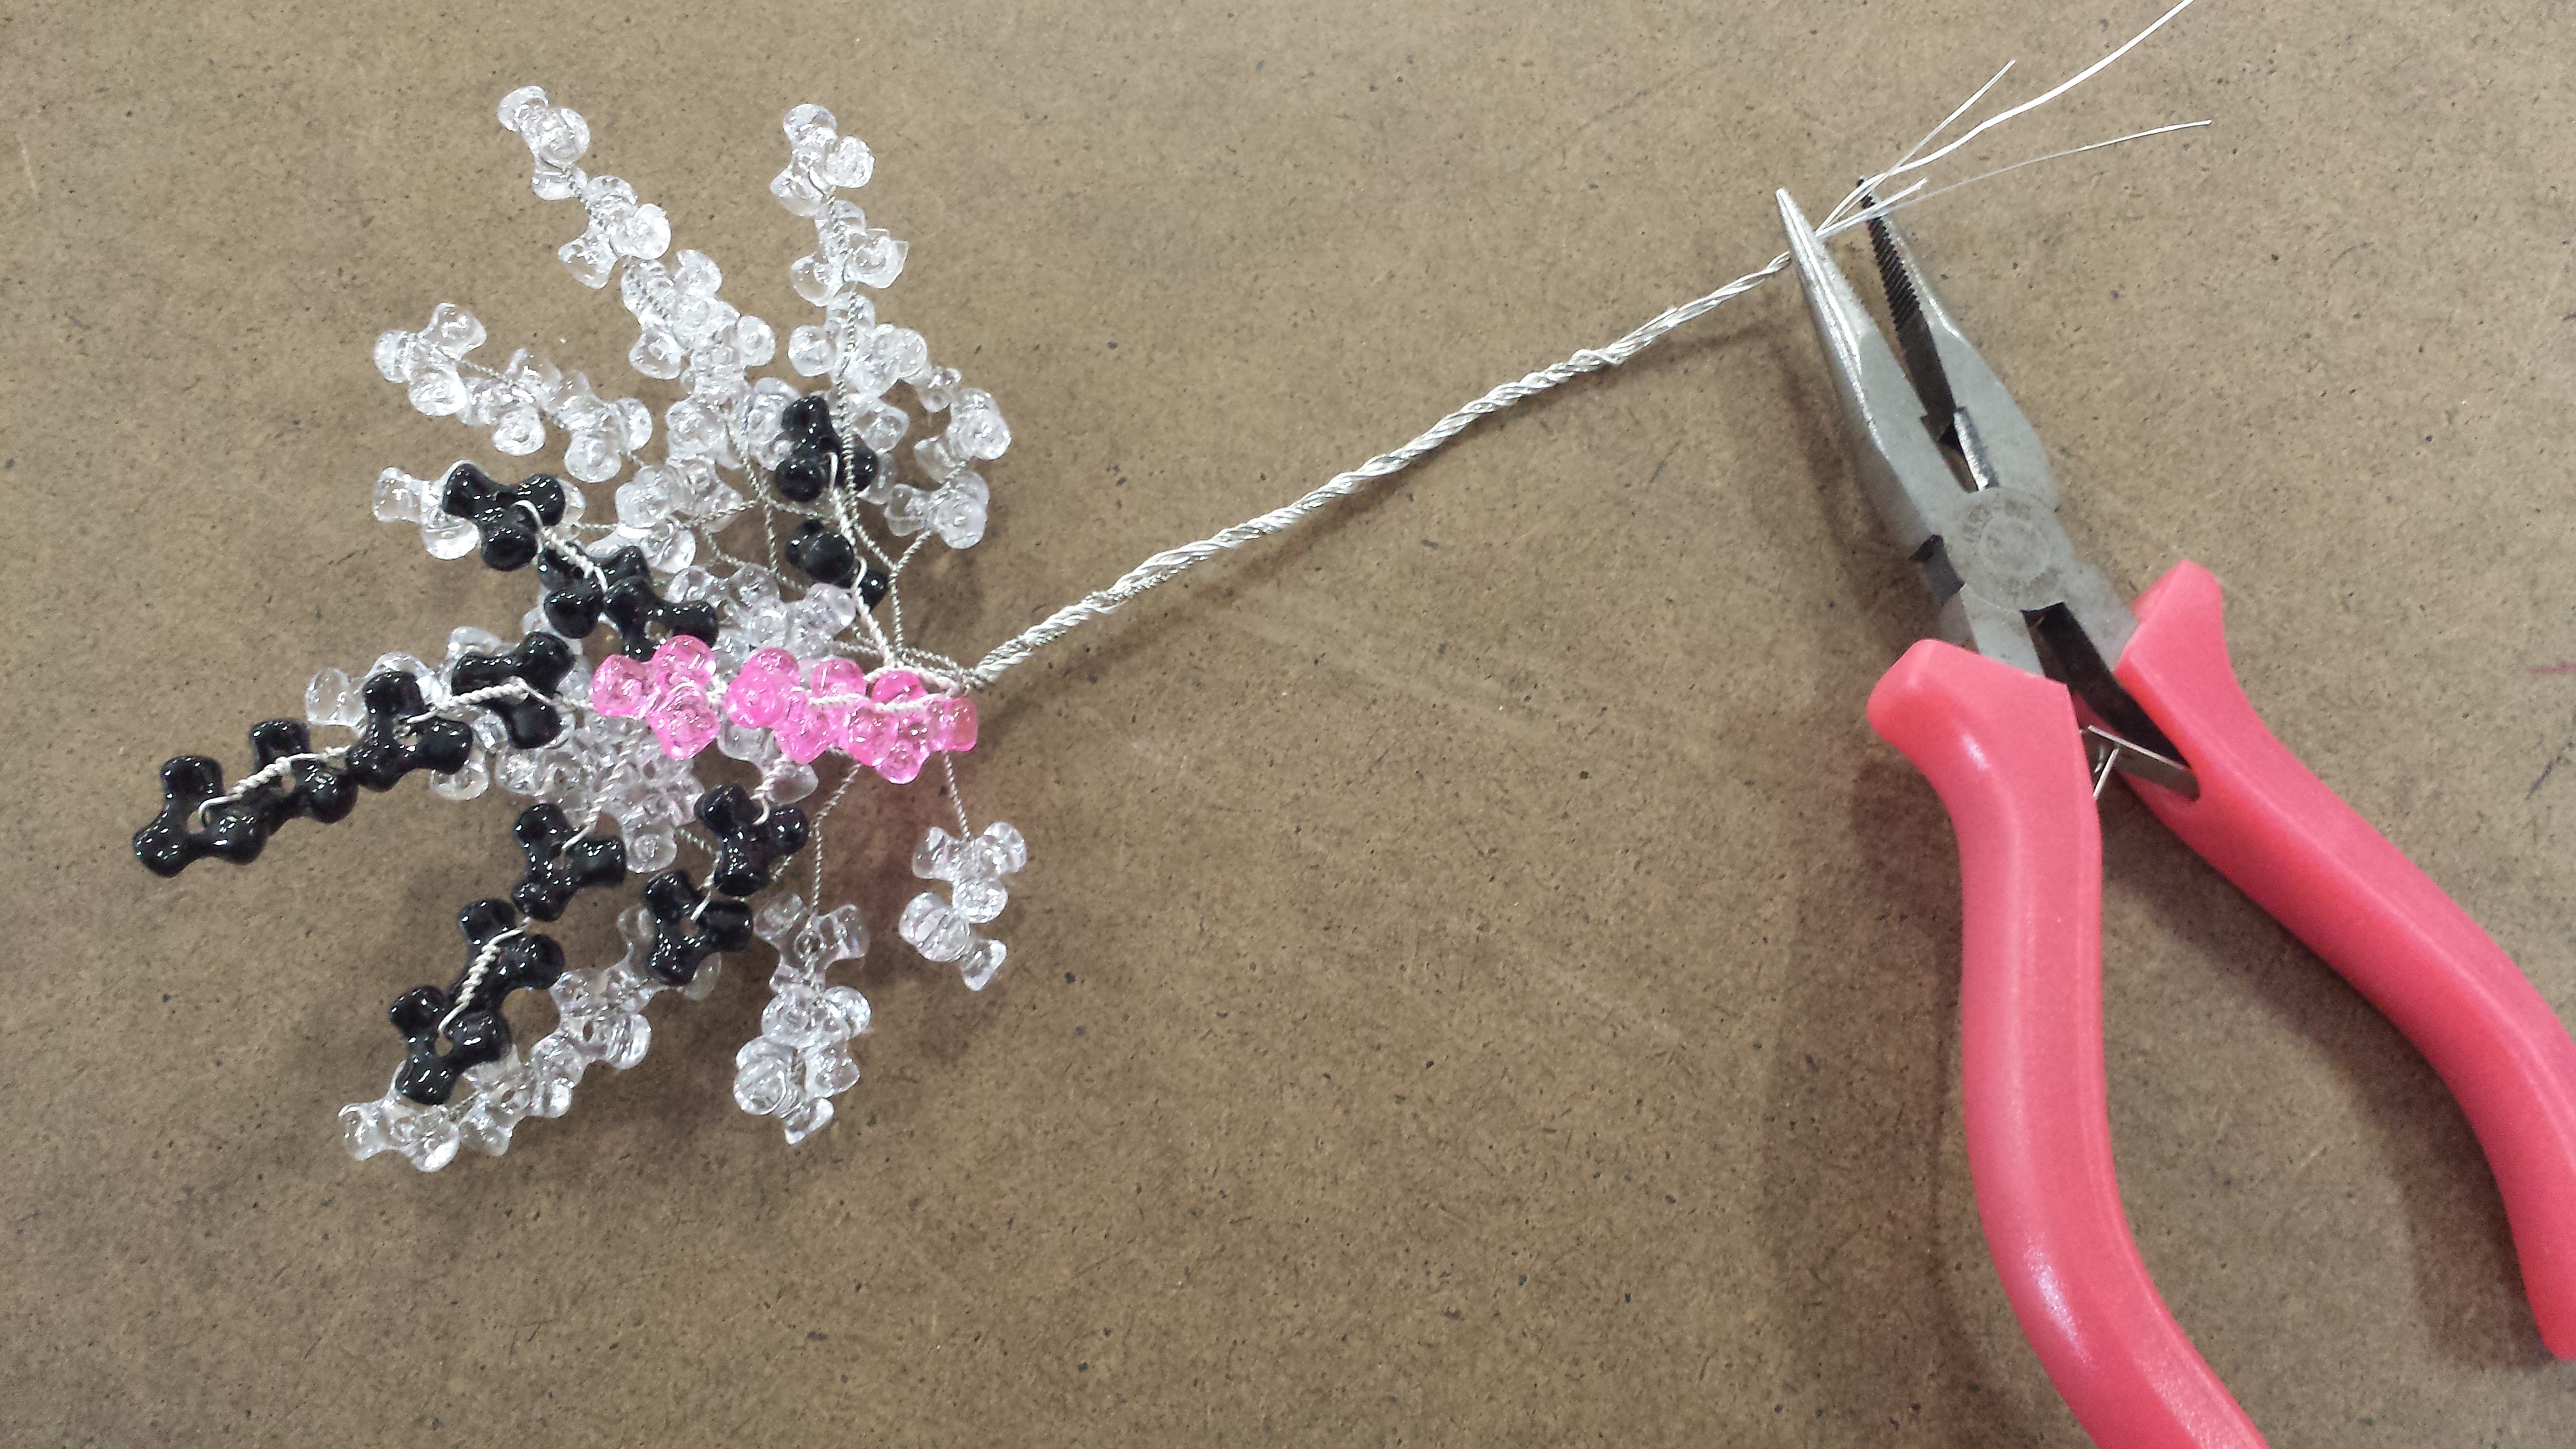
Combine the big leaf with the second and third set one on top of the other.

Using your pliers to help you twist them together your leaf should look like this. Repeat the process for the other 9 pieces.
Step 3: WRAPPING THE FLORAL WIRE AND FLORAL TAPE
Now you will need to wrap each set of leaves around the green floral wire, making sure that there are no wires sticking out. The wire should lay completely around the green floral wire
(see video for better understanding)
Once you are done wrapping each set of leaves to the green floral wire you will now need to wrap the wire and green floral wire with the brown floral tape. I recommend pulling out about 15 inches of brown floral tape and wrapping it around 2 to 3 times because you will need to bend and twist the floral wire and you don’t want the wire showing thru.

Step 4: CREATING THE TREE TRUNK AND ROOTS
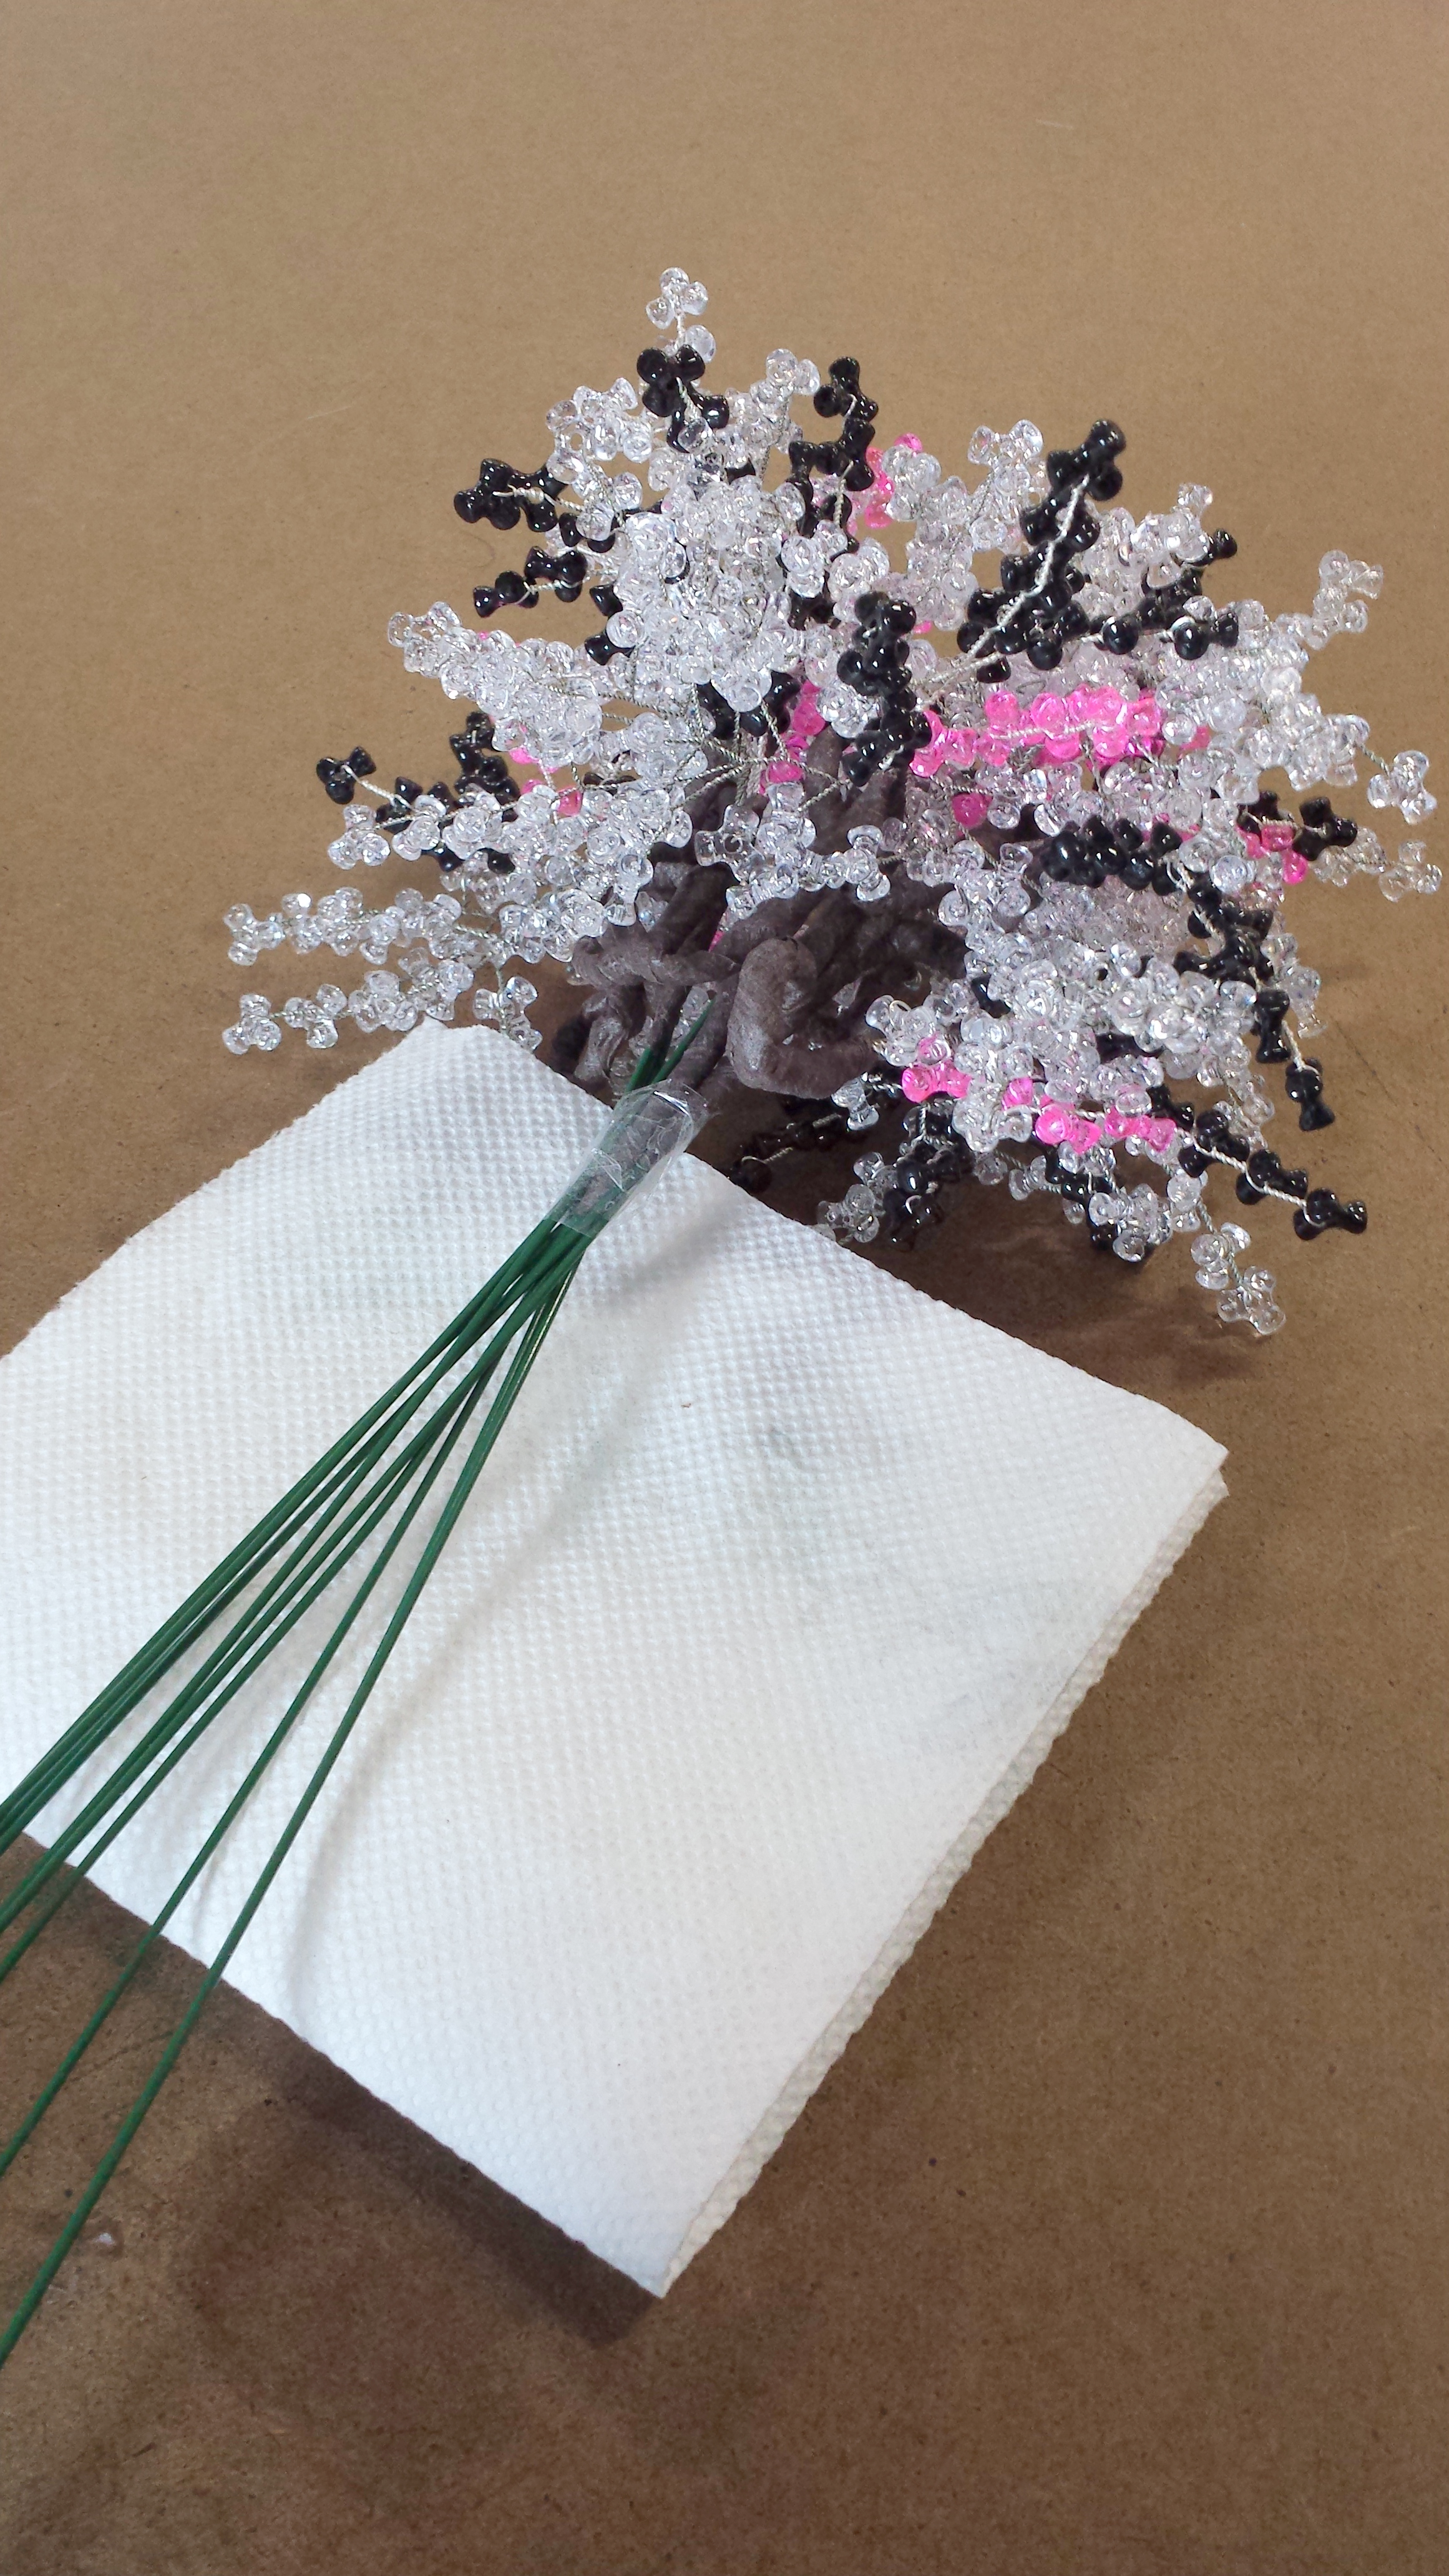
Once all the leaves have been wrapped with the brown floral tape and twisted gather them and combine them all together to create a “bouquet” and tape them together.

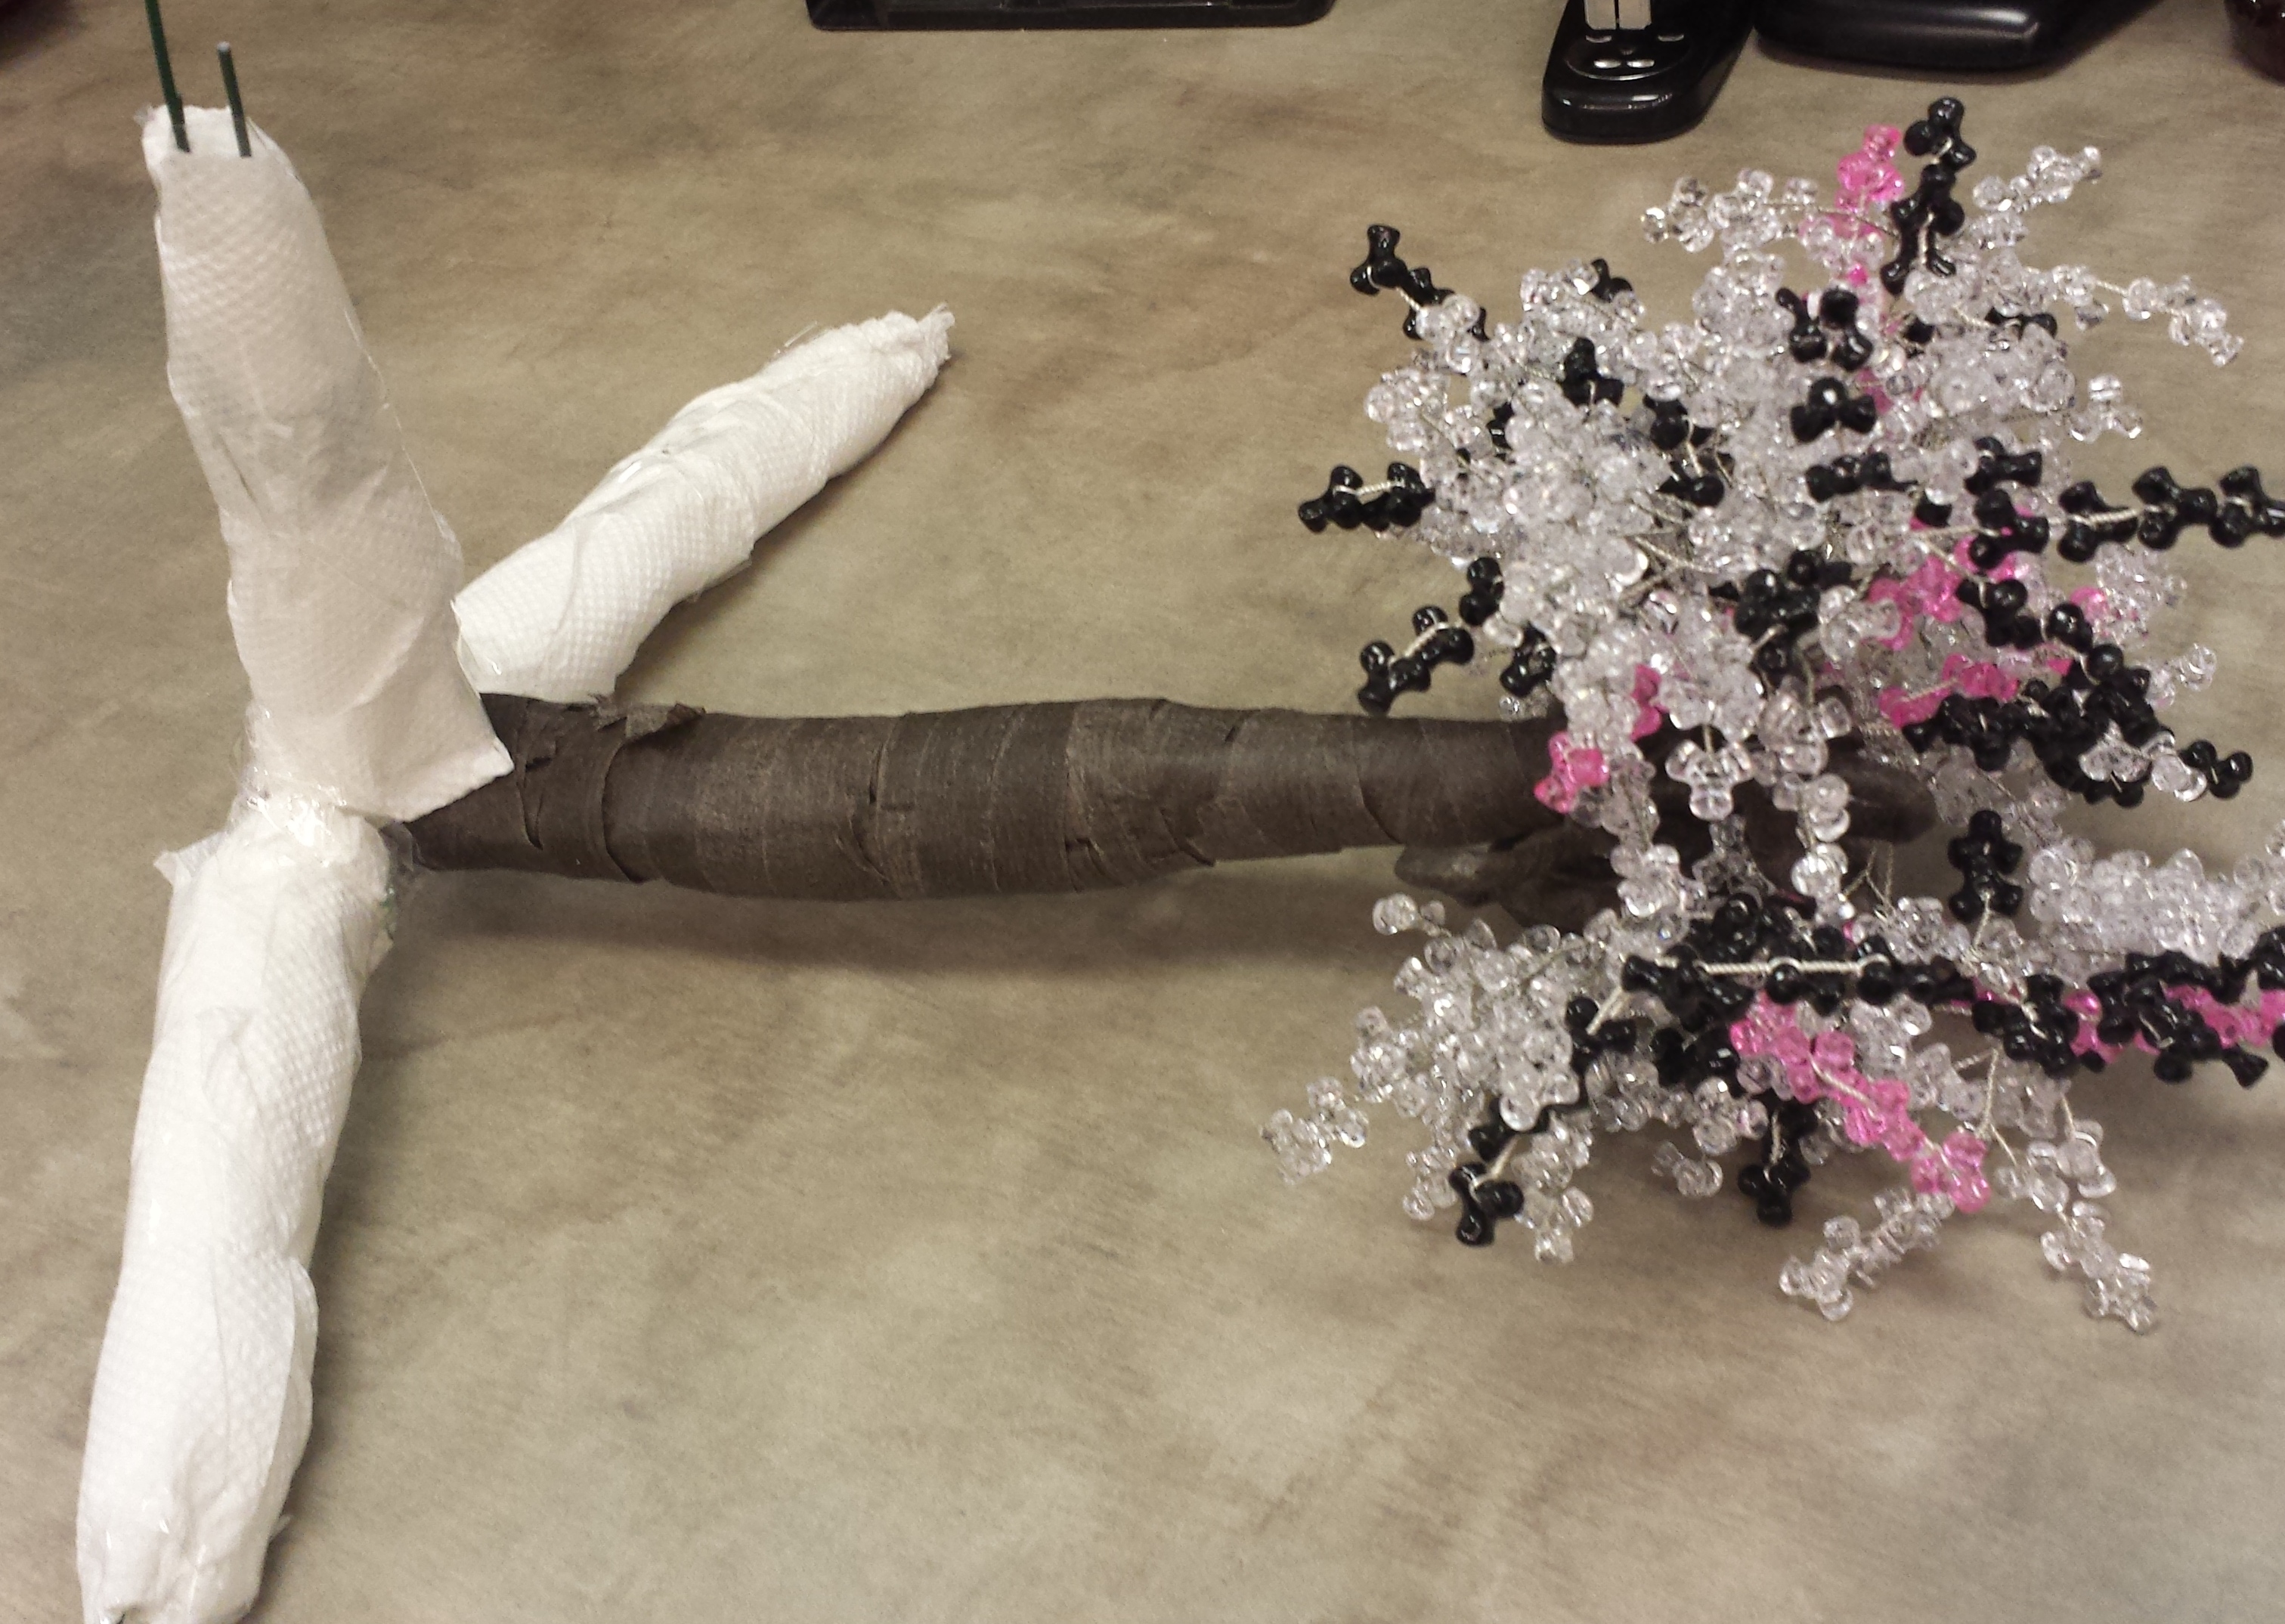
Tear a few sheets of paper towels to start creating the “trunk”.
Wrap a small sheet at the top and tape it down and then wrap another sheet at the bottom part making it slightly bigger than the top and tape it down about 7″ down. Once you are done your trunk should look like this:
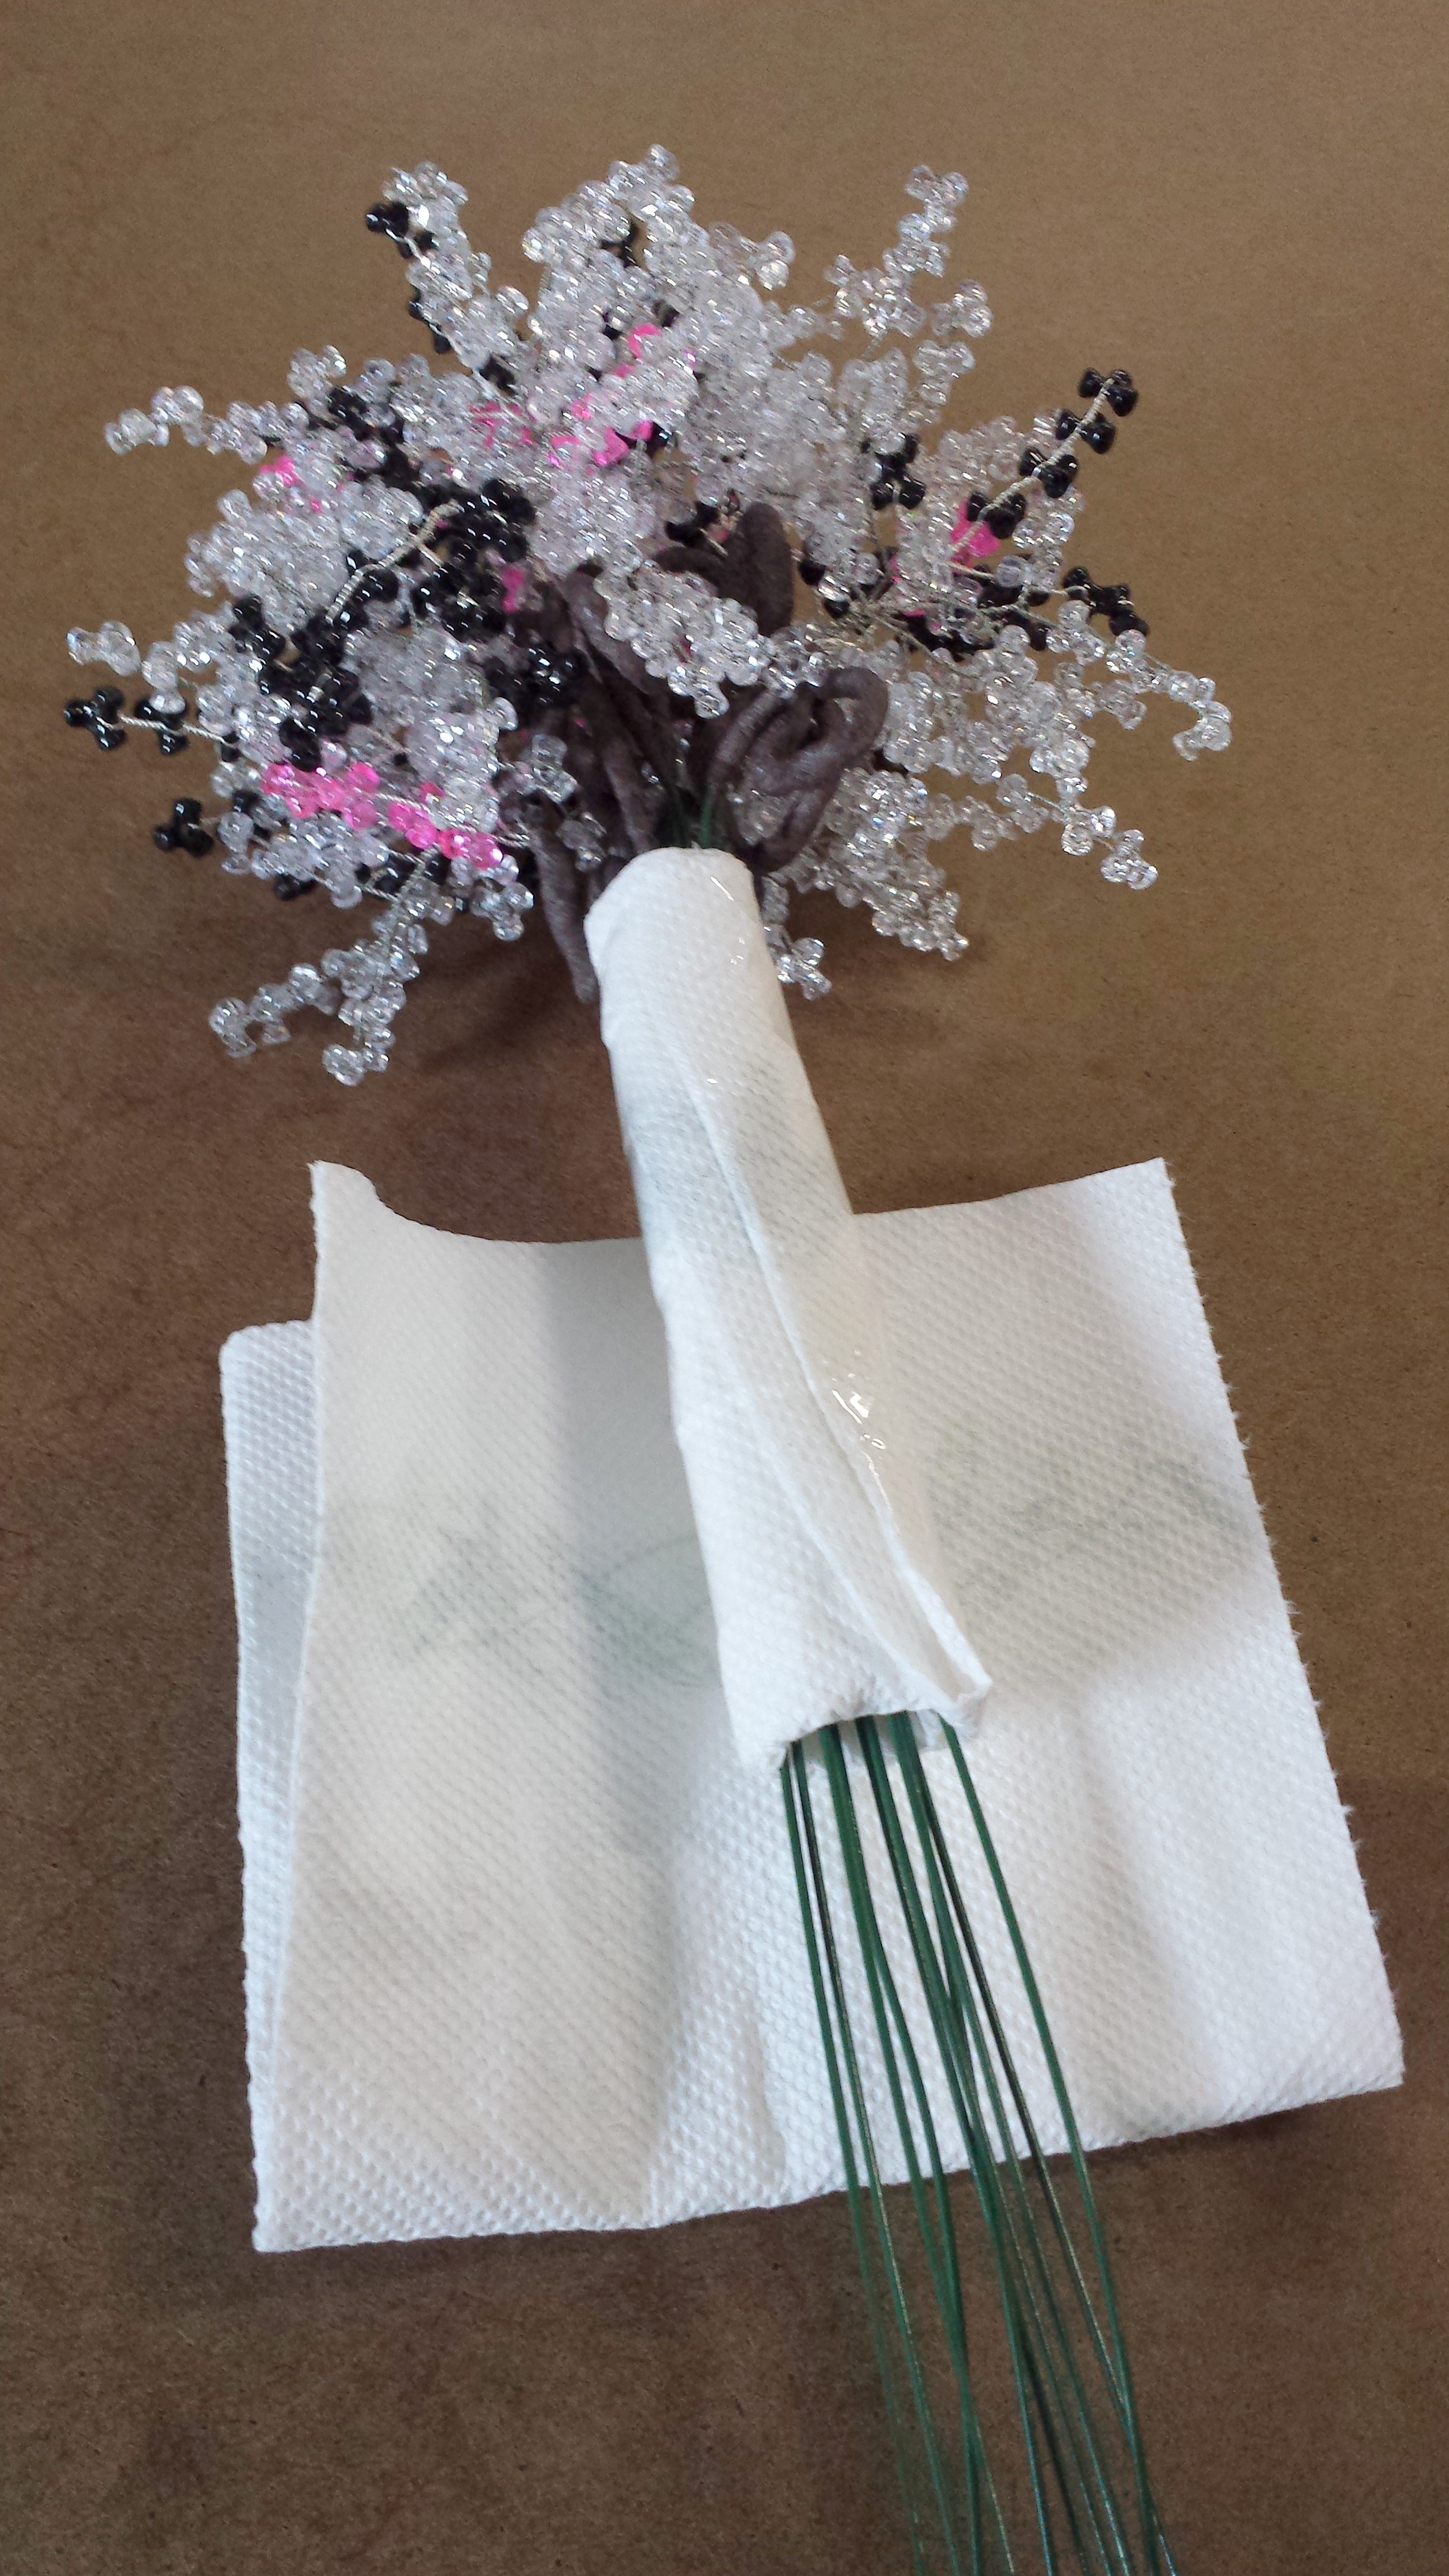
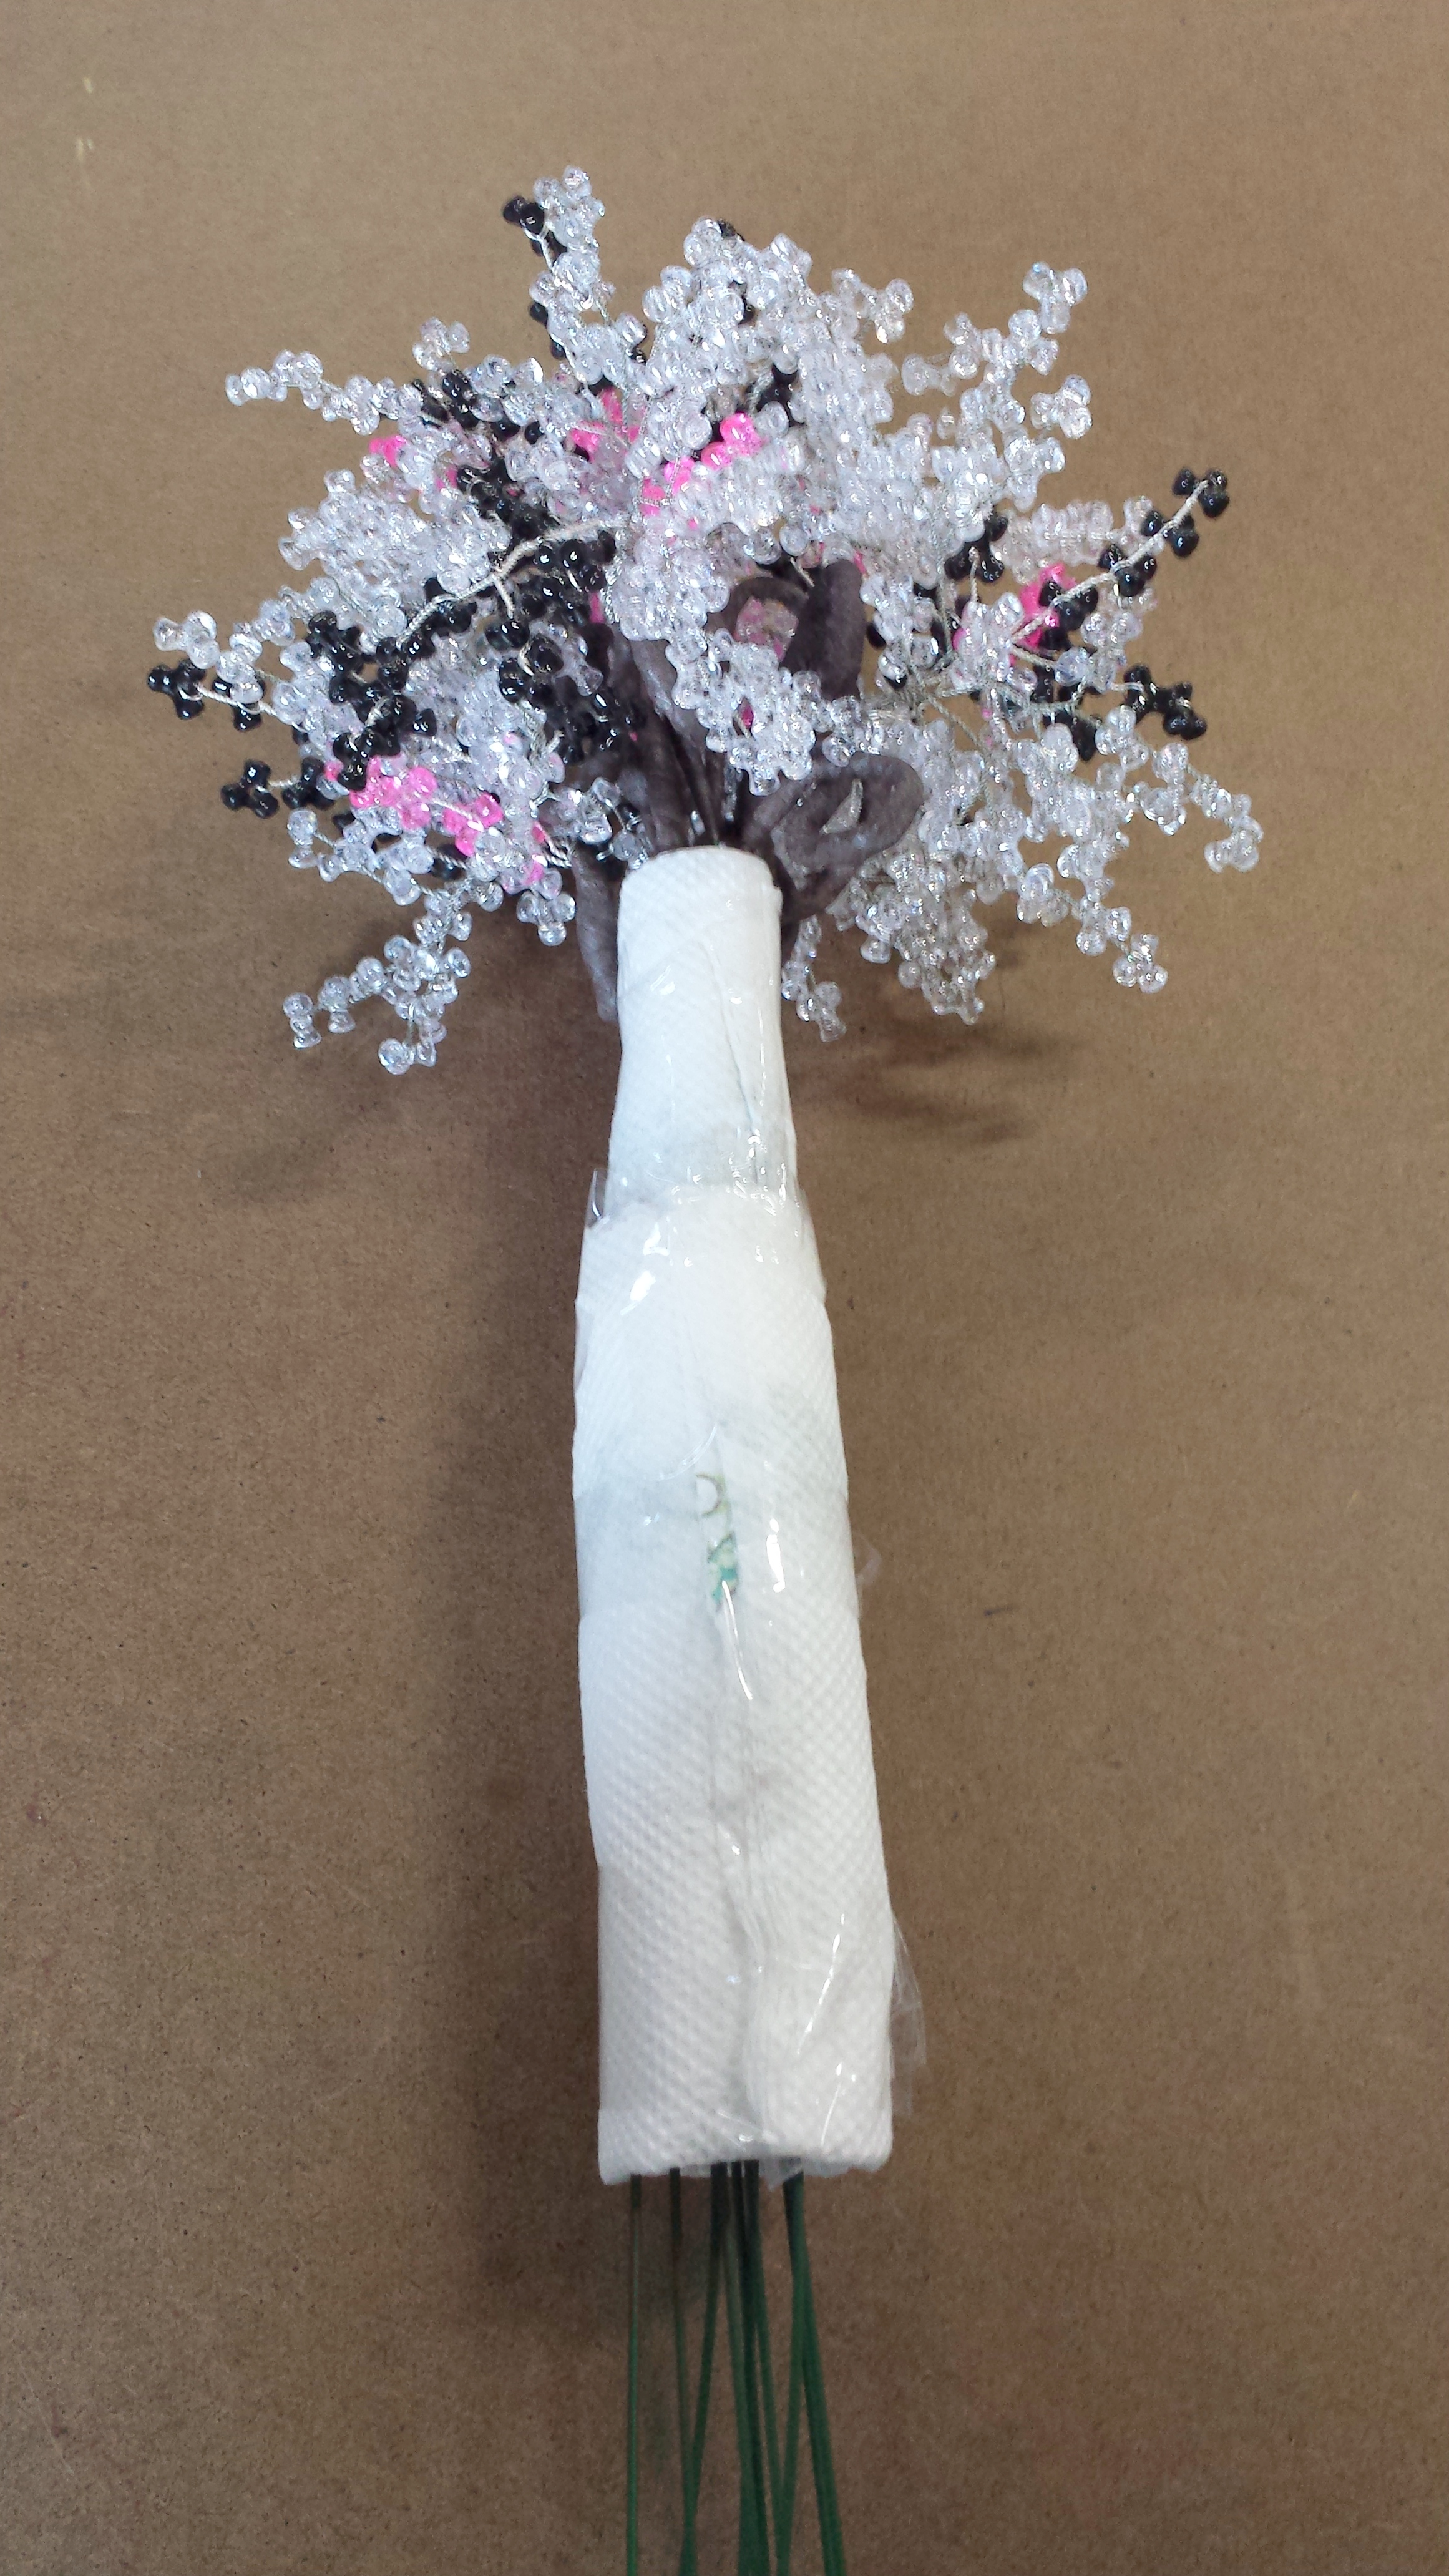
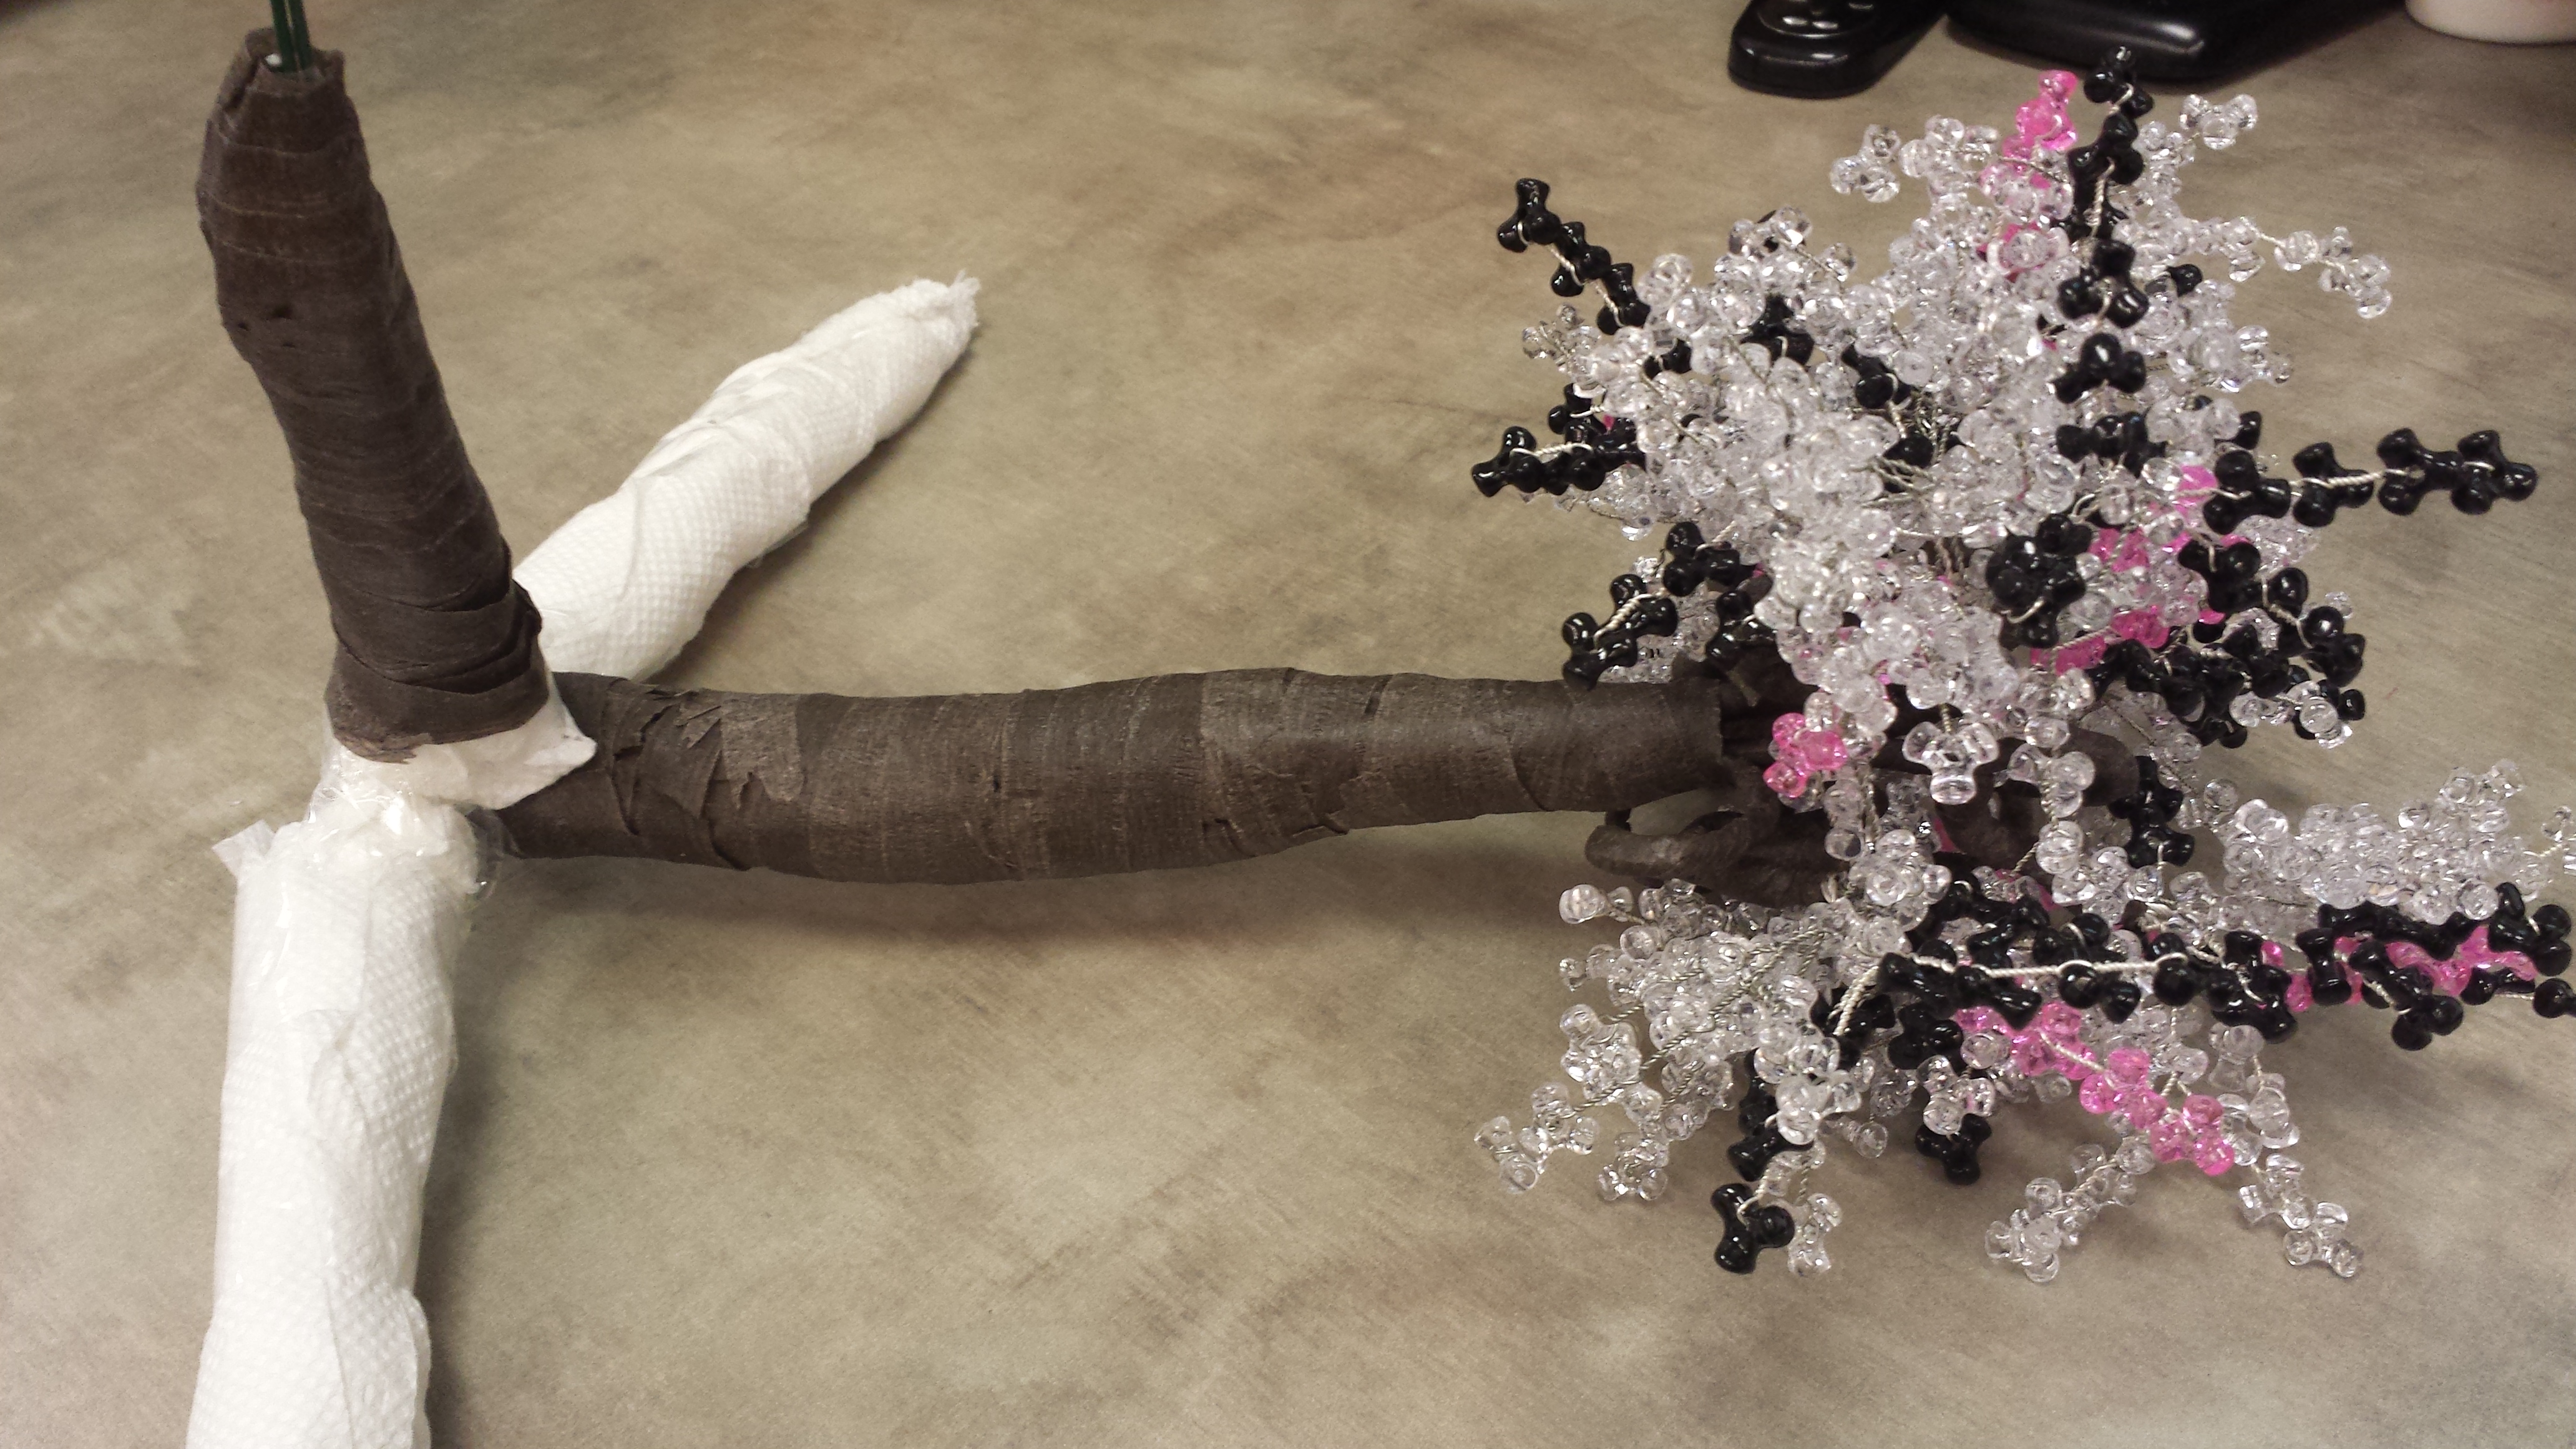
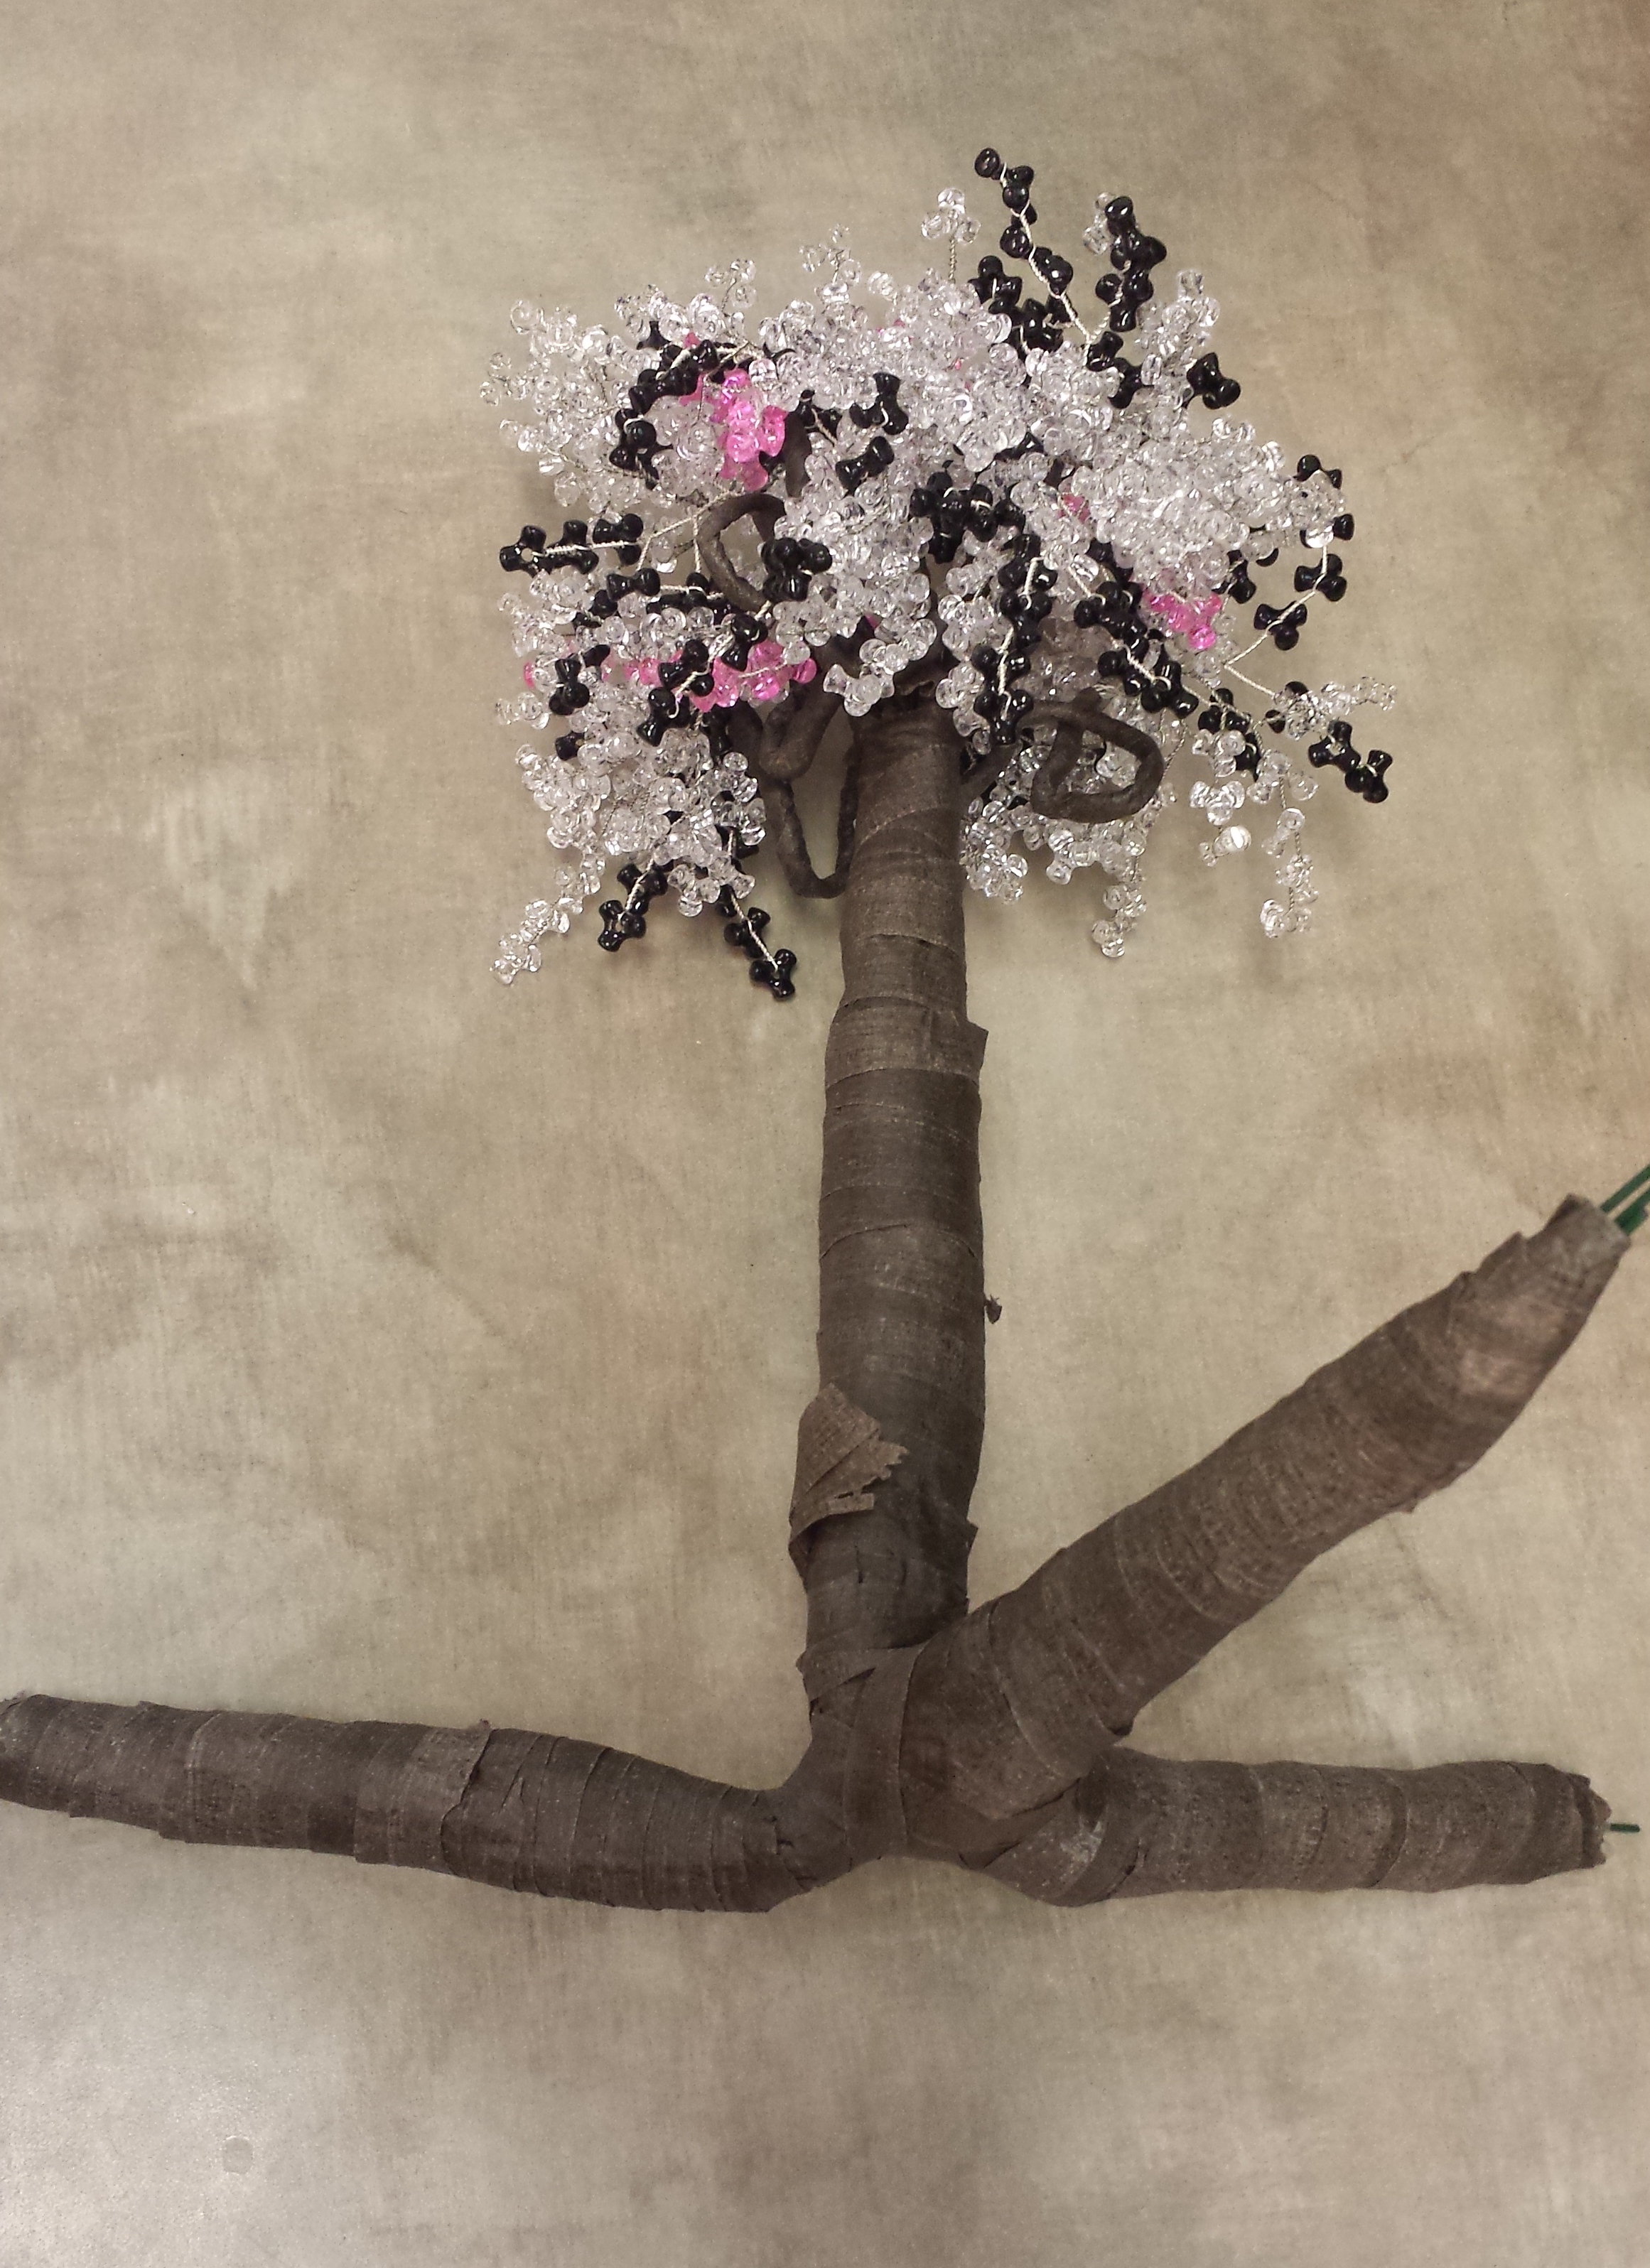
Now you will want to start wrapping the trunk with the brown floral tape. I also recommend wrapping the trunk 3-4 times with the brown floral tape so that the paper towel will not show thru after bending it. After you are done wrapping the trunk split the ends of the green floral wire into 3 groups and bend them to create the “roots” of the tree like it is shown in the picture:

Wrap each root with paper towels and tape them closed (same process as the trunk). And again you will want to wrap each root with brown floral tape 3-4 times as shown in the pictures:
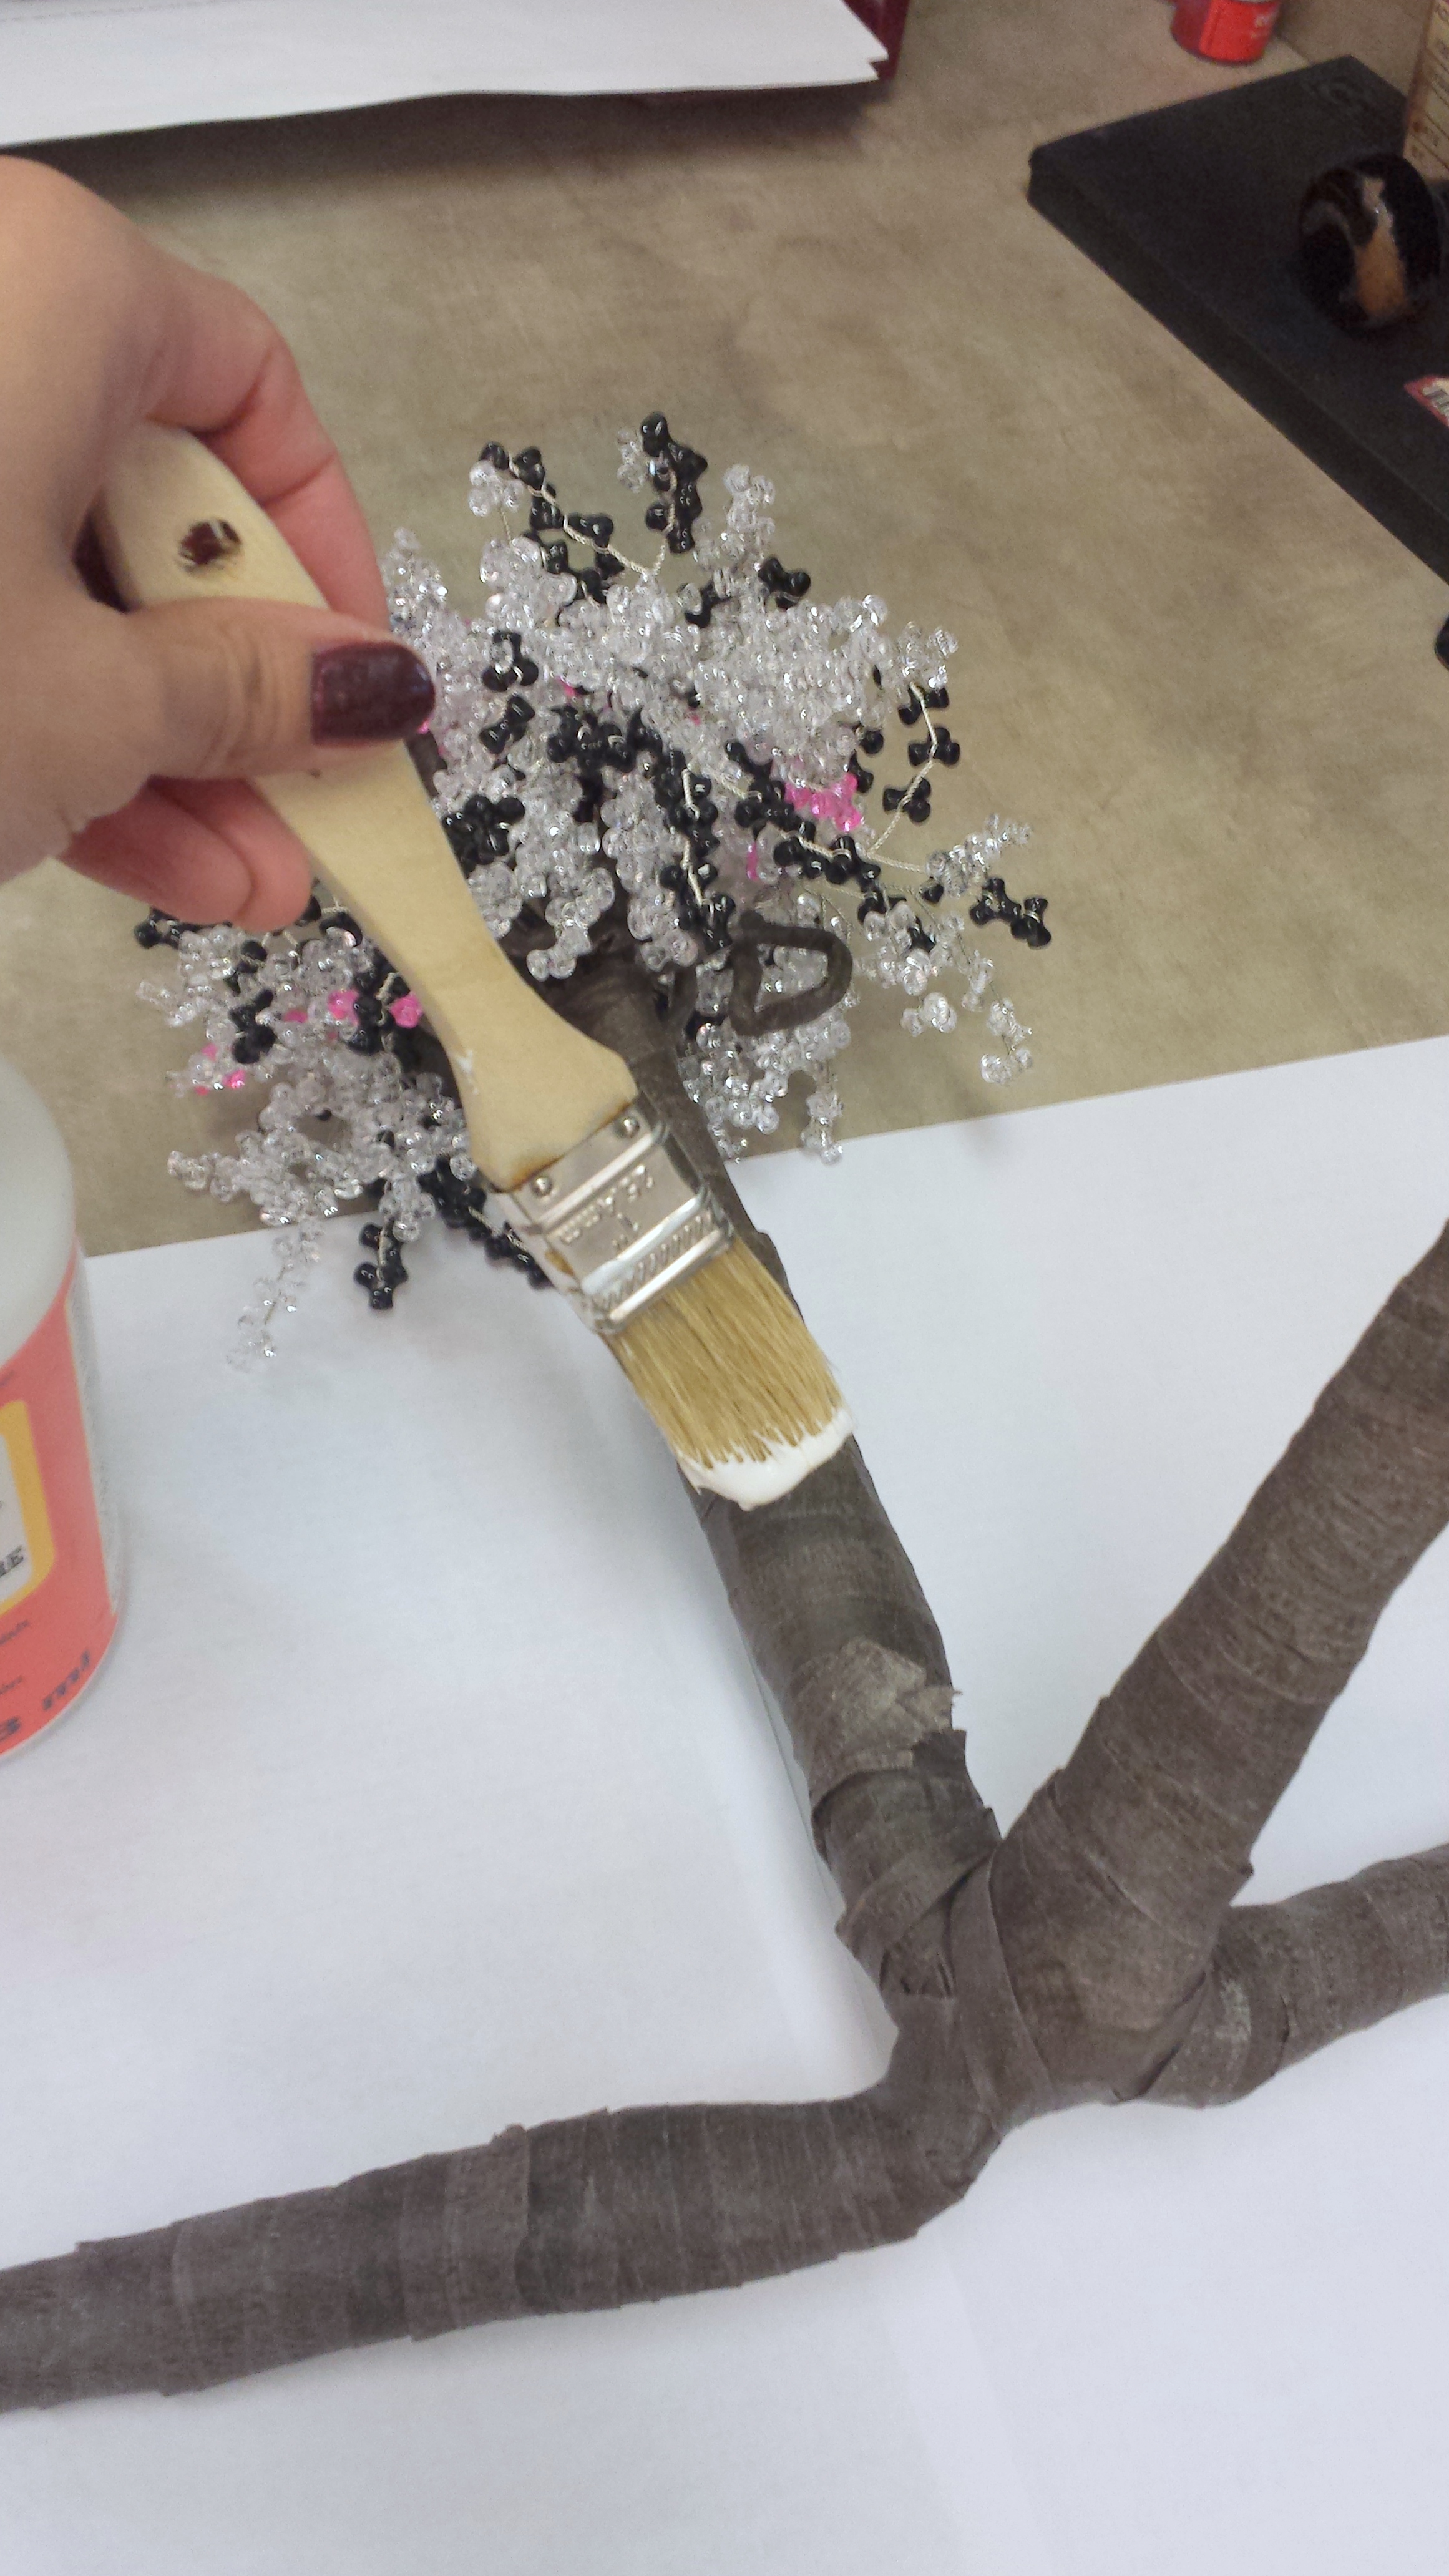
Step 5: FINISHING THE TRUNK AND ADDING THE MOSS
Once you are done wrapping the trunk and the roots with the brown floral tape you have the option to cover it with Mod Podge for a secure glossy finish. Let it sit for a few hours to dry.
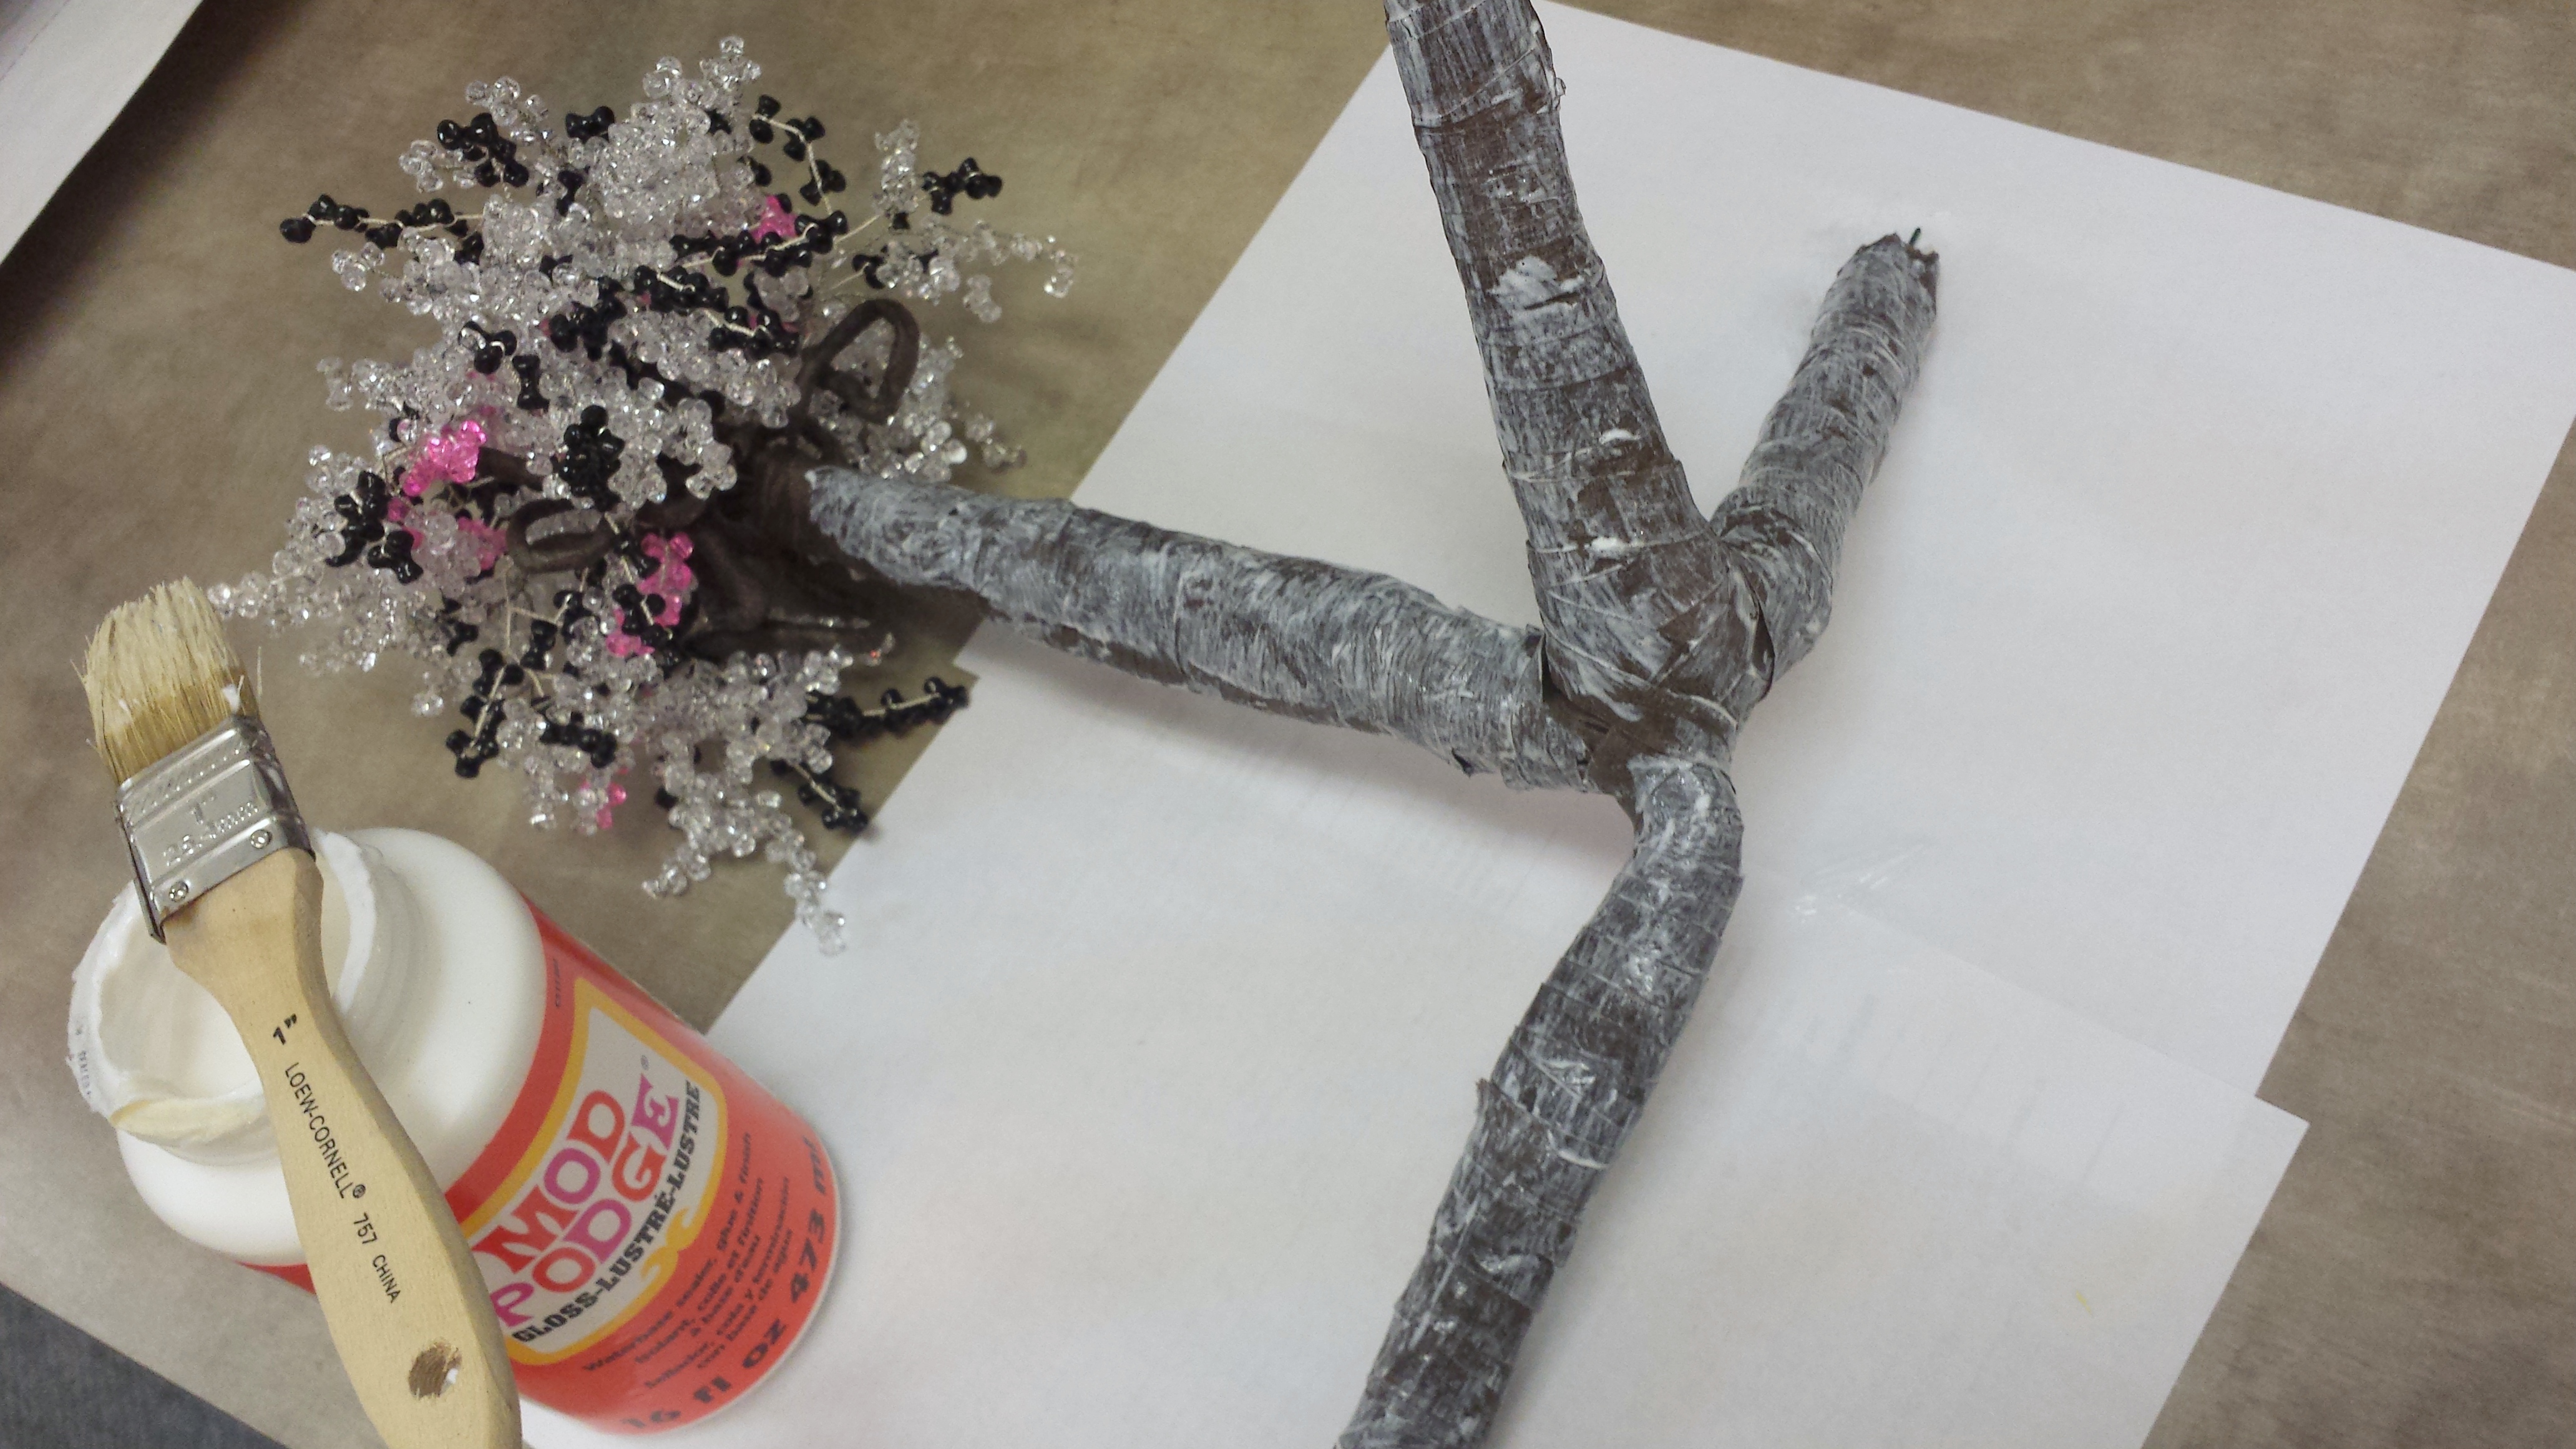
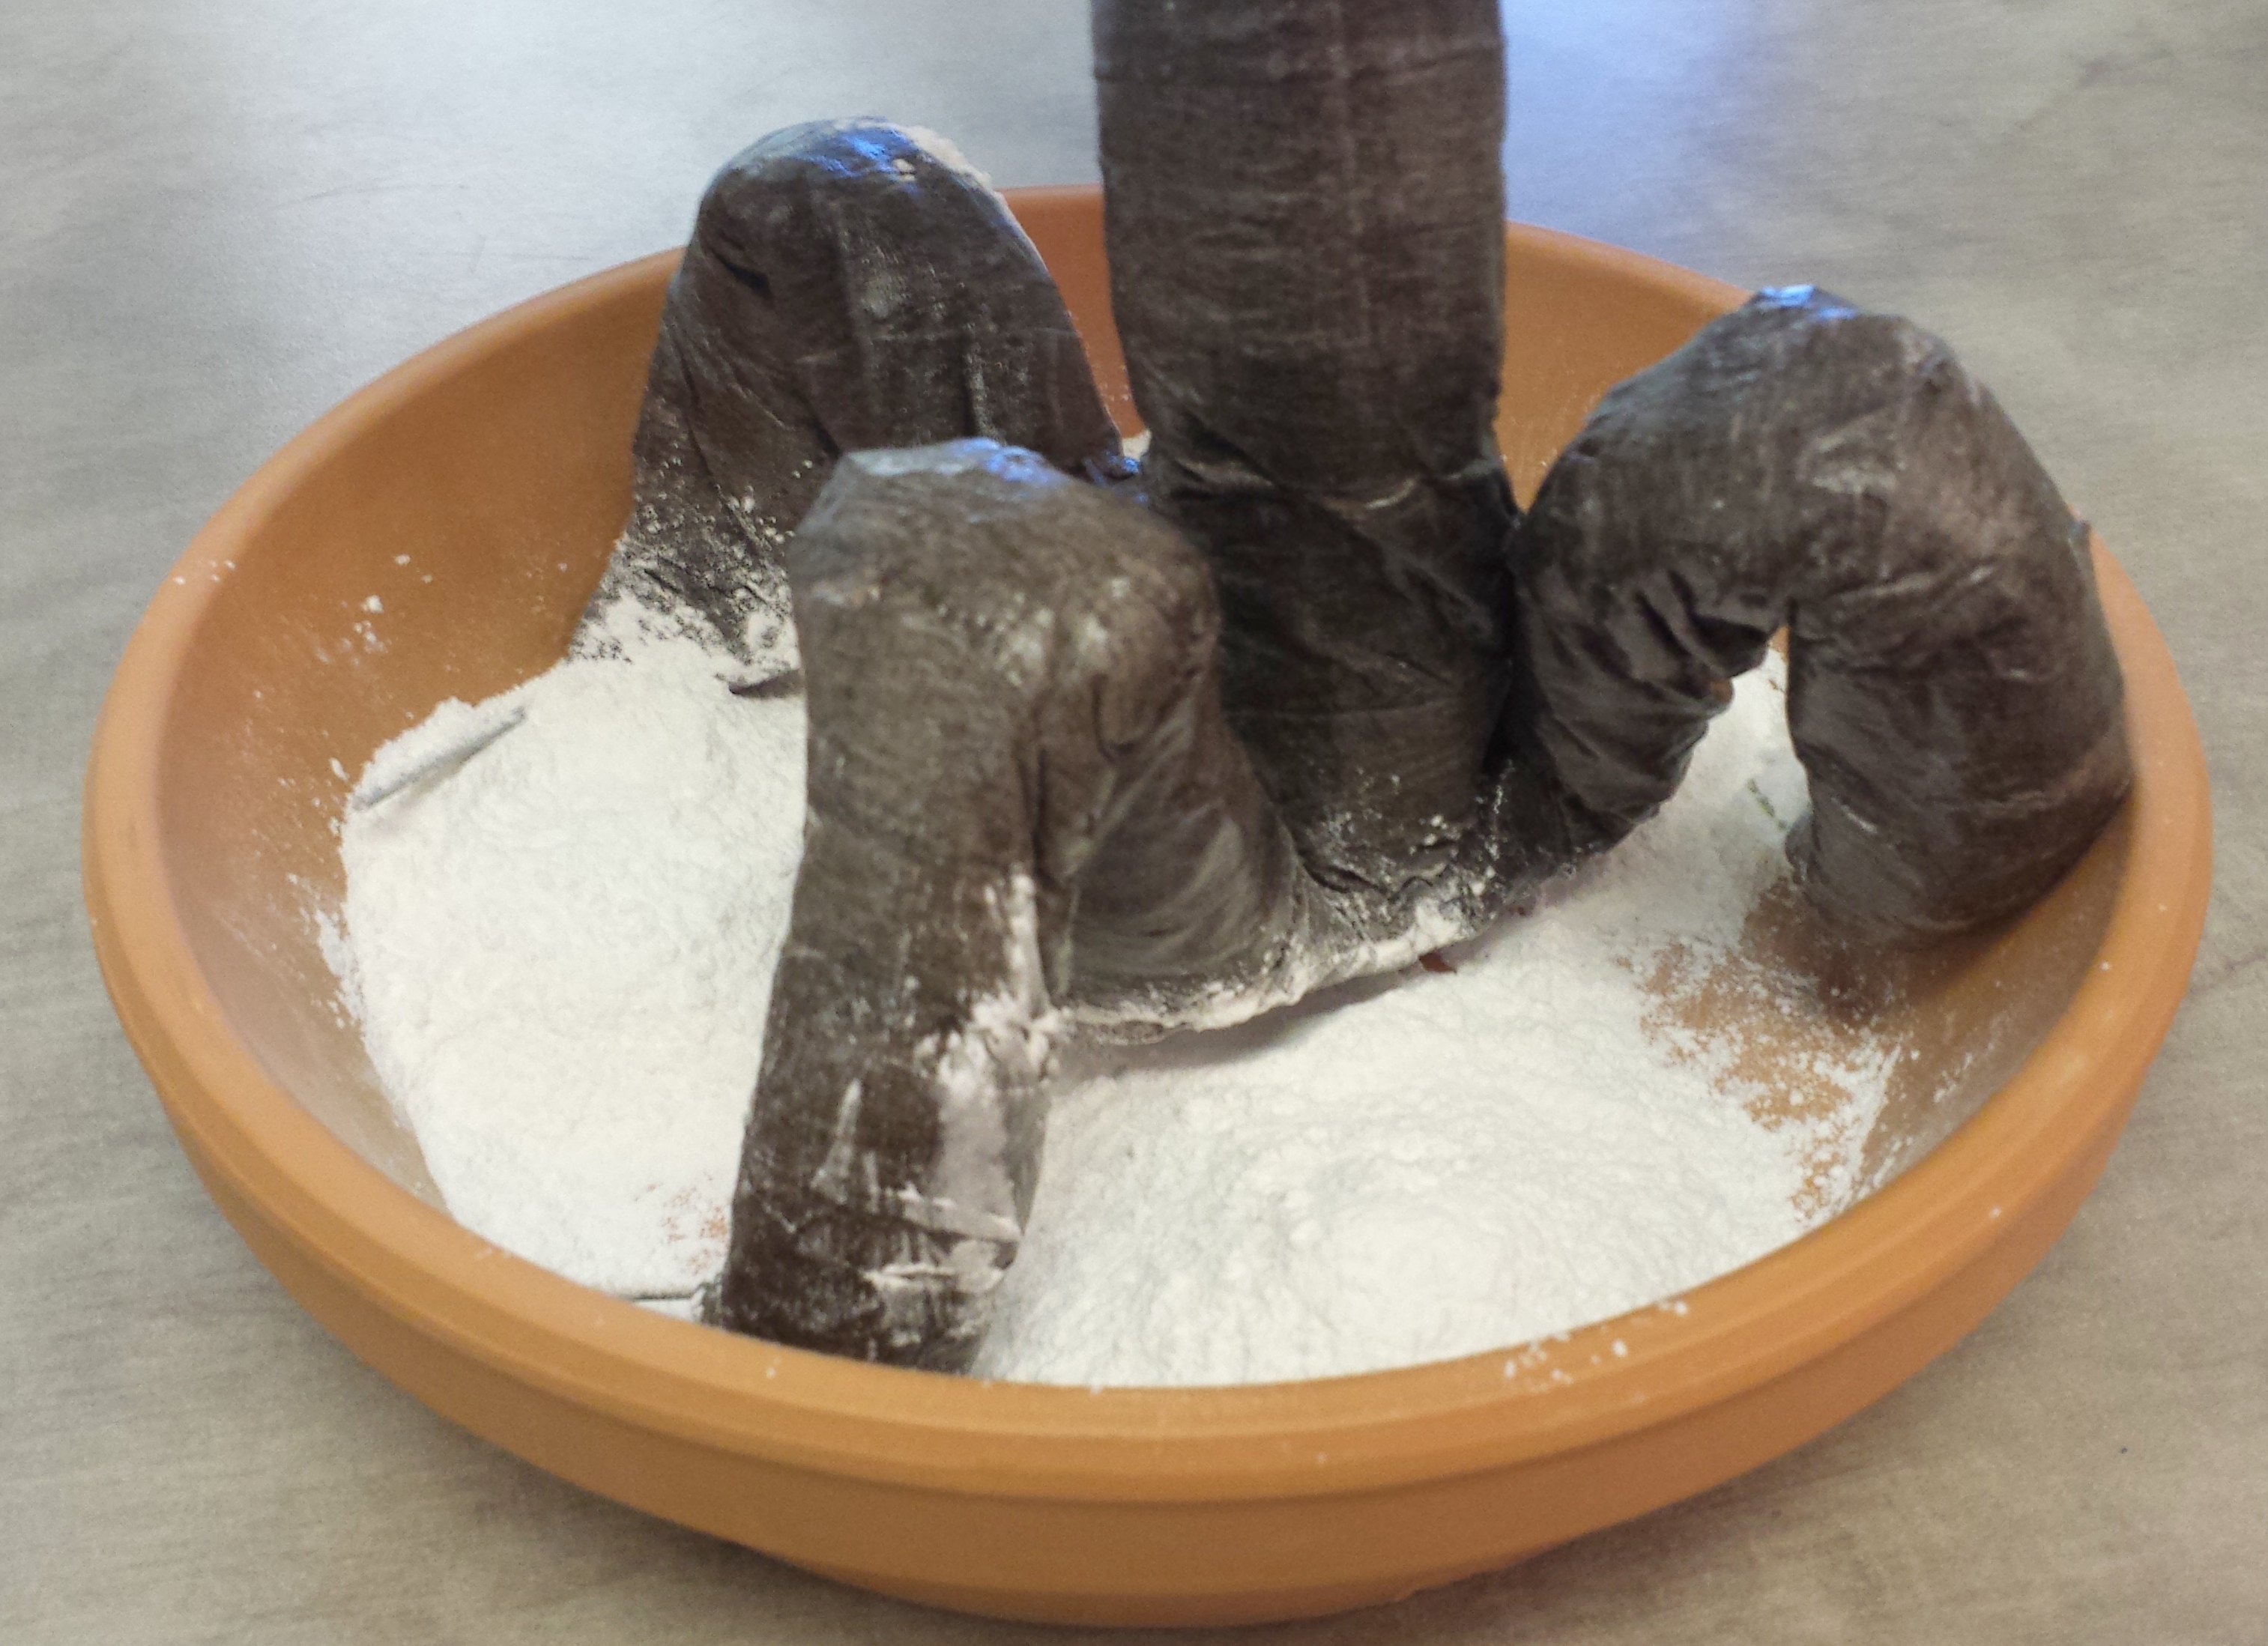
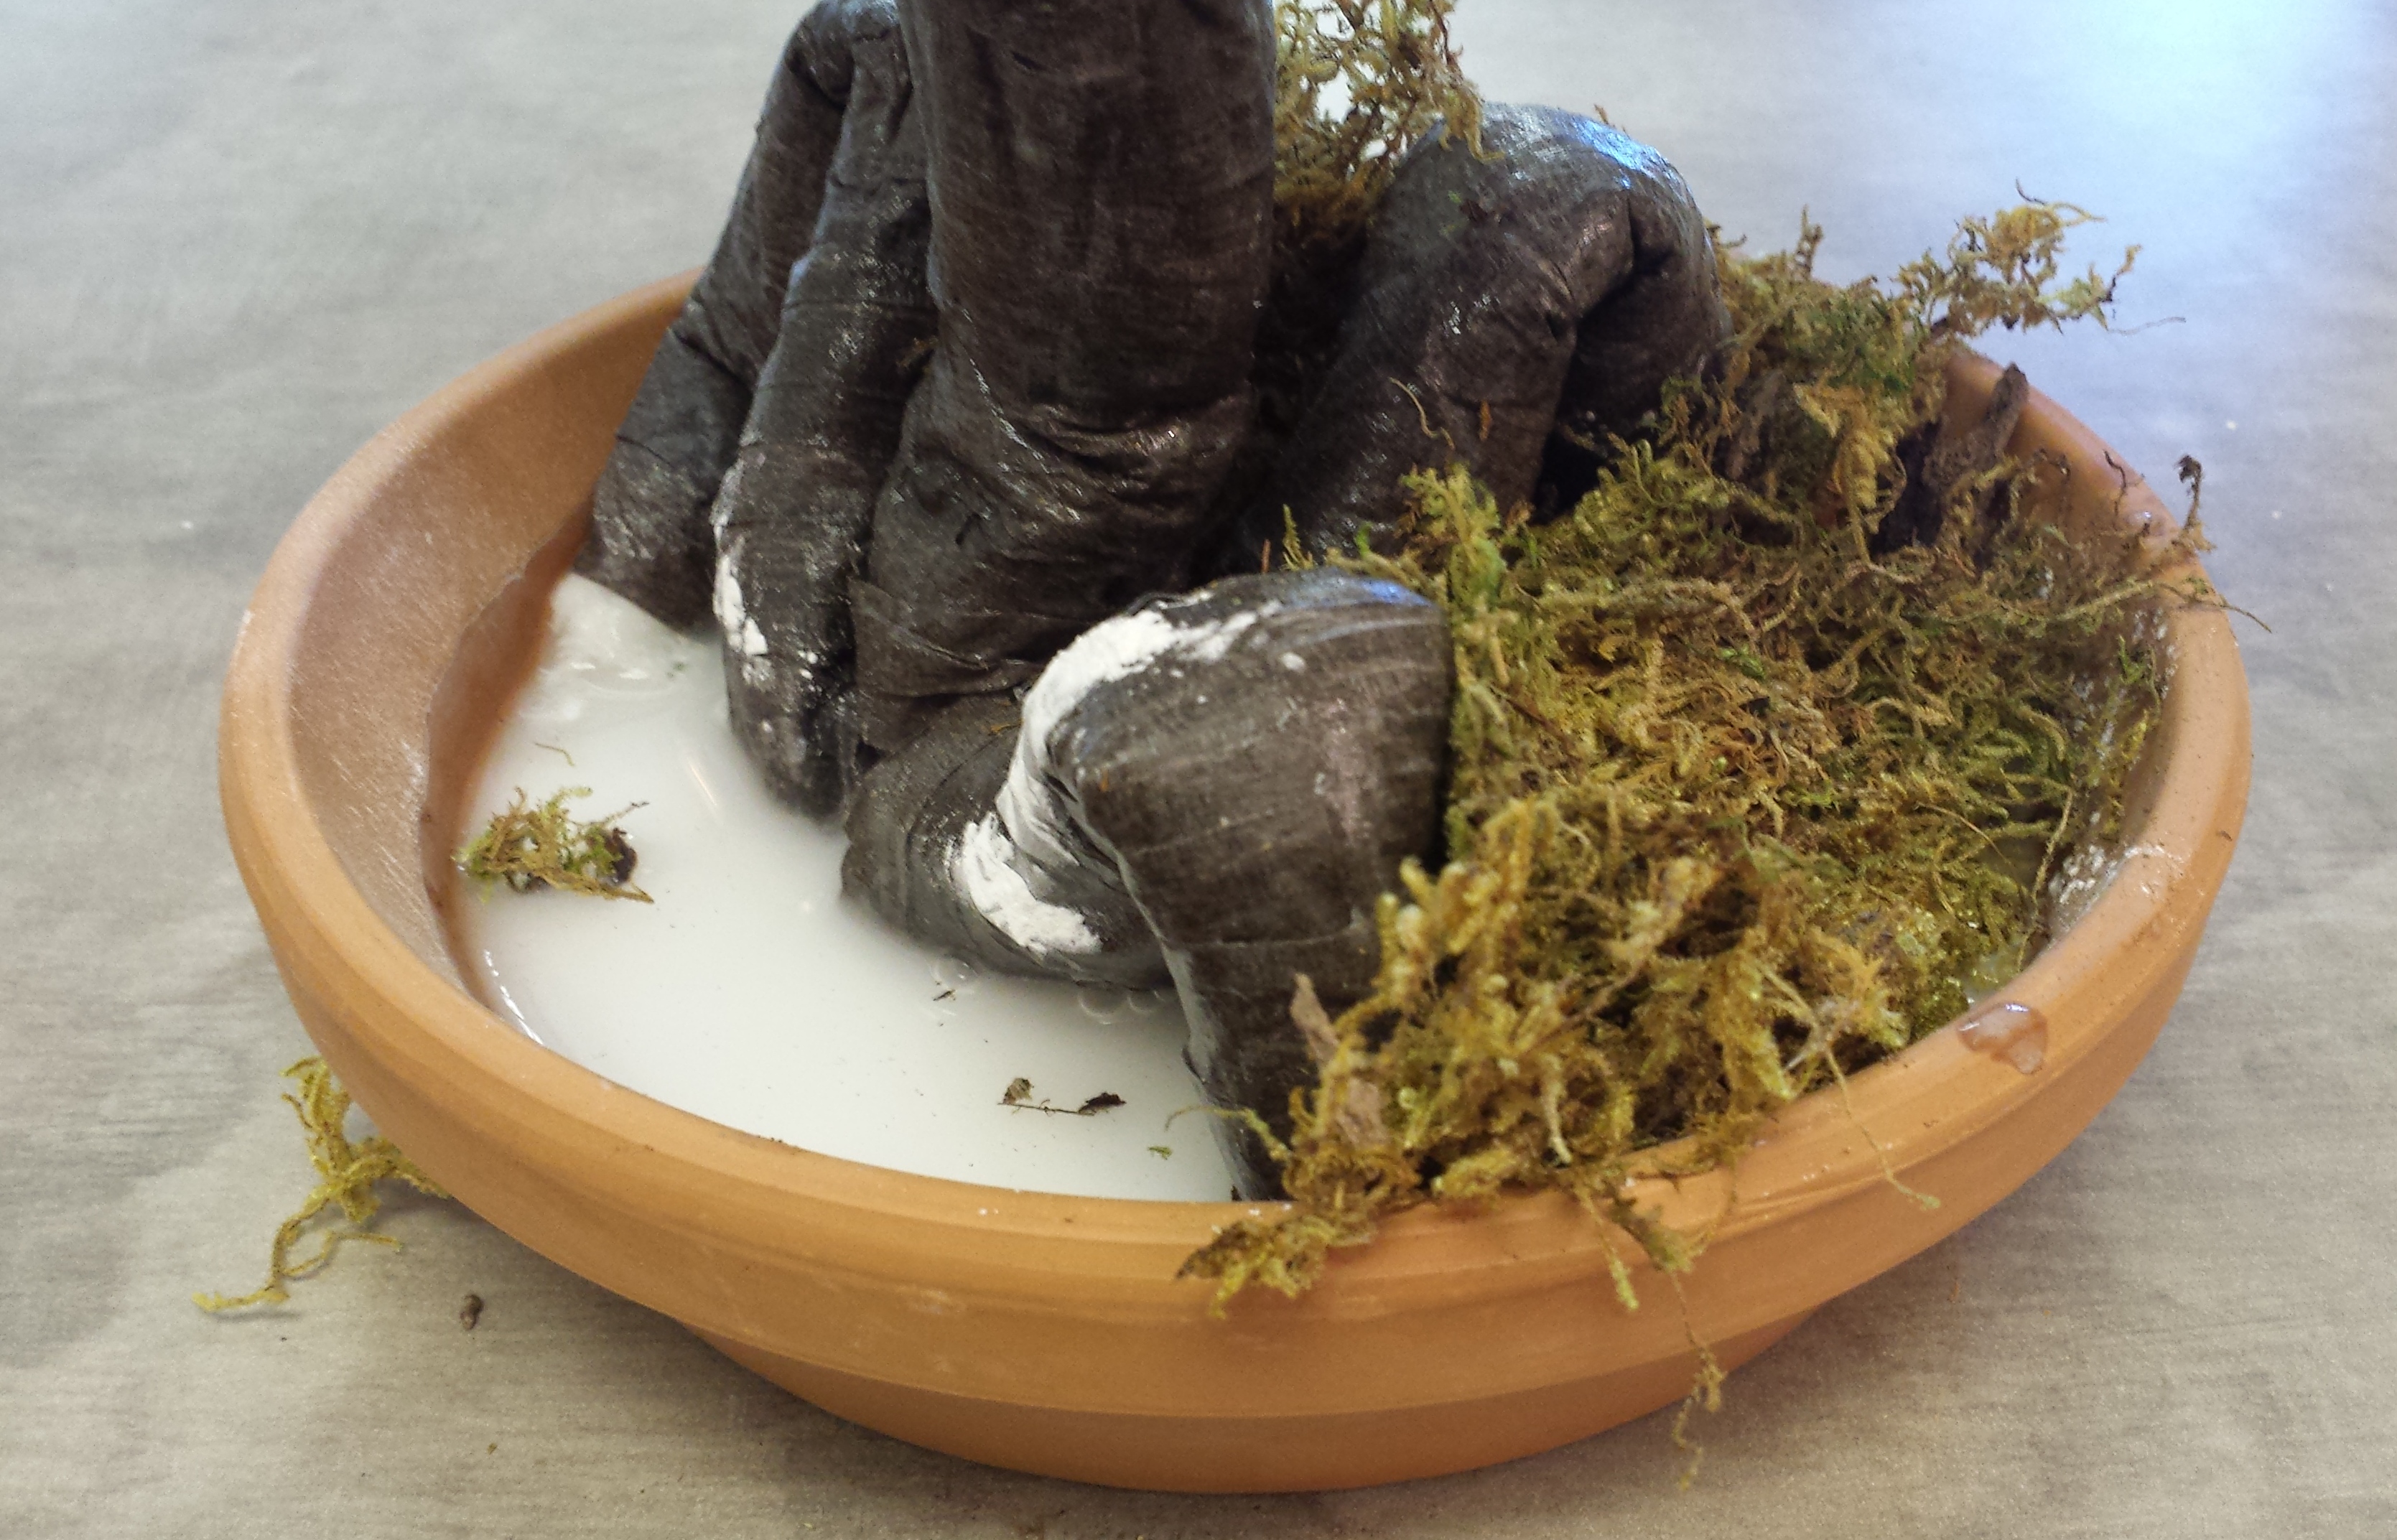
After you are done Mod Podging your tree now you want to create some shape by bending the trunk to one side then bending it back up again and you will also bend the roots making sure your tree sits well inside the clay pot like shown in the picture:


Take some Faster Plaster and spread it around inside the clay pot filling it a bit below halfway then take some water and now fill the pot almost halfway with water..I must admit that I always just guess the amount when I do this so I apologize for not having exact amounts of plaster and water but I figure as long as there is a little more water than plaster we are all good or you can follow the instructions on the container and estimate from there 😉
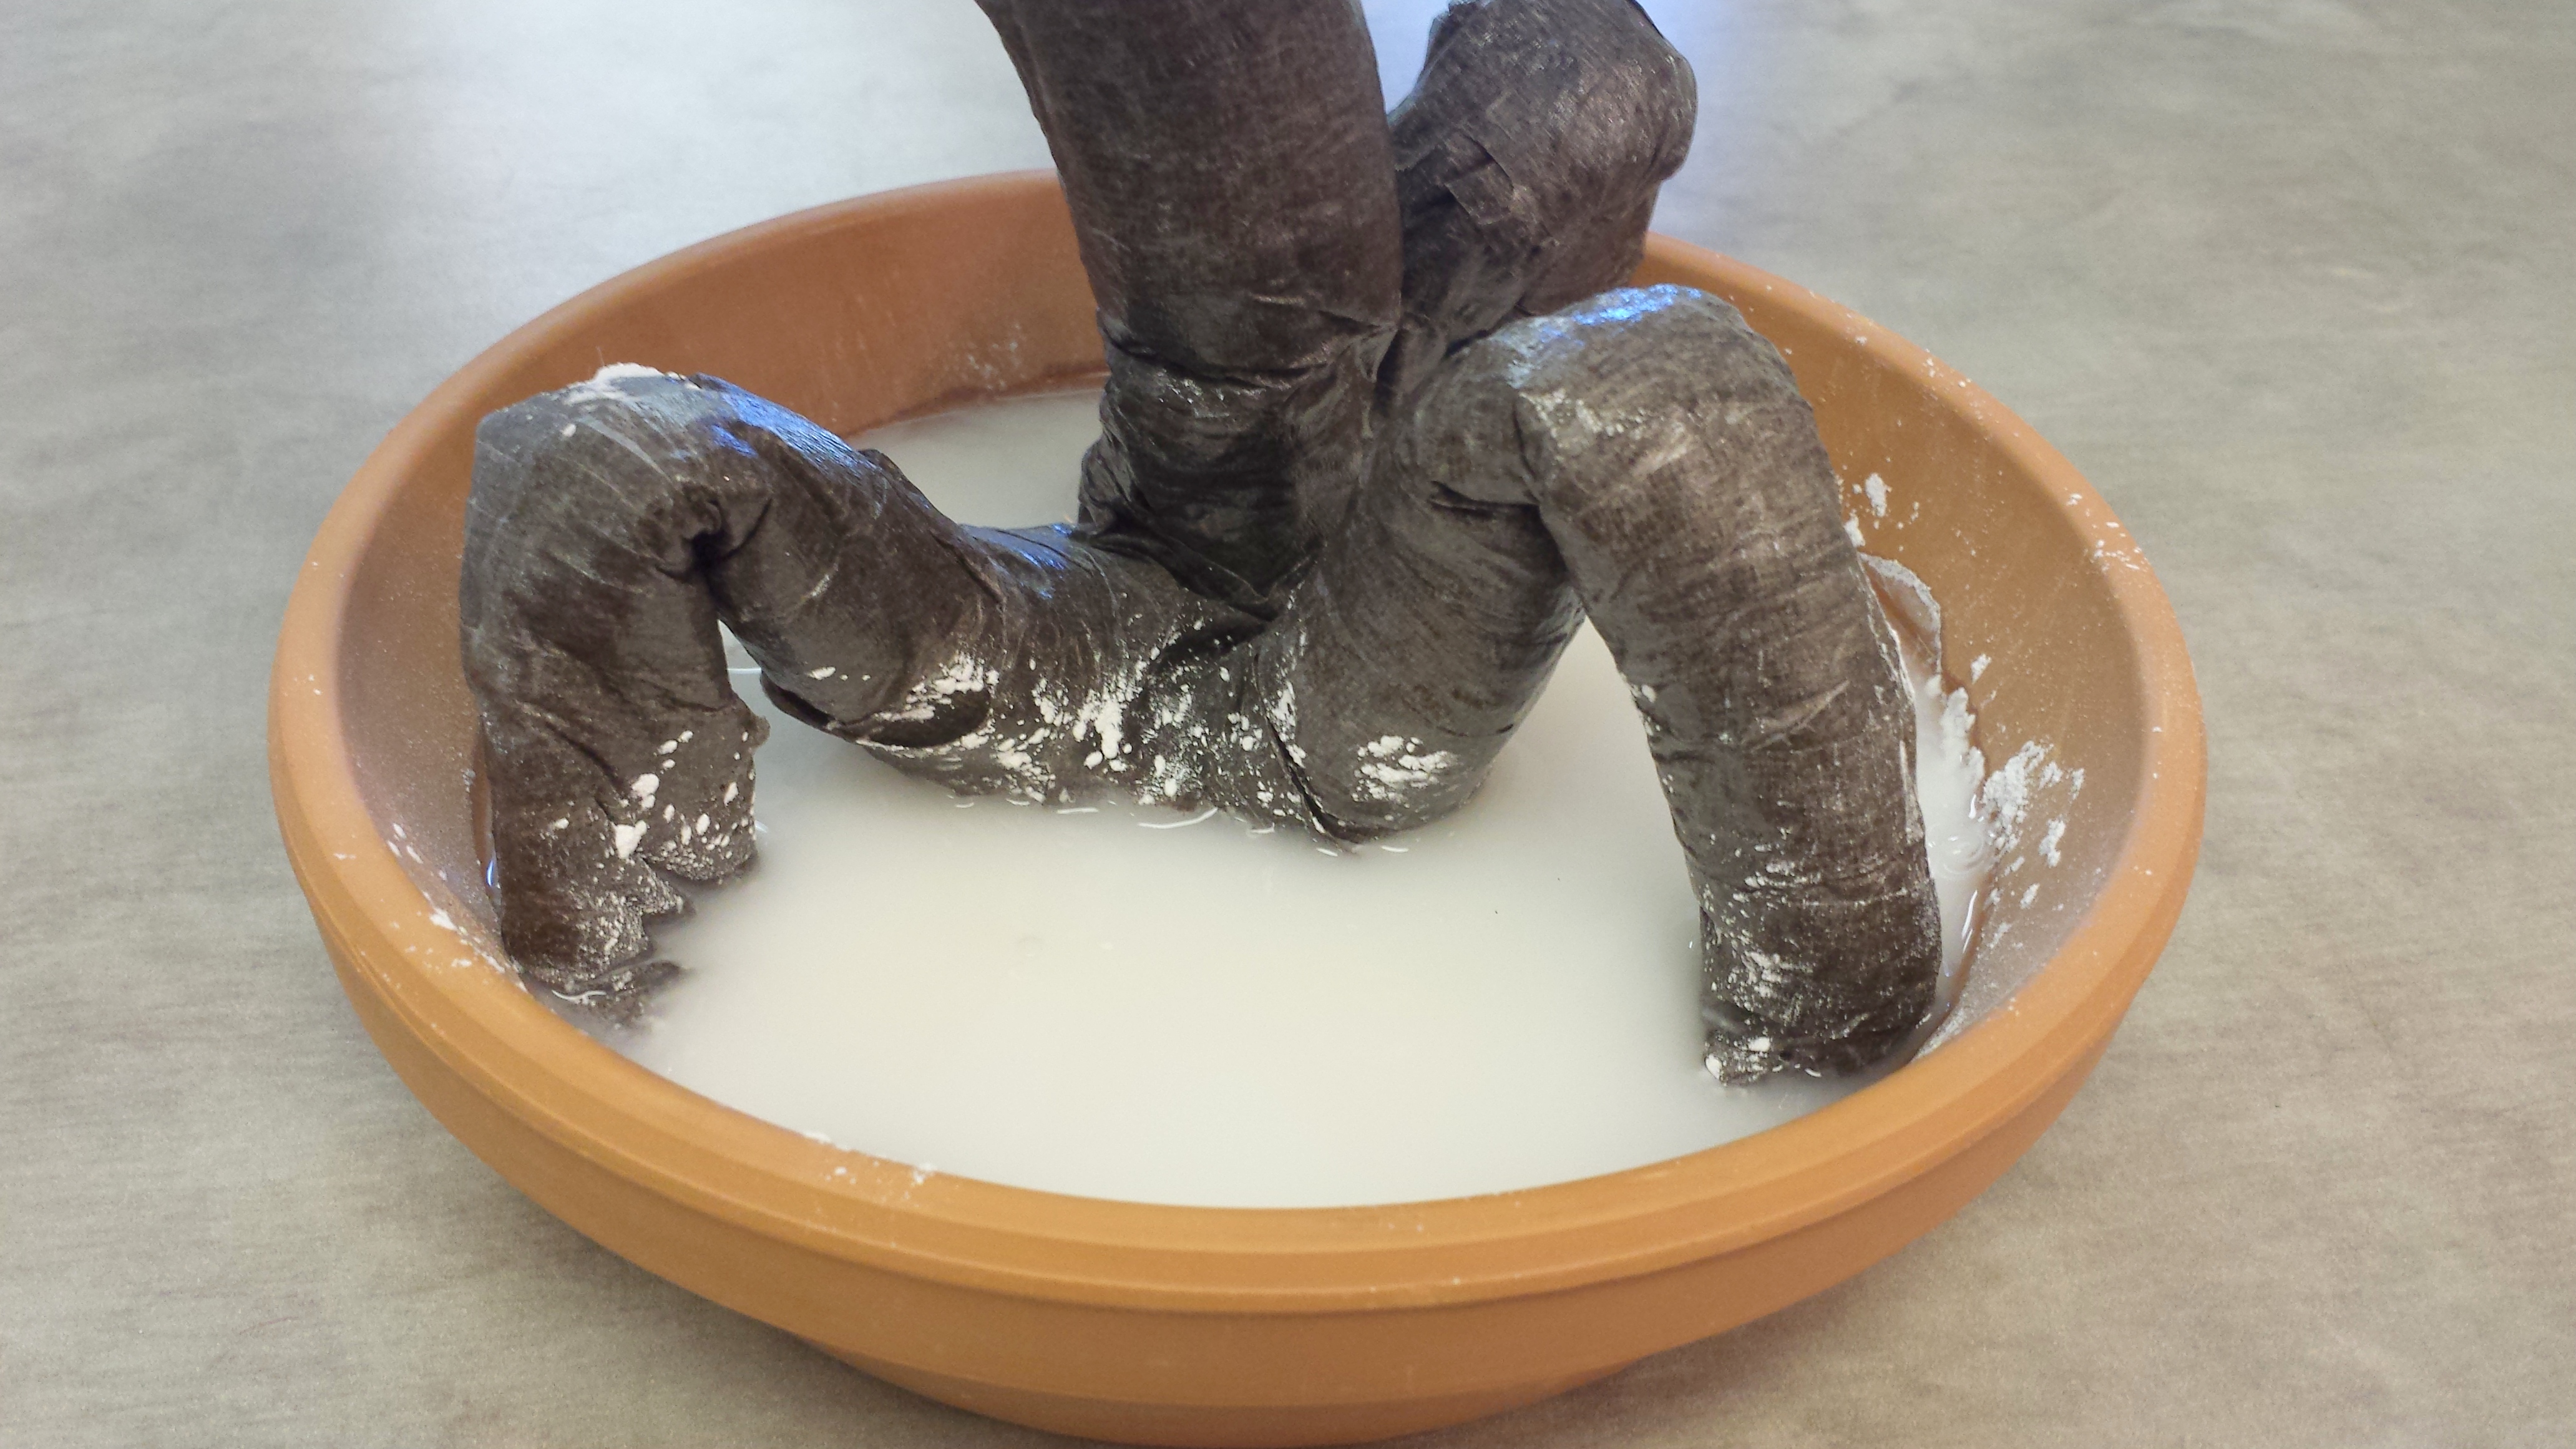
Soon after you add the plaster with water you will need to take some moss and just spread it around filling up the inside of the pot and please let it sit for a few hours maybe even a day so that the plaster can harden and your tree is secure inside the pot.

Step 6: DECORATING YAAY!
Now once the plaster has dried you might want to decorate the tree with some marble accents scattered around the roots on the moss or maybe add a little fake bird whatever your heart desires and fits nicely inside the pot.
You are now done and I hope you are patting yourself on your back for a job well done! Please feel free to comment, share your story and pics, ask me any questions, did you like this tutorial and was it helpful?
If you are interested in commissioning me to make one I would gladly do so, please feel free to contact me


Thank You!
